Canon imageCLASS MF5750 imageCLASS MF5700 Series Software Guide - Page 117
Scanning an Image from an Application - driver windows 8
 |
View all Canon imageCLASS MF5750 manuals
Add to My Manuals
Save this manual to your list of manuals |
Page 117 highlights
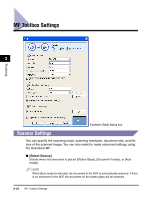
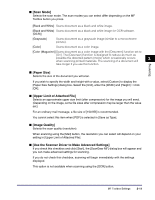
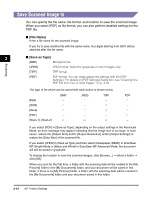
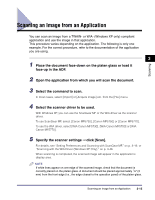
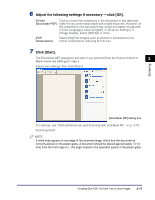
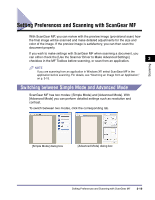
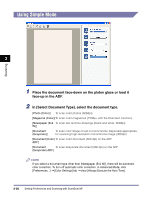
Scanning Scanning an Image from an Application You can scan an image from a TWAIN- or WIA- (Windows XP only) compliant application and use the image in that application. This procedure varies depending on the application. The following is only one example. For the correct procedure, refer to the documentation of the application you are using. 3 1 Place the document face-down on the platen glass or load it face-up in the ADF. 2 Open the application from which you will scan the document. 3 Select the command to scan. In most cases, select [Import] or [Acquire image] etc. from the [File] menu. 4 Select the scanner driver to be used. With Windows XP, you can use the ScanGear MF or the WIA driver as the scanner driver. To use ScanGear MF, select [Canon MF5730], [Canon MF5750] or [Canon MF5770]. To use the WIA driver, select [WIA Canon MF5730], [WIA Canon MF5750] or [WIA Canon MF5770]. 5 Specify the scanner settings ➞ click [Scan]. For details, see "Setting Preferences and Scanning with ScanGear MF," on p. 3-19, or "Scanning with the WIA Driver (Windows XP Only)," on p. 3-46. When scanning is completed, the scanned image will appear in the application's display area. NOTE If white lines appear on one edge of the scanned image, check that the document is correctly placed on the platen glass. A document should be placed approximately 1/8" (3 mm) from the front edge (i.e., the edge closest to the operation panel) of the platen glass. Scanning an Image from an Application 3-15
-
 1
1 -
2
-
3
-
4
-
5
-
6
-
7
-
8
-
9
-
10
-
11
-
12
-
13
-
14
-
15
-
16
-
17
-
18
-
19
-
20
-
21
-
22
-
23
-
24
-
25
-
26
-
27
-
28
-
29
-
30
-
31
-
32
-
33
-
34
-
35
-
36
-
37
-
38
-
39
-
40
-
41
-
42
-
43
-
44
-
45
-
46
-
47
-
48
-
49
-
50
-
51
-
52
-
53
-
54
-
55
-
56
-
57
-
58
-
59
-
60
-
61
-
62
-
63
-
64
-
65
-
66
-
67
-
68
-
69
-
70
-
71
-
72
-
73
-
74
-
75
-
76
-
77
-
78
-
79
-
80
-
81
-
82
-
83
-
84
-
85
-
86
-
87
-
88
-
89
-
90
-
91
-
92
-
93
-
94
-
95
-
96
-
97
-
98
-
99
-
100
-
101
-
102
-
103
-
104
-
105
-
106
-
107
-
108
-
109
-
110
-
111
-
 112
112 -
 113
113 -
 114
114 -
 115
115 -
 116
116 -
 117
117 -
 118
118 -
 119
119 -
 120
120 -
 121
121 -
 122
122 -
123
-
124
-
125
-
126
-
127
-
128
-
129
-
130
-
131
-
132
-
133
-
134
-
135
-
136
-
137
-
138
-
139
-
140
-
141
-
142
-
143
-
144
-
145
-
146
-
147
-
148
-
149
-
150
-
151
-
152
-
153
-
154
-
155
-
156
-
157
-
158
-
159
-
160
-
161
-
162
-
163
-
164
-
165
-
166
-
167
-
168
-
169
-
170
-
171
-
172
-
173
-
174
-
175
-
176
-
177
-
178
-
179
-
180
-
181
-
182
-
183
-
184
-
185
-
186
-
187
-
188
-
189
-
190
-
191
-
192
-
193
-
194
-
195
-
196
-
197
-
198
-
199
-
200
-
201
-
202
-
203
-
204
-
205
-
206
-
207
-
208
-
209
-
210
-
211
-
212
-
213
-
214
-
215
-
216
-
217
-
218
-
219
-
220
-
221
-
222
-
223
-
224
-
225
-
226
-
227
-
228
-
229
-
230
-
231
-
232
-
233
-
234
-
235
-
236
-
237
-
238
-
239
-
240
-
241
-
242
-
243
-
244
-
245
-
246
-
247
-
248
-
249
-
250
-
251
-
252
-
253
-
254
-
255
 |
 |