Canon imagePROGRAF iPF825 MFP M40 iPF815/iPF825 Basic Guide No.1
Canon imagePROGRAF iPF825 MFP M40 Manual
 |
View all Canon imagePROGRAF iPF825 MFP M40 manuals
Add to My Manuals
Save this manual to your list of manuals |
Canon imagePROGRAF iPF825 MFP M40 manual content summary:
- Canon imagePROGRAF iPF825 MFP M40 | iPF815/iPF825 Basic Guide No.1 - Page 1
Guide Printer Operations 1 This Basic Guide includes three booklets. Read this manual first. Printer Operations 1 Safety Precautions 2 Types of Manuals Maintenance Cartridge 32 Replacing the Printhead 37 Menu Map 42 Troubleshooting 2 Troubleshooting 2 If Roll Paper Jams 18 If a Sheet - Canon imagePROGRAF iPF825 MFP M40 | iPF815/iPF825 Basic Guide No.1 - Page 2
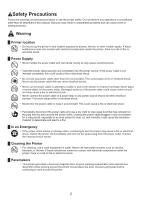
Do not perform any operations or procedures other than as described in this manual. Doing so may result in unexpected accidents and can cause a fi and remove the power plug from the power outlet. Contact the nearest service center. █ Cleaning the Printer • For cleaning, use a cloth dampened - Canon imagePROGRAF iPF825 MFP M40 | iPF815/iPF825 Basic Guide No.1 - Page 3
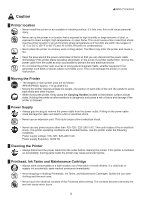
where such fields occur. This could damage the printer or cause malfunction. █ Moving the Printer • The weights of main printer units are as follows: iPF815/iPF825: Approx. 112 kg (246.9 lb) • Moving the printer requires at least six people, one person on each side of the unit. Be careful to avoid - Canon imagePROGRAF iPF825 MFP M40 | iPF815/iPF825 Basic Guide No.1 - Page 4
printer off, unplug the printer power cable from the outlet, and then call for service. If you continue to use the printer, this could cause a fire or for installation. Trademarks Canon, the Canon logo, and imagePROGRAF are trademarks or registered trademarks of CANON INC. Microsoft and Windows - Canon imagePROGRAF iPF825 MFP M40 | iPF815/iPF825 Basic Guide No.1 - Page 5
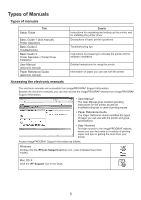
can also access the imagePROGRAF website from imagePROGRAF Support Information. • User Manual The User Manual gives detailed operating instructions for the printer, as well as troubleshooting tips in case of printing issues. • Paper Reference Guide The Paper Reference Guide identifies the types of - Canon imagePROGRAF iPF825 MFP M40 | iPF815/iPF825 Basic Guide No.1 - Page 6
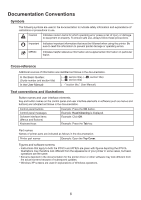
Guides: (Guide number and section title) In the User Manual: (→ , section title) (→ , section title) (→ , section title) (→ "section title," User Manual the Top Cover. Figures and software screens • Instructions that apply to both the iPF815 and iPF825 are given with figures depicting the iPF815. - Canon imagePROGRAF iPF825 MFP M40 | iPF815/iPF825 Basic Guide No.1 - Page 7
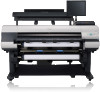
Canon Large Format Printer iPF815 iPF825 installed and used in accordance with the instructions, may cause harmful interference to radio the manual. If such changes or modifications should be made, you could be required to stop operation of the equipment. Canon U.S.A. Inc. One Canon Plaza - Canon imagePROGRAF iPF825 MFP M40 | iPF815/iPF825 Basic Guide No.1 - Page 8
parts are as follows. iPF825 a h b i l k o qj l m p c g n d eq c t r d s g f Name Operation a Top Cover Open this cover to install the Printhead, load paper, and remove any jammed paper from inside the printer as needed. b Ejection Guide Guides printed documents as they are - Canon imagePROGRAF iPF825 MFP M40 | iPF815/iPF825 Basic Guide No.1 - Page 9
Parts iPF815 a i b j m l p f se m n q c rk o h g s dt Name a Top Cover b Ejection Guide c Roll Holder Slot d Roll Holder e Ejection Support f Stationary Output Stacker g Paper Feed Slot h Holder Stopper i Ink Tank Cover j Control Panel k Release Lever l Maintenance Cartridge m - Canon imagePROGRAF iPF825 MFP M40 | iPF815/iPF825 Basic Guide No.1 - Page 10
Parts Top Cover (Inside) i a j h m c k d Name a Top Cover Roller b Paper Alignment Line c Carriage d Carriage Shaft e Paper Retainer f Platen g Borderless Printing Ink Grooves h Cleaning Brush i Cutter Rail j Cutter Unit k Linear Scale l Switch m Ink Tube Stabilizer ef g b l Operation - Canon imagePROGRAF iPF825 MFP M40 | iPF815/iPF825 Basic Guide No.1 - Page 11
menu one level higher. Offline: Press this button to rewind rolls manually. Menu mode: Press this button to display the previous menu item or off. By pressing this button, you can check instructions on loading and removing paper. Instructions for loading paper are shown on the Display Screen if - Canon imagePROGRAF iPF825 MFP M40 | iPF815/iPF825 Basic Guide No.1 - Page 12
. Otherwise, it may cause feeding problems and affect the printing quality. Be supported sizes and types of rolls, see "Paper Sizes" or the Paper Reference Guide. (→"Paper Sizes," User Manual) (→"Types of Paper," User Manual) • After pressing the Load/Eject button, you can refer to instructions - Canon imagePROGRAF iPF825 MFP M40 | iPF815/iPF825 Basic Guide No.1 - Page 13
3 With the edge of the roll paper facing forward as shown, insert the Roll Holder from the right of the roll. Insert it firmly until the roll touches the flange (a) of the Roll Holder. Attaching the Roll Holder to Rolls a • When loading a roll, be careful to avoid hitting the printer hard with the - Canon imagePROGRAF iPF825 MFP M40 | iPF815/iPF825 Basic Guide No.1 - Page 14
Checking Instructions During Printer Operations," User Manual) Load a roll in the printer (iPF825: in the Roll 1 (Upper) position) 1 Confirm that a roll is selected as the paper source. (→"Selecting the Paper Source," User Manual) OK 2 Open the Top Cover and lift the Ejection Guide. 3 Holding - Canon imagePROGRAF iPF825 MFP M40 | iPF815/iPF825 Basic Guide No.1 - Page 15
loading it. • Load the roll so that there is no gap between the right edge of the paper and the Roll Holder. 5 Lower the Ejection Guide. 6 Close the Top Cover. 7 Press the OK button. The paper is now advanced. After you load a roll, the printer automatically shows a menu for selection of - Canon imagePROGRAF iPF825 MFP M40 | iPF815/iPF825 Basic Guide No.1 - Page 16
2 (Lower) position (iPF825 only) • Do not as the paper source. (→"Selecting the Paper Source," User Manual) OK 2 Holding the Roll Unit Lever (a), pull out the Holder shaft (a) and the guide grooves (b) when loading rolls. • See the following procedure for instructions on attaching the Roll - Canon imagePROGRAF iPF825 MFP M40 | iPF815/iPF825 Basic Guide No.1 - Page 17
a crouching position, push the Roll Unit into the printer. 6 Position the Wheeled Output Stacker by the printer. (→"Using the Wheeled Output Stacker," User Manual) 7 Press the OK button. The paper is now advanced. After you load a roll, the printer automatically shows a menu for selection of the - Canon imagePROGRAF iPF825 MFP M40 | iPF815/iPF825 Basic Guide No.1 - Page 18
the desired position. (→"Specifying the Cutting Method for Rolls," User Manual) • If you have selected Media Menu > ManageRemainRoll > On track of the amount of roll paper left. Remove the roll from the printer (iPF825: from the Roll 1 (Upper) position) 1 Press the Load/Eject button. Guide. 18 - Canon imagePROGRAF iPF825 MFP M40 | iPF815/iPF825 Basic Guide No.1 - Page 19
6 Remove the Roll Holder from the Roll Holder Slot. • See the following procedure for instructions on removing the Roll Holder from the roll. (→"Removing the Roll Holder from Rolls," User Manual) 7 Lower the Ejection Guide and close the Top Cover. • To load new paper in the printer at this point - Canon imagePROGRAF iPF825 MFP M40 | iPF815/iPF825 Basic Guide No.1 - Page 20
the Roll from the Printer Remove the roll from the Roll 2 (Lower) position (iPF825 only) 1 Press the Load/Eject button. 2 Press ▲ or ▼ to select Remove Slot. • See the following procedure for instructions on removing the Roll Holder from the roll. (→"Removing the Roll Holder from Rolls," User - Canon imagePROGRAF iPF825 MFP M40 | iPF815/iPF825 Basic Guide No.1 - Page 21
7 In a crouching position, push the Roll Unit in. Removing the Roll from the Printer • To load new paper in the printer at this point, see the following procedure. (→ , Loading Rolls in the Printer) 21 - Canon imagePROGRAF iPF825 MFP M40 | iPF815/iPF825 Basic Guide No.1 - Page 22
supported types and sizes of paper, see "Paper Sizes" or the Paper Reference Guide. (→"Paper Sizes," User Manual), (→"Types of Paper," User Manual instructions on the Display Screen as you load the paper. (→"Checking Instructions During Printer Operations," User Manual not indicate a problem. If the - Canon imagePROGRAF iPF825 MFP M40 | iPF815/iPF825 Basic Guide No.1 - Page 23
for selection of the type of paper on the Display Screen. In this case, select the type of paper. (→"Selecting the Paper Type (Sheet)," User Manual) 23 - Canon imagePROGRAF iPF825 MFP M40 | iPF815/iPF825 Basic Guide No.1 - Page 24
Removing Sheets This section describes how to remove sheets from the printer. Remove sheets from the printer as follows. 1 Press the Load/Eject button. OK • Paper cannot be ejected by using the Load/Eject button when print jobs are in progress or during the ink drying period. Before ejecting paper, - Canon imagePROGRAF iPF825 MFP M40 | iPF815/iPF825 Basic Guide No.1 - Page 25
Consumables Ink Tanks When purchasing Ink Tanks, make sure an "A" is printed on the label, along with the following Ink Tank serial numbers. 330 ml (11.2 fl oz) • MBK Ink Tank PFI-303MBK • BK Ink Tank PFI-303BK • C Ink Tank PFI-303C • M Ink Tank PFI-303M • Y Ink Tank PFI-303Y 700 ml (23.7 fl oz) • MBK - Canon imagePROGRAF iPF825 MFP M40 | iPF815/iPF825 Basic Guide No.1 - Page 26
fl oz) and 700 ml (23.7 fl oz) capacities are supported. (→ , Consumables) Precautions when handling ink tanks Take the following the OK button. In this case, go to "Remove the Ink Tanks" without following the instructions in "Access the menu for Ink Tank replacement". C MY M B B K K Ink - Canon imagePROGRAF iPF825 MFP M40 | iPF815/iPF825 Basic Guide No.1 - Page 27
Access the menu for ink tank replacement Replacing Ink Tanks • This step is not necessary if a message requests you to replace ink tanks. Check the message on the Display Screen and press the OK button. Remove the Ink Tank at this point. 1 Press the Menu button to display MAIN MENU. OK 2 Press - Canon imagePROGRAF iPF825 MFP M40 | iPF815/iPF825 Basic Guide No.1 - Page 28
Replacing Ink Tanks 2 Lift the stopper (a) of the Ink Tank Lock Lever for the color to replace. Lift the Ink Tank Lock Lever until it stops, and then push it down to the front. A A M BK R GG B A A M BK R GG B B a 330 ml tanks A A A A B GG B B a 700 ml tanks • Push the Ink Tank Lock Lever - Canon imagePROGRAF iPF825 MFP M40 | iPF815/iPF825 Basic Guide No.1 - Page 29
Install the ink tanks 1 Before opening the pouch, tilt the Ink Tank to the left and right gently seven or eight times. Hold 330 ml ink tanks in one hand and 700 ml ink tanks in two hands, as shown. Replacing Ink Tanks 330 ml tanks 700 ml tanks • If you do not agitate the Ink Tank, the ink may - Canon imagePROGRAF iPF825 MFP M40 | iPF815/iPF825 Basic Guide No.1 - Page 30
Replacing Ink Tanks 3 Press the OK button and insert the Ink Tank into the holder with the ink holes facing down, as shown. A A Y GY MBK BK M 330 ml tanks A A Y GY MBK BK M 700 ml tanks • Ink tanks cannot be loaded in the holder if the color or orientation is incorrect. If the Ink Tank does not - Canon imagePROGRAF iPF825 MFP M40 | iPF815/iPF825 Basic Guide No.1 - Page 31
5 Make sure the Ink Lamp is lit. • If the Ink Lamp is not lit, reload the tank. 6 Close the Ink Tank Cover. The printer will go online or offline. Replacing Ink Tanks M 31 - Canon imagePROGRAF iPF825 MFP M40 | iPF815/iPF825 Basic Guide No.1 - Page 32
the Maintenance Cartridge, press the OK button. In this case, go to "Replace the maintenance cartridge" without following the instructions in "Access the menu for maintenance cartridge replacement". C MY M B B K K Maintenance cartridge full. Replace the maintenance cartridge. • Do not pull - Canon imagePROGRAF iPF825 MFP M40 | iPF815/iPF825 Basic Guide No.1 - Page 33
Replacing the Maintenance Cartridge Access the menu for maintenance cartridge replacement 1 Press the Menu button to display MAIN MENU. OK 2 Press ▲ or ▼ to select Maintenance, and then press the ► button. 3 Press ▲ or ▼ to select Repl. maint cart, and then press the ► button. 4 Press ▲ or ▼ - Canon imagePROGRAF iPF825 MFP M40 | iPF815/iPF825 Basic Guide No.1 - Page 34
Replacing the Maintenance Cartridge 3 Open the box, remove the plastic bag, packaging material, and Shaft Cleaner (a), and then take out the Maintenance Cartridge (b). • Never touch the metal contacts (a). This may damage the Maintenance Cartridge. 4 Keep the used Maintenance Cartridge level as - Canon imagePROGRAF iPF825 MFP M40 | iPF815/iPF825 Basic Guide No.1 - Page 35
8 Press the OK button. The printer now initializes the Maintenance Cartridge. Next, replace the Shaft Cleaner. Replacing the Maintenance Cartridge OK Replace the shaft cleaner 1 After the message is displayed regarding Shaft Cleaner replacement, press ▲ or ▼ to select Yes, and then press the OK - Canon imagePROGRAF iPF825 MFP M40 | iPF815/iPF825 Basic Guide No.1 - Page 36
Replacing the Maintenance Cartridge 4 After removing the cap of the new Shaft Cleaner, hold it by the bottom of the grips (a) and attach it to the Carriage. a Push the Shaft Cleaner until it clicks into place. • Attach the cap from the new Shaft Cleaner on the used one. Be sure to put the used - Canon imagePROGRAF iPF825 MFP M40 | iPF815/iPF825 Basic Guide No.1 - Page 37
indicates Open top cover and replace the printhead. • If your Canon dealer has advised you to replace the Printhead Compatible printheads Use Printhead of the cutting method selected, cut it manually and remove it. (→"Cutting Roll Paper After Printing," User Manual) 2 Clean inside the Top Cover. - Canon imagePROGRAF iPF825 MFP M40 | iPF815/iPF825 Basic Guide No.1 - Page 38
OK button. Ink is now filled. After about two minutes, a message is shown on the Display Screen instructing you to open the Top Cover. Replace the printhead 1 Open the Top Cover. Instructions are now shown on the Display Screen regarding Printhead replacement. 2 If the Printhead Fixer Cover or - Canon imagePROGRAF iPF825 MFP M40 | iPF815/iPF825 Basic Guide No.1 - Page 39
the ventilation duct (a) is dirty, use a damp cloth that you have wrung out completely to wipe it clean. Move the Carriage out of the way manually if Carriage is concealing the ventilation duct, and then clean the duct. 4 Pull the Printhead Fixer Lever forward all the way to open it completely - Canon imagePROGRAF iPF825 MFP M40 | iPF815/iPF825 Basic Guide No.1 - Page 40
or the surrounding area. If ink accidentally spills, wipe off the ink with a dry cloth. • Never touch the ink supply section (d). This may cause printing problems. • Do not reattach the Safety Cap or protective material. Dispose of these materials in accordance with local regulations. 40 - Canon imagePROGRAF iPF825 MFP M40 | iPF815/iPF825 Basic Guide No.1 - Page 41
menu, the printhead will be automatically adjusted after Printhead replacement when the system is finished filling with ink. In this case, follow the instructions displayed for Printhead adjustment. If Auto Print is set to Off, execute Auto Head Adj. > Advanced Adj. in the printer menu. (→ , If - Canon imagePROGRAF iPF825 MFP M40 | iPF815/iPF825 Basic Guide No.1 - Page 42
On B * 3 mm 20 mm Fast Standard Slow C Automatic Off On Automatic Eject Manual Off 30 sec. 1 min. 3 min. 5 min. 10 min. 30 min. the types of paper the printer supports, refer to *2: Available only if ManageRemainRoll is On. the Paper Reference Guide.The paper type setting in the - Canon imagePROGRAF iPF825 MFP M40 | iPF815/iPF825 Basic Guide No.1 - Page 43
Auto Head Adj. Standard Adj. Yes Advanced Adj. No Yes Auto Print Off Manual Head Adj No *9 Yes On * b c *9: Available after you have used Adj. once. *12: Available only on the iPF815. *13: Available only on the iPF825. 43 * * (Choose a pen number.) (Choose a pen number.) (Choose a - Canon imagePROGRAF iPF825 MFP M40 | iPF815/iPF825 Basic Guide No.1 - Page 44
Service *6 On Off Auto Detect Comm.Mode *7 Ethernet Type *7 Spanning Tree MAC Address No Yes No Yes No Yes No Yes Automatic Manual DHCP BOOTP RARP IP Address Subnet Mask *13: Available only on the iPF825. *15: Viewing and configuration is possible for administra- tors, and only viewing for other - Canon imagePROGRAF iPF825 MFP M40 | iPF815/iPF825 Basic Guide No.1 - Page 45
Aires -2: -1:Cape Verde J English Français Italiano Deutsch Español *8: Follows the setting in Date Format. *13: Available only on the iPF825. Menu When Printing *15: Viewing and configuration is possible for administrators, and only viewing for other users. *16: Viewing and configuration - Canon imagePROGRAF iPF825 MFP M40 | iPF815/iPF825 Basic Guide No.1 - Page 46
Attachment 12 3-Inch Paper Core Attachment 12 c Carriage 10, 35, 38 d Display Screen 11 e Ejection Guide 8, 9 Electronic manuals (User Manual 5, 6 f Flange 13 h Holder Stopper 8, 9, 12 i imagePROGRAF Support Information 5 Ink Lamp 27, 31 Ink Tank Cover 8, 9, 27, 31 Ink Tank Lock Lever 28 - Canon imagePROGRAF iPF825 MFP M40 | iPF815/iPF825 Basic Guide No.1 - Page 47
- Canon imagePROGRAF iPF825 MFP M40 | iPF815/iPF825 Basic Guide No.1 - Page 48
. 30-2, Shimomaruko 3-chome, Ohta-ku, Tokyo 146-8501, Japan Canon U.S.A., Inc. One Canon Plaza, Lake Success, NY 11042 U.S.A Canon Europe Ltd. 3 The Square, Stockley Park, Uxbridge, Middlesex, UB11 1ET United Kingdom Canon (China) Co., Ltd. 15F Jinbao Building No.89 Jinbao Street, Dongcheng District
-
 1
1 -
 2
2 -
 3
3 -
 4
4 -
 5
5 -
 6
6 -
 7
7 -
8
-
9
-
10
-
11
-
12
-
13
-
14
-
15
-
16
-
17
-
18
-
19
-
20
-
21
-
22
-
23
-
24
-
25
-
26
-
27
-
28
-
29
-
30
-
31
-
32
-
33
-
34
-
35
-
36
-
37
-
38
-
39
-
40
-
41
-
42
-
43
-
44
-
45
-
46
-
47
-
48
 |
 |

1
Printer Operations
Basic Guide
Read this manual before attempting to operate the printer.
Keep this manual in a handy location for future referencing.
Printer Operations
1
This Basic Guide includes three booklets.
Large-Format Printers
2
Troubleshooting
3
Printer Relocation
Printer Driver Installation
ENG
Read this manual
fi
rst.
Safety Precautions
........................................
2
Types of Manuals
.............................................
5
Documentation Conventions
............................
6
Parts
.................................................................
8
Attaching the Roll Holder to Rolls
...................
12
Loading Rolls in the Printer
............................
14
Removing the Roll from the Printer
................
18
Loading Sheets in the Printer
.........................
22
Removing Sheets
...........................................
24
Consumables
..................................................
25
Replacing Ink Tanks
.......................................
26
Replacing the Maintenance Cartridge
............
32
Replacing the Printhead
.................................
37
Menu Map
.......................................................
42
Troubleshooting
................................................
2
If Roll Paper Jams
..........................................
18
If a Sheet Jams
...............................................
21
If Paper is Soiled
............................................
23
If Printing is Faint
............................................
25
If Vertical Lines are Warped or Colors are
Misaligned
..................................................
26
If Banding Occurs
...........................................
28
If Line Length Does Not Match
.......................
30
Error Messages
..............................................
32
Preparing to Transfer the Printer
......................
2
Reinstalling the Printer
.....................................
8
Installing the Printer Driver (Windows)
...........
12
Installing the Printer Driver (Mac OS X)
.........
14
Convenient Printer Driver Features
................
16