Casio P600 User Manual - Page 48
Using the On-screen Menus, to change the currently, selected setting, and then press [SET].
 |
UPC - 079767683573
View all Casio P600 manuals
Add to My Manuals
Save this manual to your list of manuals |
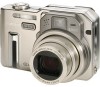
Page 48 highlights
GETTING READY G See page 48 for information about how to use menus. To configure this feature: Sleep Auto Power Off Select this setting: Sleep Auto Power Off 5. Use [̆] and [̄] to change the currently selected setting, and then press [SET]. • Available Sleep settings are: "30 sec", "1 min", "2 min", and "Off". • Available Auto Power Off settings are: "2 min" and "5 min". • Note that the Sleep feature does not operate in the PLAY mode. • Pressing any button while the camera is in the Sleep state immediately turns the monitor screen back on. • The Auto Power Off and Sleep features are disabled in the following cases. - While the camera is connected to computer or TV via its USB/AV port - While a slideshow is in progress - While playing back a voice recording file - While playing back a movie Using the On-screen Menus Pressing [MENU] displays menus on the monitor screen that you can use to perform various operations. The menu that appears depends on whether you are in the REC mode or the PLAY mode. The following shows an example menu procedure in the REC mode. 1. Turn on the camera, and then align the mode dial with . • If you want to enter the PLAY mode instead, you would align the mode dial with . Mode dial 48
-
 1
1 -
2
-
3
-
4
-
5
-
6
-
7
-
8
-
9
-
10
-
11
-
12
-
13
-
14
-
15
-
16
-
17
-
18
-
19
-
20
-
21
-
22
-
23
-
24
-
25
-
26
-
27
-
28
-
29
-
30
-
31
-
32
-
33
-
34
-
35
-
36
-
37
-
38
-
39
-
40
-
41
-
42
-
 43
43 -
 44
44 -
 45
45 -
 46
46 -
 47
47 -
 48
48 -
 49
49 -
 50
50 -
 51
51 -
 52
52 -
 53
53 -
54
-
55
-
56
-
57
-
58
-
59
-
60
-
61
-
62
-
63
-
64
-
65
-
66
-
67
-
68
-
69
-
70
-
71
-
72
-
73
-
74
-
75
-
76
-
77
-
78
-
79
-
80
-
81
-
82
-
83
-
84
-
85
-
86
-
87
-
88
-
89
-
90
-
91
-
92
-
93
-
94
-
95
-
96
-
97
-
98
-
99
-
100
-
101
-
102
-
103
-
104
-
105
-
106
-
107
-
108
-
109
-
110
-
111
-
112
-
113
-
114
-
115
-
116
-
117
-
118
-
119
-
120
-
121
-
122
-
123
-
124
-
125
-
126
-
127
-
128
-
129
-
130
-
131
-
132
-
133
-
134
-
135
-
136
-
137
-
138
-
139
-
140
-
141
-
142
-
143
-
144
-
145
-
146
-
147
-
148
-
149
-
150
-
151
-
152
-
153
-
154
-
155
-
156
-
157
-
158
-
159
-
160
-
161
-
162
-
163
-
164
-
165
-
166
-
167
-
168
-
169
-
170
-
171
-
172
-
173
-
174
-
175
-
176
-
177
-
178
-
179
-
180
-
181
-
182
-
183
-
184
-
185
-
186
-
187
-
188
-
189
-
190
-
191
-
192
-
193
-
194
-
195
-
196
-
197
-
198
-
199
-
200
-
201
-
202
-
203
-
204
-
205
-
206
-
207
-
208
-
209
-
210
-
211
-
212
-
213
-
214
-
215
-
216
-
217
-
218
-
219
-
220
-
221
-
222
-
223
-
224
-
225
-
226
-
227
-
228
-
229
-
230
-
231
-
232
-
233
-
234
-
235
-
236
-
237
-
238
-
239
-
240
-
241
-
242
-
243
-
244
-
245
-
246
-
247
 |
 |
