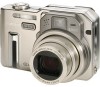
Casio P600 User Manual - Page 5
Combining Shots of Two People into a Single Image, Recording a Subject onto an Existing Background - review
 |
UPC - 079767683573
View all Casio P600 manuals
Add to My Manuals
Save this manual to your list of manuals |
Page 5 highlights
INTRODUCTION Using Auto Bracketing 95 Using Auto Bracketing with Exposure Selected as the Variable (AE Bracketing) 96 Using Auto Bracketing with White Balance as the Variable (WB Bracketing) 97 Using Auto Bracketing with the Focus Distance as the Variable (Focus Bracketing) 98 Using Auto Bracketing with Non-configurable Variables (Multi Bracketing) 99 Auto Bracketing Precautions 100 Previewing Images Recorded with High Speed Continuous Shutter or Auto Bracketing 100 Deleting an Image on the Preview Screen 102 Using the BESTSHOT Mode 103 Creating Your Own BESTSHOT Setup 104 Combining Shots of Two People into a Single Image (Coupling Shot 107 Recording a Subject onto an Existing Background Image (Pre-shot 109 Using the Movie Mode 111 Recording Audio 113 Adding Audio to a Snapshot 113 Recording Your Voice 114 REC Mode Camera Settings 116 Specifying ISO Sensitivity 117 Selecting the Auto Focus (AF) Mode 118 Selecting the Metering Mode 119 Using the Filter Function 120 Specifying Outline Sharpness 121 Specifying Color Saturation 121 Specifying Contrast 122 Turning the On-screen Grid On and Off 122 Turning Image Review On and Off 123 Assigning Functions to the [̇] and [̈] Keys 123 Specifying Power On Default Settings 124 Resetting the Camera 126 Using the Shortcut Menu 127 Using the Card Remote Controller for Recording ... 128 Loading the Battery 128 Before Using the Card Remote Controller for Recording 129 Using the Card Remote Controller 130 Using an External Flash 132 External Flash Unit Requirements 132 Attaching an External Flash Unit 133 Using a Conversion Lens or Filter 135 Installing a Conversion Lens or Close-up Lens 136 Installing a Filter 137 5
-
 1
1 -
 2
2 -
 3
3 -
 4
4 -
 5
5 -
 6
6 -
 7
7 -
 8
8 -
 9
9 -
 10
10 -
 11
11 -
12
-
13
-
14
-
15
-
16
-
17
-
18
-
19
-
20
-
21
-
22
-
23
-
24
-
25
-
26
-
27
-
28
-
29
-
30
-
31
-
32
-
33
-
34
-
35
-
36
-
37
-
38
-
39
-
40
-
41
-
42
-
43
-
44
-
45
-
46
-
47
-
48
-
49
-
50
-
51
-
52
-
53
-
54
-
55
-
56
-
57
-
58
-
59
-
60
-
61
-
62
-
63
-
64
-
65
-
66
-
67
-
68
-
69
-
70
-
71
-
72
-
73
-
74
-
75
-
76
-
77
-
78
-
79
-
80
-
81
-
82
-
83
-
84
-
85
-
86
-
87
-
88
-
89
-
90
-
91
-
92
-
93
-
94
-
95
-
96
-
97
-
98
-
99
-
100
-
101
-
102
-
103
-
104
-
105
-
106
-
107
-
108
-
109
-
110
-
111
-
112
-
113
-
114
-
115
-
116
-
117
-
118
-
119
-
120
-
121
-
122
-
123
-
124
-
125
-
126
-
127
-
128
-
129
-
130
-
131
-
132
-
133
-
134
-
135
-
136
-
137
-
138
-
139
-
140
-
141
-
142
-
143
-
144
-
145
-
146
-
147
-
148
-
149
-
150
-
151
-
152
-
153
-
154
-
155
-
156
-
157
-
158
-
159
-
160
-
161
-
162
-
163
-
164
-
165
-
166
-
167
-
168
-
169
-
170
-
171
-
172
-
173
-
174
-
175
-
176
-
177
-
178
-
179
-
180
-
181
-
182
-
183
-
184
-
185
-
186
-
187
-
188
-
189
-
190
-
191
-
192
-
193
-
194
-
195
-
196
-
197
-
198
-
199
-
200
-
201
-
202
-
203
-
204
-
205
-
206
-
207
-
208
-
209
-
210
-
211
-
212
-
213
-
214
-
215
-
216
-
217
-
218
-
219
-
220
-
221
-
222
-
223
-
224
-
225
-
226
-
227
-
228
-
229
-
230
-
231
-
232
-
233
-
234
-
235
-
236
-
237
-
238
-
239
-
240
-
241
-
242
-
243
-
244
-
245
-
246
-
247
 |
 |
