Casio XJ-A240 User Manual - Page 13
Changing the aspect ratio of the projected image, XJ-A230/XJ-A235/XJ-A240/XJ-A245
 |
View all Casio XJ-A240 manuals
Add to My Manuals
Save this manual to your list of manuals |
Page 13 highlights
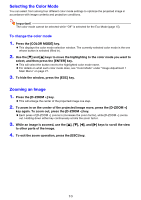
Changing the aspect ratio of the projected image Press the [ASPECT] key to cycle through the aspect ratio settings for the projected image. Available settings depend on your projector model as shown below. For details about the meaning of each setting, see the "Aspect Ratio" setting (page 29) on the "Screen Settings Main Menu". XJ-A230/XJ-A235/XJ-A240/XJ-A245 Pressing the [ASPECT] key will cycle through settings in accordance with the current input source as shown below. Input Source VIDEO, Component, HDMI (DTV) RGB, HDMI (PC) Pressing [ASPECT] will cycle through these settings: Normal 16:9 Letter Box Normal Full True XJ-A130/XJ-A135/XJ-A140/XJ-A145 Pressing the [ASPECT] key will toggle between settings in accordance with the current input source as shown below. Input Source VIDEO, Component, HDMI (DTV) RGB, HDMI (PC) Pressing [ASPECT] will toggle between these settings: Normal 16:9 Normal Full Note When the input source is a component or an HDMI (DTV) signal with an aspect ratio of 16:9, the aspect ratio is fixed at 16:9. In this case, pressing the [ASPECT] key will not change the aspect ratio setting. For details about how the aspect ratio setting affects the projected image, see "Aspect Ratio Setting and Projection Image" (page 44). You also can change the aspect ratio setting using the setup menu. For details, see "Aspect Ratio" under "Screen Settings Main Menu" on page 29. Important! Note that enlarging or reducing the size of an image using the [ASPECT] key for commercial purposes or public presentation may infringe on the legally protected copyright of the copyright holder of the original material. 13
-
 1
1 -
2
-
3
-
4
-
5
-
6
-
7
-
 8
8 -
 9
9 -
 10
10 -
 11
11 -
 12
12 -
 13
13 -
 14
14 -
 15
15 -
 16
16 -
 17
17 -
 18
18 -
19
-
20
-
21
-
22
-
23
-
24
-
25
-
26
-
27
-
28
-
29
-
30
-
31
-
32
-
33
-
34
-
35
-
36
-
37
-
38
-
39
-
40
-
41
-
42
-
43
-
44
-
45
-
46
-
47
-
48
-
49
-
50
-
51
 |
 |