Cisco 7937G Administration Guide - Page 67
Configuring Personal Directory, Modifying Button Templates - 7937
 |
UPC - 882658165283
View all Cisco 7937G manuals
Add to My Manuals
Save this manual to your list of manuals |
Page 67 highlights
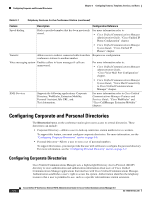
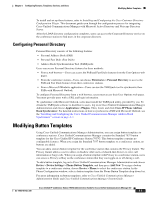
Chapter 5 Configuring Features, Templates, Services, and Users Modifying Button Templates To install and set up these features, refer to Installing and Configuring the Cisco Customer Directory Configuration Plugin. This document guides you through the configuration process for integrating Cisco Unified Communications Manager with Microsoft Active Directory and Netscape Directory Server. After the LDAP directory configuration completes, users can access the Corporate Directory service on the conference station to find users in the corporate directory. Configuring Personal Directory Personal Directory consists of the following features: • Personal Address Book (PAB) • Personal Fast Dials (Fast Dials) • Address Book Synchronization Tool (TABSynch) Users can access Personal Directory features by these methods: • From a web browser-Users can access the PAB and Fast Dials features from the User Options web pages. • From the conference station-Users can choose Directories > Personal Directory to access the PAB and Fast Dials features from their conference stations. • From a Microsoft Windows application-Users can use the TABSynch tool to synchronize their PABs with Microsoft Outlook. To configure Personal Directory from a web browser, users must access their User Options web pages. You must provide users with a URL and login information. To synchronize with Microsoft Outlook, users must install the TABSynch utility, provided by you. To obtain the TABSynch software to distribute to users, log on to Cisco Unified Communications Manager Administration and choose Application > Plugins. Then, locate and click Cisco IP Phone Address Book Synchronizer. For detailed instructions on how to synchronize a PAB with Microsoft Outlook, see the "Installing and Configuring the Cisco Unified Communications Manager Address Book Synchronizer" section on page A-3. Modifying Button Templates Using Cisco Unified Communications Manager Administration, you can assign button templates to conference stations. Cisco Unified Communications Manager contains the Standard 7937 button template for the Cisco Unified IP Conference Station 7937G. This button template contains no configurable features. When you assign the Standard 7937 button template to a conference station, no buttons are added. You can add a custom button template for the conference station that contains the Privacy feature. The Privacy feature allows a user to allow or disallow other users of shared-line devices to view call information or barge calls. When you assign a button template with Privacy to a conference station, users can access a Privacy softkey on the conference station that they can toggle on or off during a call. To add a button template, log on to Cisco Unified Communications Manager Administration and choose Device > Device Settings > Phone Button Template, and then press Add New. To assign a button template to a conference station, choose Device > Phone to select the conference station. In the Phone Configuration window, select a button template from the Phone Button Template drop-down list. For more information on button templates, refer to Cisco Unified Communications Manager Administration Guide and Cisco Unified Communications Manager System Guide. Cisco Unified IP Conference Station 7937G Administration Guide for Cisco Unified Communications Manager 6.0 OL-11560-01 Rev. B0 5-7
-
 1
1 -
2
-
3
-
4
-
5
-
6
-
7
-
8
-
9
-
10
-
11
-
12
-
13
-
14
-
15
-
16
-
17
-
18
-
19
-
20
-
21
-
22
-
23
-
24
-
25
-
26
-
27
-
28
-
29
-
30
-
31
-
32
-
33
-
34
-
35
-
36
-
37
-
38
-
39
-
40
-
41
-
42
-
43
-
44
-
45
-
46
-
47
-
48
-
49
-
50
-
51
-
52
-
53
-
54
-
55
-
56
-
57
-
58
-
59
-
60
-
61
-
 62
62 -
 63
63 -
 64
64 -
 65
65 -
 66
66 -
 67
67 -
 68
68 -
 69
69 -
 70
70 -
 71
71 -
 72
72 -
73
-
74
-
75
-
76
-
77
-
78
-
79
-
80
-
81
-
82
-
83
-
84
-
85
-
86
-
87
-
88
-
89
-
90
-
91
-
92
-
93
-
94
-
95
-
96
-
97
-
98
-
99
-
100
-
101
-
102
-
103
-
104
-
105
-
106
-
107
-
108
-
109
-
110
-
111
-
112
-
113
-
114
-
115
-
116
-
117
-
118
-
119
-
120
-
121
-
122
 |
 |