Cisco ASR1002 Installation Guide - Page 19
Installing the Cisco ASR 1002 Router in a Rack - chassis
 |
UPC - 882658196416
View all Cisco ASR1002 manuals
Add to My Manuals
Save this manual to your list of manuals |
Page 19 highlights
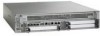
Chapter 8 Cisco ASR 1002 Router Overview and Installation Installing the Cisco ASR 1002 Router in a Rack Step 1 Locate the threaded holes on the rear side of the chassis. Make certain that you hold the rear rack-mount bracket with the ear and holes facing outward and towards the rear of the chassis. Figure 8-13 shows where to attach the rear rack-mount brackets to the Cisco ASR 1002 Router. Figure 8-13 Attaching the Rear Rack-Mount Brackets to the Cisco ASR 1002 Router 3 280279 2 1 1 Rear rack-mount bracket ear and holes 2 Rear rack-mount bracket 3 Rear rack-mount bracket screws -- Step 2 Step 3 Step 4 Position the rear rack-mount bracket top hole with the chassis top hole from the back. Insert and tighten the screws on one side. Repeat Step 1 through Step 3 on the other side of the chassis. Use the remaining screws to secure the rear rack-mount brackets to the chassis. This completes the steps for attaching the rear rack-mount brackets to the Cisco ASR 1002 Router. Caution To make installation easier, before you mount the ASR 1002 Router in a rack, make certain you read which rack-mount bracket ear holes to use when positioning the chassis in the rack. As a result of using the designated ear holes on the rack-mount bracket, the cable-management bracket installation will be made easier. Installing the Cisco ASR 1002 Router in a Rack After installing the rack-mount brackets on the chassis, you mount the chassis by securing the rack-mount brackets to two posts or mounting strips in the rack using the screws provided. Because the rack-mount brackets support the weight of the entire chassis, be sure to use all screws to fasten the two rack-mount brackets to the rack posts. Warning To prevent bodily injury when mounting or servicing this unit in a rack, you must take special precautions to ensure that the system remains stable. The following guidelines are provided to ensure your safety: -This unit should be mounted at the bottom of the rack if it is the only unit in the rack. OL-13208-09 Cisco ASR 1000 Series Aggregation Services Routers Hardware Installation Guide 8-19
-
 1
1 -
2
-
3
-
4
-
5
-
6
-
7
-
8
-
9
-
10
-
11
-
12
-
13
-
 14
14 -
 15
15 -
 16
16 -
 17
17 -
 18
18 -
 19
19 -
 20
20 -
 21
21 -
 22
22 -
 23
23 -
 24
24 -
25
-
26
-
27
-
28
-
29
-
30
-
31
-
32
-
33
-
34
-
35
-
36
-
37
-
38
-
39
-
40
-
41
-
42
-
43
-
44
-
45
-
46
 |
 |
