Compaq 12XL325 Presario 1200 Series Models XL101-XL113, XL115, XL118-XL127 - M - Page 98
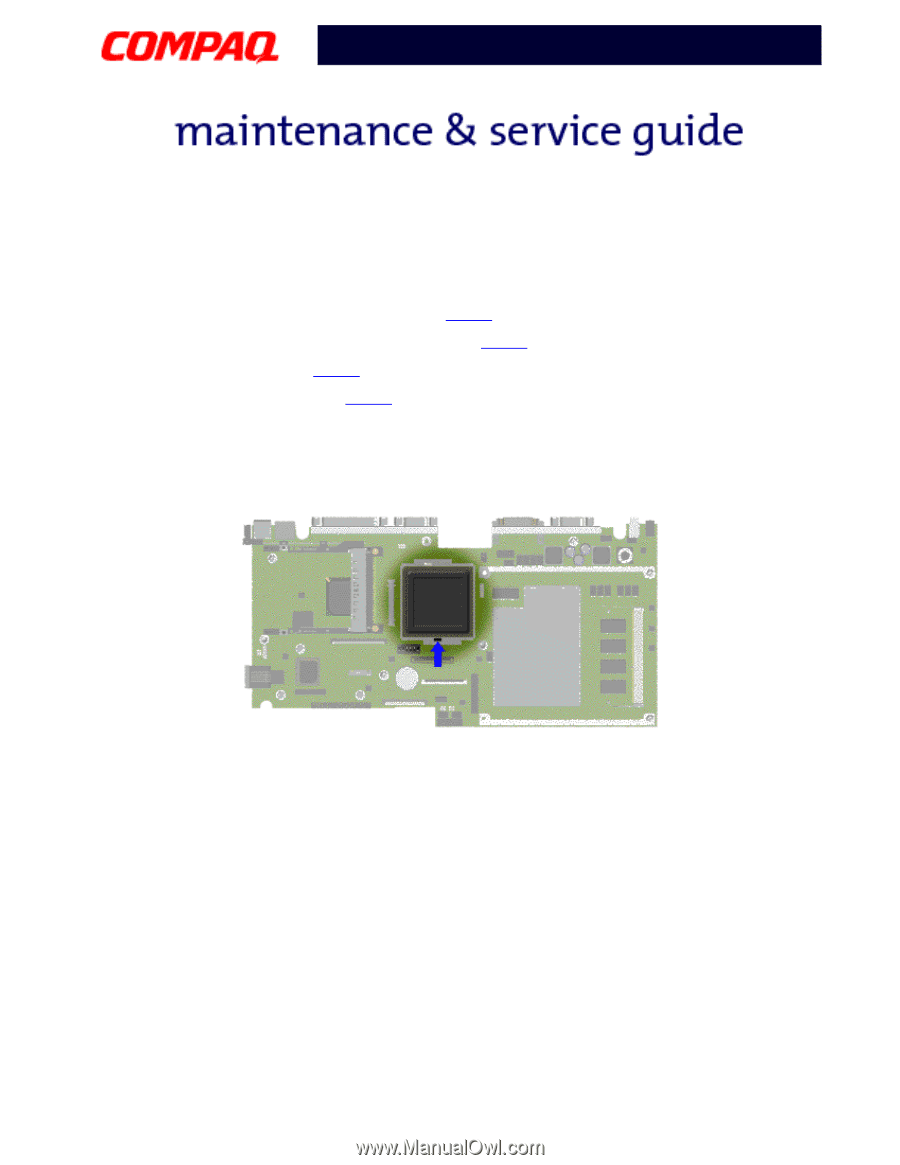
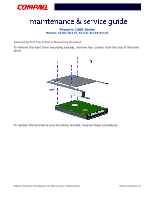
Removing the Processor, Fully align the processor with the system board connector.
 |
UPC - 720591465094
View all Compaq 12XL325 manuals
Add to My Manuals
Save this manual to your list of manuals |
Page 98 highlights
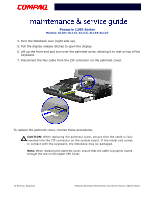
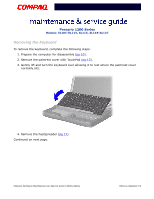
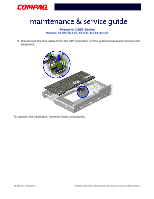
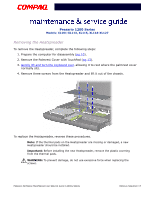
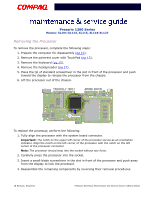
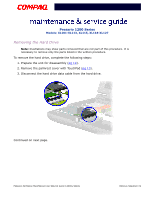
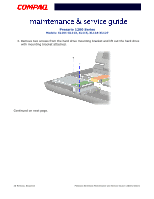
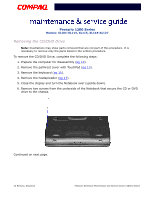
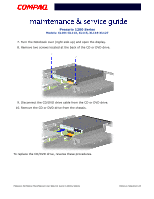
Presario 1200 Series Models: XL101-XL113, XL115, XL118-XL127 Removing the Processor To remove the processor, complete the following steps: 1. Prepare the computer for disassembly (pg 10). 2. Remove the palmrest cover with TouchPad (pg 13). 3. Remove the keyboard (pg 15). 4. Remove the heatspreader (pg 17). 5. Place the tip of standard screwdriver in the slot in front of the processor and push toward the display to release the processor from the chassis. 6. Lift the processor out of the chassis. To replace the processor, perform the following: 1. Fully align the processor with the system board connector. Important: The notch on the upper left corner of the processor serves as an orientation indicator. Align the notch on the left corner of the processor with the notch on the left corner of the processor connector. Note: The processor should drop into the socket without any force. 2. Carefully press the processor into the socket. 3. Insert a small-blade screwdriver in the slot in front of the processor and push away from the display to lock the processor. 4. Reassemble the remaining components by reversing their removal procedures. 18 REMOVAL SEQUENCE PRESARIO NOTEBOOK MAINTENANCE AND SERVICE GUIDE 1200XL SERIES
-
 1
1 -
2
-
3
-
4
-
5
-
6
-
7
-
8
-
9
-
10
-
11
-
12
-
13
-
14
-
15
-
16
-
17
-
18
-
19
-
20
-
21
-
22
-
23
-
24
-
25
-
26
-
27
-
28
-
29
-
30
-
31
-
32
-
33
-
34
-
35
-
36
-
37
-
38
-
39
-
40
-
41
-
42
-
43
-
44
-
45
-
46
-
47
-
48
-
49
-
50
-
51
-
52
-
53
-
54
-
55
-
56
-
57
-
58
-
59
-
60
-
61
-
62
-
63
-
64
-
65
-
66
-
67
-
68
-
69
-
70
-
71
-
72
-
73
-
74
-
75
-
76
-
77
-
78
-
79
-
80
-
81
-
82
-
83
-
84
-
85
-
86
-
87
-
88
-
89
-
90
-
91
-
92
-
 93
93 -
 94
94 -
 95
95 -
 96
96 -
 97
97 -
 98
98 -
 99
99 -
 100
100 -
 101
101 -
 102
102 -
 103
103 -
104
-
105
-
106
-
107
-
108
-
109
-
110
-
111
-
112
-
113
-
114
-
115
-
116
-
117
-
118
-
119
-
120
-
121
-
122
-
123
-
124
-
125
-
126
-
127
-
128
-
129
-
130
-
131
-
132
 |
 |