Compaq Pro 6305 Maintenance and Service Guide Pro 6305 Microtower Business PC - Page 107
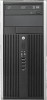
the system board up at an angle, and then lift the system board out of the computer.
 |
View all Compaq Pro 6305 manuals
Add to My Manuals
Save this manual to your list of manuals |
Page 107 highlights
● Processor (Processor on page 90) ● WLAN module (WLAN module on page 67) 5. Disconnect all cables connected to the system board, noting their location for reinstallation. 6. Remove the eight Torx T15 screws that secure the system board to the chassis. Figure 6-46 System board screws 7. Slide the system board toward the front of the computer to disengage the I/O panel, lift the rear of the system board up at an angle, and then lift the system board out of the computer. Figure 6-47 Removing the system board System Board 97
-
 1
1 -
2
-
3
-
4
-
5
-
6
-
7
-
8
-
9
-
10
-
11
-
12
-
13
-
14
-
15
-
16
-
17
-
18
-
19
-
20
-
21
-
22
-
23
-
24
-
25
-
26
-
27
-
28
-
29
-
30
-
31
-
32
-
33
-
34
-
35
-
36
-
37
-
38
-
39
-
40
-
41
-
42
-
43
-
44
-
45
-
46
-
47
-
48
-
49
-
50
-
51
-
52
-
53
-
54
-
55
-
56
-
57
-
58
-
59
-
60
-
61
-
62
-
63
-
64
-
65
-
66
-
67
-
68
-
69
-
70
-
71
-
72
-
73
-
74
-
75
-
76
-
77
-
78
-
79
-
80
-
81
-
82
-
83
-
84
-
85
-
86
-
87
-
88
-
89
-
90
-
91
-
92
-
93
-
94
-
95
-
96
-
97
-
98
-
99
-
100
-
101
-
 102
102 -
 103
103 -
 104
104 -
 105
105 -
 106
106 -
 107
107 -
 108
108 -
 109
109 -
 110
110 -
 111
111 -
 112
112 -
113
-
114
-
115
-
116
-
117
-
118
-
119
-
120
-
121
-
122
-
123
-
124
-
125
-
126
-
127
-
128
-
129
-
130
-
131
-
132
-
133
-
134
-
135
-
136
-
137
-
138
-
139
-
140
-
141
-
142
-
143
-
144
-
145
-
146
-
147
-
148
-
149
-
150
-
151
-
152
-
153
-
154
-
155
-
156
-
157
-
158
-
159
-
160
-
161
-
162
-
163
-
164
-
165
-
166
-
167
-
168
-
169
-
170
-
171
-
172
-
173
-
174
-
175
-
176
-
177
-
178
-
179
-
180
-
181
-
182
-
183
-
184
-
185
-
186
-
187
-
188
-
189
-
190
-
191
-
192
-
193
-
194
-
195
-
196
-
197
-
198
-
199
-
200
-
201
-
202
-
203
-
204
-
205
-
206
-
207
-
208
-
209
-
210
-
211
-
212
-
213
-
214
-
215
-
216
-
217
-
218
-
219
-
220
-
221
-
222
-
223
-
224
-
225
-
226
-
227
-
228
-
229
-
230
-
231
-
232
 |
 |

●
Processor (
Processor
on page
90
)
●
WLAN module (
WLAN module
on page
67
)
5.
Disconnect all cables connected to the system board, noting their location for reinstallation.
6.
Remove the eight Torx T15 screws that secure the system board to the chassis.
Figure 6-46
System board screws
7.
Slide the system board toward the front of the computer to disengage the I/O panel, lift the rear of
the system board up at an angle, and then lift the system board out of the computer.
Figure 6-47
Removing the system board
System Board
97