Cub Cadet CC 30 e Electric Rider Operation Manual - Page 8
Installing the Mulch Plug If equipped
 |
View all Cub Cadet CC 30 e Electric Rider manuals
Add to My Manuals
Save this manual to your list of manuals |
Page 8 highlights
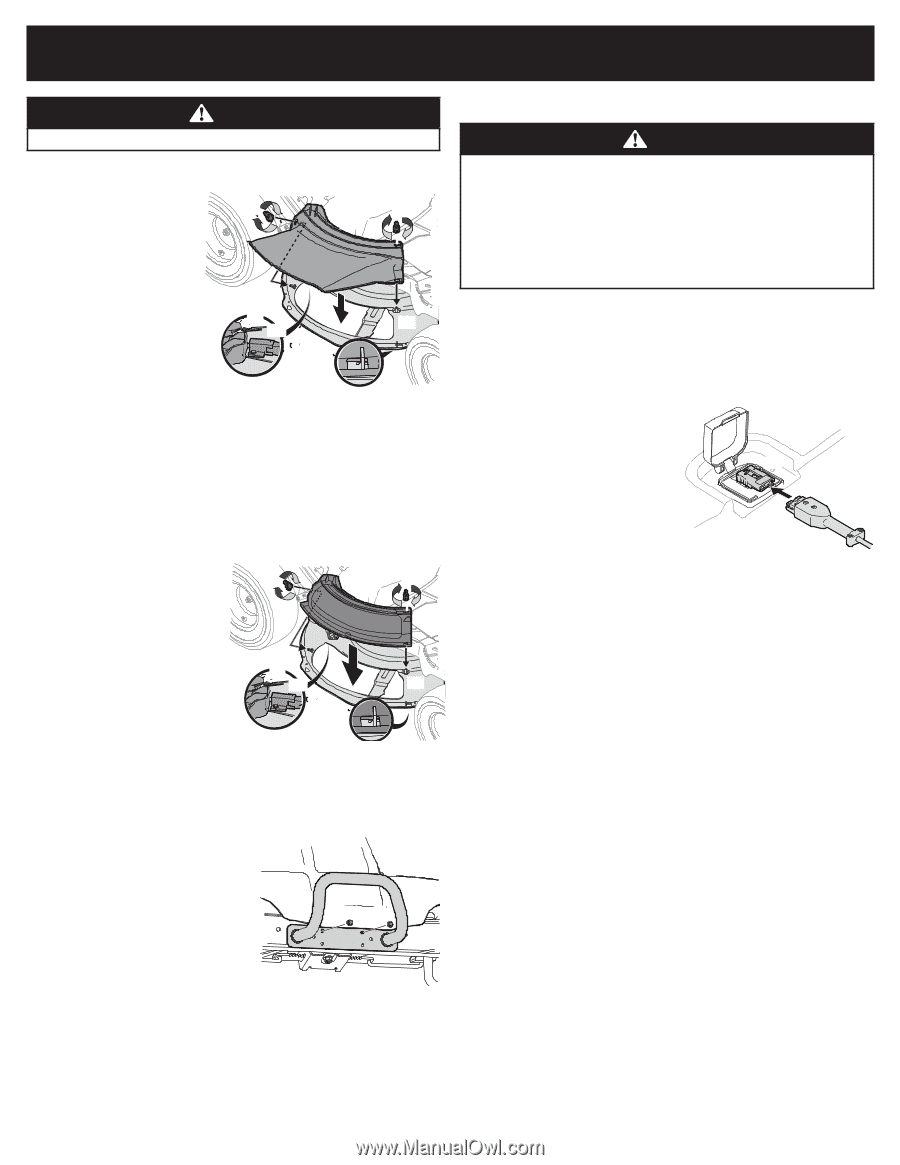
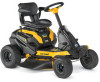
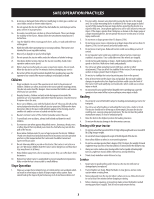
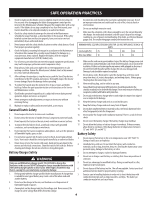
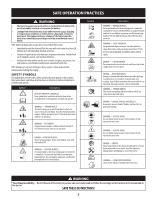
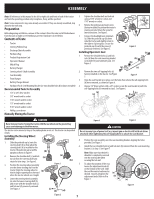
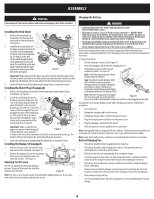
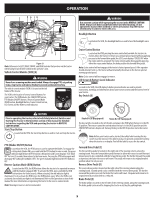
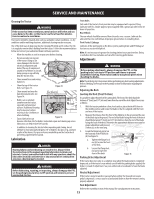
ASSEMBLY WARNING Never operate this tractor without either the mulch plug or deck chute installed. Installing the Deck Chute 1. Remove the wing knobs (a) (a) installed on the mowing deck and retain for later installation. See Figure 8. (a) (b) 2. Install the deck chute (b) into the discharge opening on the deck. The rear of the chute should be under the tab (f) on the rear deck bracket (e) (g). The studs (c) on the deck (c) (f) (g) (c) surface will fit through the holes on the upper portion of the deck (d) chute. The small tab (d) on the deck lip area will fit through the square cutout on the lower portion of the Figure 8 deck chute. See Figure 8. Important: Make certain that the upper-rear portion of deck chute (b) is depressing the safety switch (e) located on the deck surface and under the tab (f) on the rear deck bracket (g). The blade(s) will not start without the deck chute (b) properly in place. 3. Secure the deck chute (b) by tightening the wing knobs (a) removed in step 1. Installing the Mulch Plug (If equipped) 1. Remove the wing knobs (a) installed on the mowing deck and retain for later installation. See Figure 9. 2. Install the mulch plug (b) into the (a) discharge opening on the deck. The (a) (b) rear of the mulch plug (b) should be under the tab (f) on the rear deck bracket (g). The studs (c) on the deck surface will fit through the holes on the upper portion of the mulch plug (c) (b). The small tab (d) on the deck lip area will fit through the square (e) (f) (g) (c) cutout on the lower portion of the mulch plug (b). See Figure 9. (d) Important: Make certain that the upper-rear portion of mulch plug (b) Figure 9 is depressing the safety switch (e) located on the deck surface and under the tab (f) on the rear deck bracket (g). The blade(s) will not start without the mulch plug (b) properly in place. 3. Secure the mulch plug (b) by tightening the wing knobs (a) removed in step 1. Installing the Bumper (If equipped) 1. Remove the two screws (a) from the front (b) and center of the front axle. See Figure 10. 2. Position the bumper (b) over the mounting holes and secure using the screws (a) removed in Step 1. See Figure 10. Checking Tire Pressure (a) (a) See the tire sidewall for the proper inflation pressure. Proper inflation pressure should be maintained at all times. Figure 10 Note: The tires on your tractor may be over-inflated for shipping purposes. If necessary, reduce the tire pressure before operating the tractor. Charging the Battery WARNING • California Proposition 65: Cancer and reproductive harm - www.P65Warnings.ca.gov. • The battery contains corrosive fluid and toxic material - HANDLE WITH CARE. Keep away from children. Do not puncture, disassemble, mutilate, or incinerate. Explosive gases could be vented during charging or discharging. Charge in a well ventilated area, away from sources of ignition. • Recharge only with the charger provided with this tractor. A charger that is not suitable for this machine may damage the batteries or create the risk of fire. • Do not charge or operate the tractor in the rain or in wet conditions. Refer to the manual packed with your battery charger for further information and instructions on charging the battery. The charging port is located on the rear body panel of the tractor. To charge the battery: 1. Lift the charge port cover (a). See Figure 11. 2. Insert the charging cord (b) into the charging port (c). 3. Plug charger power cord (b) into wall (a) receptacle (outlet). See Figure 11. Note: It will take approximately 4 hours to fully charge the battery. Note: The Vehicle Control Module (VCM) LED's will blink continuously when charging and the LCD display will display percentage of charge. The battery is completely charged when all green lights are illuminated and the LCD displays 100%. (c) (b) Note: When the charging cord is plugged into the tractor and not yet plugged into Figure 11 the wall, the LED's will illuminate continuously until the cord is plugged into the wall. If at any time your charger displays a fault while charging your battery, follow these procedures: 1. Turn the key off. 2. Unplug the charging cord from the tractor. 3. Unplug the charger power cord from the power source. 4. Plug the charger power cord back into the power source. 5. Plug the charging cord back into the tractor. 6. It the fault persists contact qualified service personnel. Note: Rechargeable batteries degrade with time and use. The battery may eventually need to be replaced. To have the battery replaced, contact your authorized Service Dealer. Note: Using old or faulty battery could cause a system fault that results in loss of power. Battery Charging Tips • The battery should be fully charged before the initial use. • The battery should be fully charged after each use. Storing the battery in a discharged state could reduce performance. • The battery will turn off automatically after a complete charge. • It will take approximately 4 hours to fully charge the battery. Leaving the battery connected to the charger for more than 4 hours will not damage the battery. • The battery does not develop a memory and does not need to be fully discharged before recharging. • Always disconnect battery charger (or extension cord, if used) from the electrical receptacle (outlet) first, then disconnect the charging cord from the charging port. • Never charge a frozen battery. • It is recommended that the tractor be charged once every month during off-season storage. 8
-
 1
1 -
2
-
 3
3 -
 4
4 -
 5
5 -
 6
6 -
 7
7 -
 8
8 -
 9
9 -
 10
10 -
 11
11 -
 12
12 -
 13
13 -
14
-
15
-
16
-
17
-
18
-
19
-
20
-
21
-
22
-
23
-
24
-
25
-
26
-
27
-
28
-
29
-
30
-
31
-
32
-
33
-
34
 |
 |