D-Link DGS-1510 Quick Install Guide - Page 19
Installing the Switch in a Standard 19\, Installing Transceivers into the Transceiver Ports, CAUTION
 |
View all D-Link DGS-1510 manuals
Add to My Manuals
Save this manual to your list of manuals |
Page 19 highlights
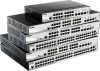
DGS-1510 Series Gigabit Ethernet SmartPro Switch Hardware Installation Guide Figure 2-2 Attach mounting brackets to the Switch Fasten the mounting brackets to the Switch using the screws provided. With the brackets attached securely, the Switch can be mounted in a standard rack, as shown below. NOTE: Please review the Installation Guidelines above before installing the Switch in a rack. Make sure there is adequate space around the Switch to allow for proper airflow, ventilation and cooling. Installing the Switch in a Standard 19" Rack Figure 2-3 Mount the Switch in a rack CAUTION: Installing systems in a rack without the front and side stabilizers installed could cause the rack to tip over, potentially resulting in bodily injury under certain circumstances. Therefore, always install the stabilizers before installing components in the rack. After installing components in a rack, do not pull more than one component out of the rack on its slide assemblies at one time. The weight of more than one extended component could cause the rack to tip over and may result in injury. Installing Transceivers into the Transceiver Ports The Switch is equipped with SFP (Small Form Factor Portable) and SFP+ ports, which are used with fiber-optical transceiver cabling. SFP ports support full-duplex transmissions, auto-negotiation, and 19
-
 1
1 -
2
-
3
-
4
-
5
-
6
-
7
-
8
-
9
-
10
-
11
-
12
-
13
-
 14
14 -
 15
15 -
 16
16 -
 17
17 -
 18
18 -
 19
19 -
 20
20 -
 21
21 -
 22
22 -
 23
23 -
 24
24 -
25
-
26
-
27
-
28
-
29
-
30
-
31
-
32
-
33
-
34
-
35
-
36
-
37
-
38
-
39
-
40
-
41
-
42
-
43
-
44
-
45
-
46
-
47
-
48
-
49
-
50
-
51
-
52
-
53
-
54
-
55
-
56
-
57
-
58
-
59
-
60
-
61
-
62
-
63
-
64
-
65
-
66
 |
 |
