D-Link DGS-1510 Quick Install Guide - Page 31
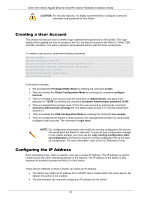
Creating a User Account, Configuring the IP Address, Global Configuration Mode
 |
View all D-Link DGS-1510 manuals
Add to My Manuals
Save this manual to your list of manuals |
Page 31 highlights
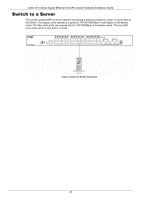
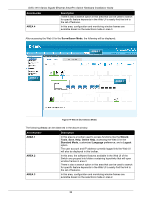
DGS-1510 Series Gigabit Ethernet SmartPro Switch Hardware Installation Guide CAUTION: For security reasons, it is highly recommended to configure a personal username and password for this Switch. Creating a User Account This section will discuss how to create a login username and password on this Switch. This login details will be applied not only for access to the CLI, but also for access to the Web UI, Telnet, SSH, and SSL interfaces. The same username and password will be used for these connections. To create a user account, enter the following commands. Switch> enable Switch# configure terminal Switch(config)# username Administrator password 12345 Switch(config)# username Administrator privilege 15 Switch(config)# line console Switch(config-line)# login local Switch(config-line)# In the above example, • We accessed the Privileged EXEC Mode by entering the command enable. • Then we entered the Global Configuration Mode by entering the command configure terminal. • Then we created a user account with the username of 'Administrator' and gave it the password of '12345' by entering the command username Administrator password 12345. • Then we assigned the privilege level of 15 to this user account by entering the command username Administrator privilege 15. The highest level access is 15 and the lowest level access is 1. • Then we entered the LINE Configuration Mode by entering the command line console. • Then we configured the Switch to allow access to the management interface by using locally configured user accounts. The command is login local. NOTE: CLI configuration commands only modify the running configuration file and are not saved when the Switch is rebooted. To save all your configuration changes in non-volatile storage, you must use the copy running-configuration startup-configuration command to copy the running configuration file to the startup configuration. For more information, refer to the CLI Reference Guide. Configuring the IP Address Each networking node, within a network, must use a unique IP Address. This IP address is used to communicate with other networking devices in the network. The IP address of the Switch is also important to be able to access the Web UI of this Switch. There are two methods in which a Switch can obtain an IP address. • The Switch can obtain an IP address from a DHCP server located within the local network. By default, this option is not enabled. • The administrator can manually configure an IP address for this Switch. 31
-
 1
1 -
2
-
3
-
4
-
5
-
6
-
7
-
8
-
9
-
10
-
11
-
12
-
13
-
14
-
15
-
16
-
17
-
18
-
19
-
20
-
21
-
22
-
23
-
24
-
25
-
 26
26 -
 27
27 -
 28
28 -
 29
29 -
 30
30 -
 31
31 -
 32
32 -
 33
33 -
 34
34 -
 35
35 -
 36
36 -
37
-
38
-
39
-
40
-
41
-
42
-
43
-
44
-
45
-
46
-
47
-
48
-
49
-
50
-
51
-
52
-
53
-
54
-
55
-
56
-
57
-
58
-
59
-
60
-
61
-
62
-
63
-
64
-
65
-
66
 |
 |
