Dell 5350dn Mono Laser Printer User's Guide - Page 141
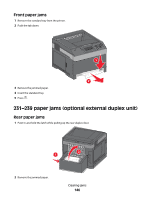
Understanding jam numbers and locations, 200 paper jam
 |
View all Dell 5350dn Mono Laser Printer manuals
Add to My Manuals
Save this manual to your list of manuals |
Page 141 highlights
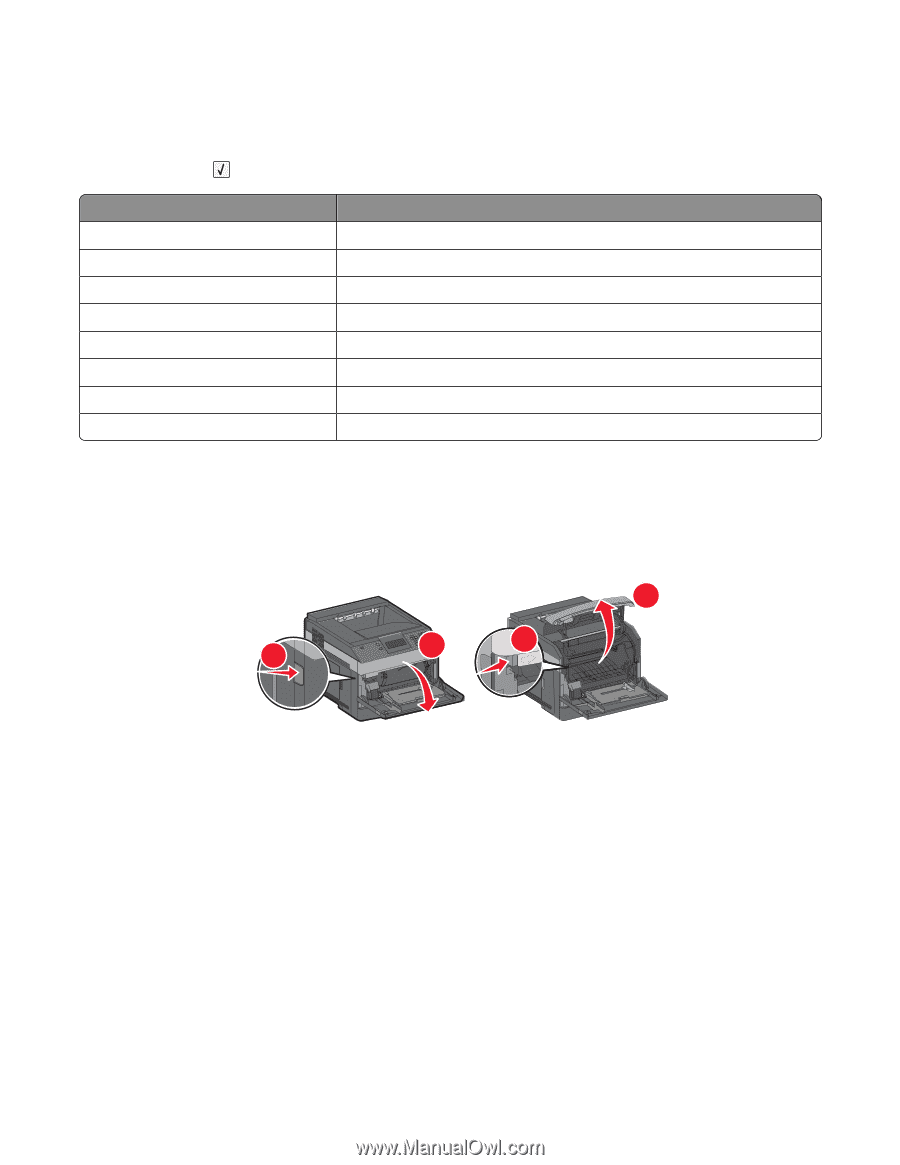
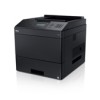
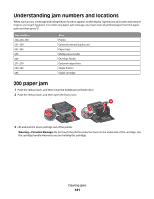
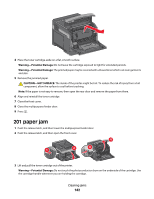
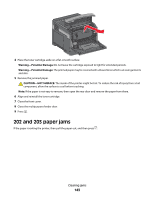
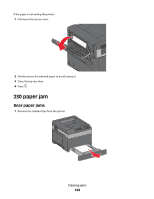
Understanding jam numbers and locations When a jam occurs, a message indicating the jam location appears on the display. Open doors and covers and remove trays to access jam locations. To resolve any paper jam message, you must clear all jammed paper from the paper path and then press . Jam numbers 200-203, 230 231-239 241-245 250 260 271-279 280-282 283 Area Printer Optional external duplex unit Paper trays Multipurpose feeder Envelope feeder Optional output bins Staple finisher Staple cartridge 200 paper jam 1 Push the release latch, and then lower the multipurpose feeder door. 2 Push the release latch, and then open the front cover. 4 1 2 3 3 Lift and pull the toner cartridge out of the printer. Warning-Potential Damage: Do not touch the photoconductor drum on the underside of the cartridge. Use the cartridge handle whenever you are holding the cartridge. Clearing jams 141
-
 1
1 -
2
-
3
-
4
-
5
-
6
-
7
-
8
-
9
-
10
-
11
-
12
-
13
-
14
-
15
-
16
-
17
-
18
-
19
-
20
-
21
-
22
-
23
-
24
-
25
-
26
-
27
-
28
-
29
-
30
-
31
-
32
-
33
-
34
-
35
-
36
-
37
-
38
-
39
-
40
-
41
-
42
-
43
-
44
-
45
-
46
-
47
-
48
-
49
-
50
-
51
-
52
-
53
-
54
-
55
-
56
-
57
-
58
-
59
-
60
-
61
-
62
-
63
-
64
-
65
-
66
-
67
-
68
-
69
-
70
-
71
-
72
-
73
-
74
-
75
-
76
-
77
-
78
-
79
-
80
-
81
-
82
-
83
-
84
-
85
-
86
-
87
-
88
-
89
-
90
-
91
-
92
-
93
-
94
-
95
-
96
-
97
-
98
-
99
-
100
-
101
-
102
-
103
-
104
-
105
-
106
-
107
-
108
-
109
-
110
-
111
-
112
-
113
-
114
-
115
-
116
-
117
-
118
-
119
-
120
-
121
-
122
-
123
-
124
-
125
-
126
-
127
-
128
-
129
-
130
-
131
-
132
-
133
-
134
-
135
-
 136
136 -
 137
137 -
 138
138 -
 139
139 -
 140
140 -
 141
141 -
 142
142 -
 143
143 -
 144
144 -
 145
145 -
 146
146 -
147
-
148
-
149
-
150
-
151
-
152
-
153
-
154
-
155
-
156
-
157
-
158
-
159
-
160
-
161
-
162
-
163
-
164
-
165
-
166
-
167
-
168
-
169
-
170
-
171
-
172
-
173
-
174
-
175
-
176
-
177
-
178
-
179
-
180
-
181
-
182
-
183
-
184
-
185
-
186
-
187
-
188
-
189
-
190
-
191
-
192
-
193
 |
 |