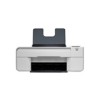
Dell 924 All-in-One Photo Printer User's Guide - Page 14
Using the Printer, Printing
 |
View all Dell 924 All-in-One Photo Printer manuals
Add to My Manuals
Save this manual to your list of manuals |
Page 14 highlights
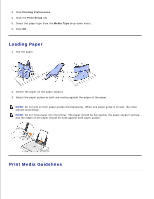
Using the Printer Printing Copying Scanning Faxing Printing Printing a Document 1. Turn on your computer and printer, and make sure they are connected. 2. Load paper with the print side facing up. For more information, see Loading Paper. 3. With your document open, click File Print. 4. To customize your print settings: a. Click Preferences, Properties, Options, or Setup (depending on the program or operating system). The Printing Preferences dialog box opens. b. On the Print Setup tab, select the print quality/speed, paper size, black and white or color printing, borderless printing, orientation, and number of copies. c. On the Advanced tab, you can specify a 2-sided printing option, a specialized layout option, or if you want to use Automatic Image Sharpening. d. After making the changes in Printing Preferences, click OK at the bottom of the screen to return to the Print dialog box. 5. Click OK or Print (depending on the program or operating system).
-
 1
1 -
2
-
3
-
4
-
5
-
6
-
7
-
8
-
 9
9 -
 10
10 -
 11
11 -
 12
12 -
 13
13 -
 14
14 -
 15
15 -
 16
16 -
 17
17 -
 18
18 -
 19
19 -
20
-
21
-
22
-
23
-
24
-
25
-
26
-
27
-
28
-
29
-
30
-
31
-
32
-
33
-
34
-
35
-
36
-
37
-
38
-
39
-
40
-
41
-
42
-
43
-
44
-
45
-
46
-
47
-
48
-
49
-
50
-
51
-
52
-
53
-
54
-
55
-
56
-
57
-
58
-
59
-
60
-
61
-
62
-
63
-
64
-
65
 |
 |
