Dell 924 All-in-One Photo Printer User's Guide - Page 47
Error Messages and Lights, Paper Problems
 |
View all Dell 924 All-in-One Photo Printer manuals
Add to My Manuals
Save this manual to your list of manuals |
Page 47 highlights
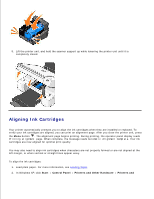
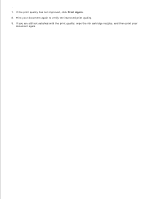
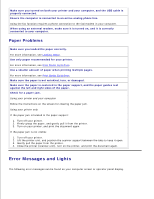
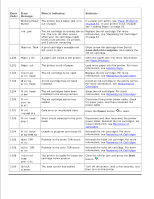
Make sure you turned on both your printer and your computer, and the USB cable is properly connected. Ensure the computer is connected to an active analog phone line. Using the fax function requires a phone connection to the fax/modem in your computer. When using an external modem, make sure it is turned on, and it is correctly connected to your computer. Paper Problems Make sure you loaded the paper correctly. For more information, see Loading Paper. Use only paper recommended for your printer. For more information, see Print Media Guidelines. Use a smaller amount of paper when printing multiple pages. For more information, see Print Media Guidelines. Make sure the paper is not wrinkled, torn, or damaged. Make sure the paper is centered in the paper support, and the paper guides rest against the left and right sides of the paper. Check for a paper jam. Using your printer and your computer Follow the instructions on the screen for clearing the paper jam. Using your printer only If the paper jam is located in the paper support: 1. Turn off your printer. 2. Firmly grasp the paper, and gently pull it from the printer. 3. Turn on your printer, and print the document again. If the paper jam is not visible: 1. Turn off your printer. 2. Lift the printer unit, and position the scanner support between the tabs to keep it open. 3. Gently pull the paper from the printer. 4. Close the printer (scanner unit), turn on the printer, and print the document again. Error Messages and Lights The following error messages can be found on your computer screen or operator panel display.
-
 1
1 -
2
-
3
-
4
-
5
-
6
-
7
-
8
-
9
-
10
-
11
-
12
-
13
-
14
-
15
-
16
-
17
-
18
-
19
-
20
-
21
-
22
-
23
-
24
-
25
-
26
-
27
-
28
-
29
-
30
-
31
-
32
-
33
-
34
-
35
-
36
-
37
-
38
-
39
-
40
-
41
-
 42
42 -
 43
43 -
 44
44 -
 45
45 -
 46
46 -
 47
47 -
 48
48 -
 49
49 -
 50
50 -
 51
51 -
 52
52 -
53
-
54
-
55
-
56
-
57
-
58
-
59
-
60
-
61
-
62
-
63
-
64
-
65
 |
 |