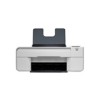
Dell 924 All-in-One Photo Printer User's Guide - Page 16
Printing Photos From a PictBridge-Compatible Camera, Print, Preferences, Properties, Options, Setup - best photo printer
 |
View all Dell 924 All-in-One Photo Printer manuals
Add to My Manuals
Save this manual to your list of manuals |
Page 16 highlights
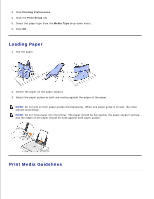
1. For best results, load photo/glossy paper, and make sure the print side is facing up. For more information, see Print Media Guidelines. 2. Make sure you have a color cartridge and a photo cartridge installed. For more information, see Replacing Ink Cartridges. 3. With your document open, click File Print. 4. To customize your print settings, click Preferences, Properties, Options, or Setup (depending on the program or operating system). The Printing Preferences dialog box opens. 5. On the Print Setup tab, select Photo, and then select the dpi settings for the photo from the drop- down menu. 6. Select the Borderless check box, orientation of the photo, and the number of copies you want. 7. On the Advanced tab, select the borderless paper size from the drop-down menu, and click OK. 8. Click OK or Print (depending on the program or operating system). Printing Photos From a PictBridge-Compatible Camera Your printer supports PictBridge-compatible cameras. 1. Insert one end of the USB cable into the camera. 2. Insert the other end of the USB cable into the PictBridge port on the front of the printer.
-
 1
1 -
2
-
3
-
4
-
5
-
6
-
7
-
8
-
9
-
10
-
 11
11 -
 12
12 -
 13
13 -
 14
14 -
 15
15 -
 16
16 -
 17
17 -
 18
18 -
 19
19 -
 20
20 -
 21
21 -
22
-
23
-
24
-
25
-
26
-
27
-
28
-
29
-
30
-
31
-
32
-
33
-
34
-
35
-
36
-
37
-
38
-
39
-
40
-
41
-
42
-
43
-
44
-
45
-
46
-
47
-
48
-
49
-
50
-
51
-
52
-
53
-
54
-
55
-
56
-
57
-
58
-
59
-
60
-
61
-
62
-
63
-
64
-
65
 |
 |
