Dell 924 All-in-One Photo Printer User's Guide - Page 6
Setting the Language on Your Printer, The Dell AIO Printer 924 supports Microsoft® Windows® 2000 - printer 924 photo all in one windows 7
 |
View all Dell 924 All-in-One Photo Printer manuals
Add to My Manuals
Save this manual to your list of manuals |
Page 6 highlights
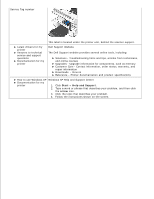
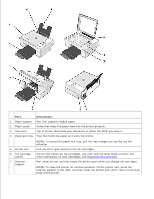
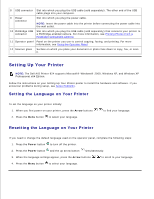
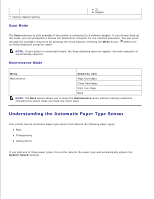
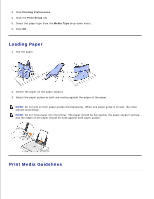
8 USB connector Slot into which you plug the USB cable (sold separately). The other end of the USB cable plugs into your computer. 9 Power connector Slot into which you plug the power cable. NOTE: Insert the power cable into the printer before connecting the power cable into the wall outlet. 10 PictBridge USB Slot into which you plug the USB cable (sold separately) that connects your printer to connector a PictBridge-enabled camera. For more information, see Printing Photos From a PictBridge-Compatible Camera. 11 Operator panel Panel on the printer you use to control copying, faxing, and printing. For more information, see Using the Operator Panel. 12 Scanner glass Surface on which you place your document or photo face down to copy, fax, or scan it. Setting Up Your Printer NOTE: The Dell AIO Printer 924 supports Microsoft® Windows® 2000, Windows XP, and Windows XP Professional x64 Edition. Follow the instructions on your Setting Up Your Printer poster to install the hardware and software. If you encounter problems during setup, see Setup Problems. Setting the Language on Your Printer To set the language on your printer initially: 1. When you first power on your printer, press the Arrow buttons 2. Press the Menu button to select your language. to find your language. Resetting the Language on Your Printer If you need to change the default language used on the operator panel, complete the following steps: 1. Press the Power button to turn off the printer. 2. Press the Power button and the up arrow button simultaneously. 3. When the language settings appear, press the Arrow buttons to scroll to your language. 4. Press the Menu button to select your language.
-
 1
1 -
 2
2 -
 3
3 -
 4
4 -
 5
5 -
 6
6 -
 7
7 -
 8
8 -
 9
9 -
 10
10 -
 11
11 -
 12
12 -
13
-
14
-
15
-
16
-
17
-
18
-
19
-
20
-
21
-
22
-
23
-
24
-
25
-
26
-
27
-
28
-
29
-
30
-
31
-
32
-
33
-
34
-
35
-
36
-
37
-
38
-
39
-
40
-
41
-
42
-
43
-
44
-
45
-
46
-
47
-
48
-
49
-
50
-
51
-
52
-
53
-
54
-
55
-
56
-
57
-
58
-
59
-
60
-
61
-
62
-
63
-
64
-
65
 |
 |