Dell 924 All-in-One Photo Printer User's Guide - Page 7
Using the Operator Panel, Power, Use
 |
View all Dell 924 All-in-One Photo Printer manuals
Add to My Manuals
Save this manual to your list of manuals |
Page 7 highlights
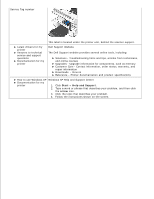
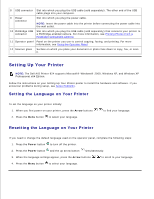
Using the Operator Panel The operator panel buttons allow you to scan, copy, and customize documents. The printer is on when the Power button is illuminated. Use the 1 Display 2 Menu button 3 Up/Down arrow buttons 4 Power button 5 Error light 6 Cancel button 7 Start button To View the number of copies selected. View settings for Mode, Copy, Copies, Quality, Dark, Size, Zoom, and Maintenance. For more information, see Operator Panel Menus. Scroll through the available menus. Each time you press this button, the current option is saved and the next menu appears on the display. Feed newly loaded paper. Navigate menus and menu items. Decrease/increase number of copies. Change the selected mode. Turn your printer on or off. Alert you to errors such as paper out, paper jam, or low ink. Cancel a scan, print, or copy job in progress. Cancel a copy job (using only the printer), and eject a page. Exit a menu, and return to the default settings. Start the copying or scanning process. If the printer is in Scan mode, pressing this button opens the Dell All-In-One Center (if your printer is connected to a computer).
-
 1
1 -
 2
2 -
 3
3 -
 4
4 -
 5
5 -
 6
6 -
 7
7 -
 8
8 -
 9
9 -
 10
10 -
 11
11 -
 12
12 -
13
-
14
-
15
-
16
-
17
-
18
-
19
-
20
-
21
-
22
-
23
-
24
-
25
-
26
-
27
-
28
-
29
-
30
-
31
-
32
-
33
-
34
-
35
-
36
-
37
-
38
-
39
-
40
-
41
-
42
-
43
-
44
-
45
-
46
-
47
-
48
-
49
-
50
-
51
-
52
-
53
-
54
-
55
-
56
-
57
-
58
-
59
-
60
-
61
-
62
-
63
-
64
-
65
 |
 |
