Dell A960 Owner's Manual - Page 71
Document Does Not Print, Setup Diagram, Setup, Diagram, User's Guide - printer ink cartridges
 |
View all Dell A960 manuals
Add to My Manuals
Save this manual to your list of manuals |
Page 71 highlights
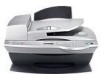
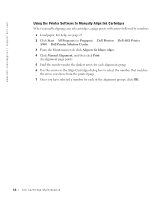
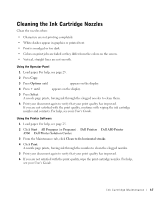
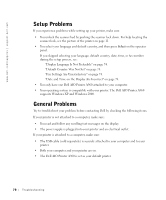
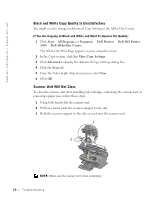
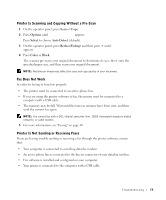
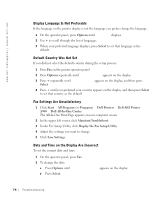
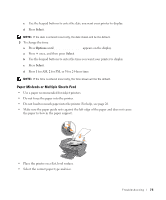
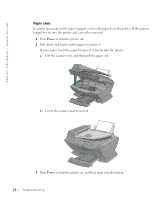
Anytime your printer has a problem, make sure: • Your printer is on. • The scanner is unlocked. For help locating the scanner lock, see the picture of the printer on page 11. • You removed the stickers and tape from the bottom of the ink cartridges. For help, see the Setup Diagram. • The paper is loaded correctly. For help, see "Loading Paper" on page 25 • You installed both of the ink cartridges. The Dell AIO Printer A960 only works if you have both cartridges installed. For help installing the cartridges, see the Setup Diagram. • Disconnect, and then reconnect both ends of the USB cable. For help, see the Setup Diagram. • Unplug the power supply from the electrical outlet. Reconnect the power supply (see your setup documentation). Turn the power on. • Restart your computer. If problems persist, see "Uninstalling and reinstalling the software" in your User's Guide. For help accessing your User's Guide, see page 13. Document Does Not Print • Make sure the cartridges are properly installed. • Use an undamaged USB cable. • Check your printer status to make sure your document is not being held or paused. To check printer status: a Click Start → Control Panel → Printers and Other Hardware → Printers and Faxes (Windows XP). Click Start → Settings → Printers and Faxes or Printers (Windows 2000). b Double-click the Dell AIO Printer A960 icon, and then click Printer. c Click Printer, and make sure no check mark appears next to Pause Printing. • Print a test page: a Click Start → All Programs (or Programs) → Dell Printers → Dell AIO Printer A960 → Dell Printer Solution Center. b Click the Maintenance tab. c From the Maintenance tab, click Print a test page. Troubleshooting 71
-
 1
1 -
2
-
3
-
4
-
5
-
6
-
7
-
8
-
9
-
10
-
11
-
12
-
13
-
14
-
15
-
16
-
17
-
18
-
19
-
20
-
21
-
22
-
23
-
24
-
25
-
26
-
27
-
28
-
29
-
30
-
31
-
32
-
33
-
34
-
35
-
36
-
37
-
38
-
39
-
40
-
41
-
42
-
43
-
44
-
45
-
46
-
47
-
48
-
49
-
50
-
51
-
52
-
53
-
54
-
55
-
56
-
57
-
58
-
59
-
60
-
61
-
62
-
63
-
64
-
65
-
 66
66 -
 67
67 -
 68
68 -
 69
69 -
 70
70 -
 71
71 -
 72
72 -
 73
73 -
 74
74 -
 75
75 -
 76
76 -
77
-
78
-
79
-
80
-
81
-
82
-
83
-
84
-
85
-
86
-
87
-
88
-
89
-
90
-
91
-
92
-
93
-
94
-
95
-
96
-
97
-
98
-
99
-
100
-
101
-
102
-
103
-
104
-
105
-
106
-
107
-
108
-
109
-
110
-
111
-
112
-
113
-
114
-
115
-
116
-
117
-
118
-
119
-
120
-
121
 |
 |