Dell Alienware M17x Manual - Page 37
Upgrading/Replacing Hard Drives
 |
UPC - 074450000071
View all Dell Alienware M17x manuals
Add to My Manuals
Save this manual to your list of manuals |
Page 37 highlights
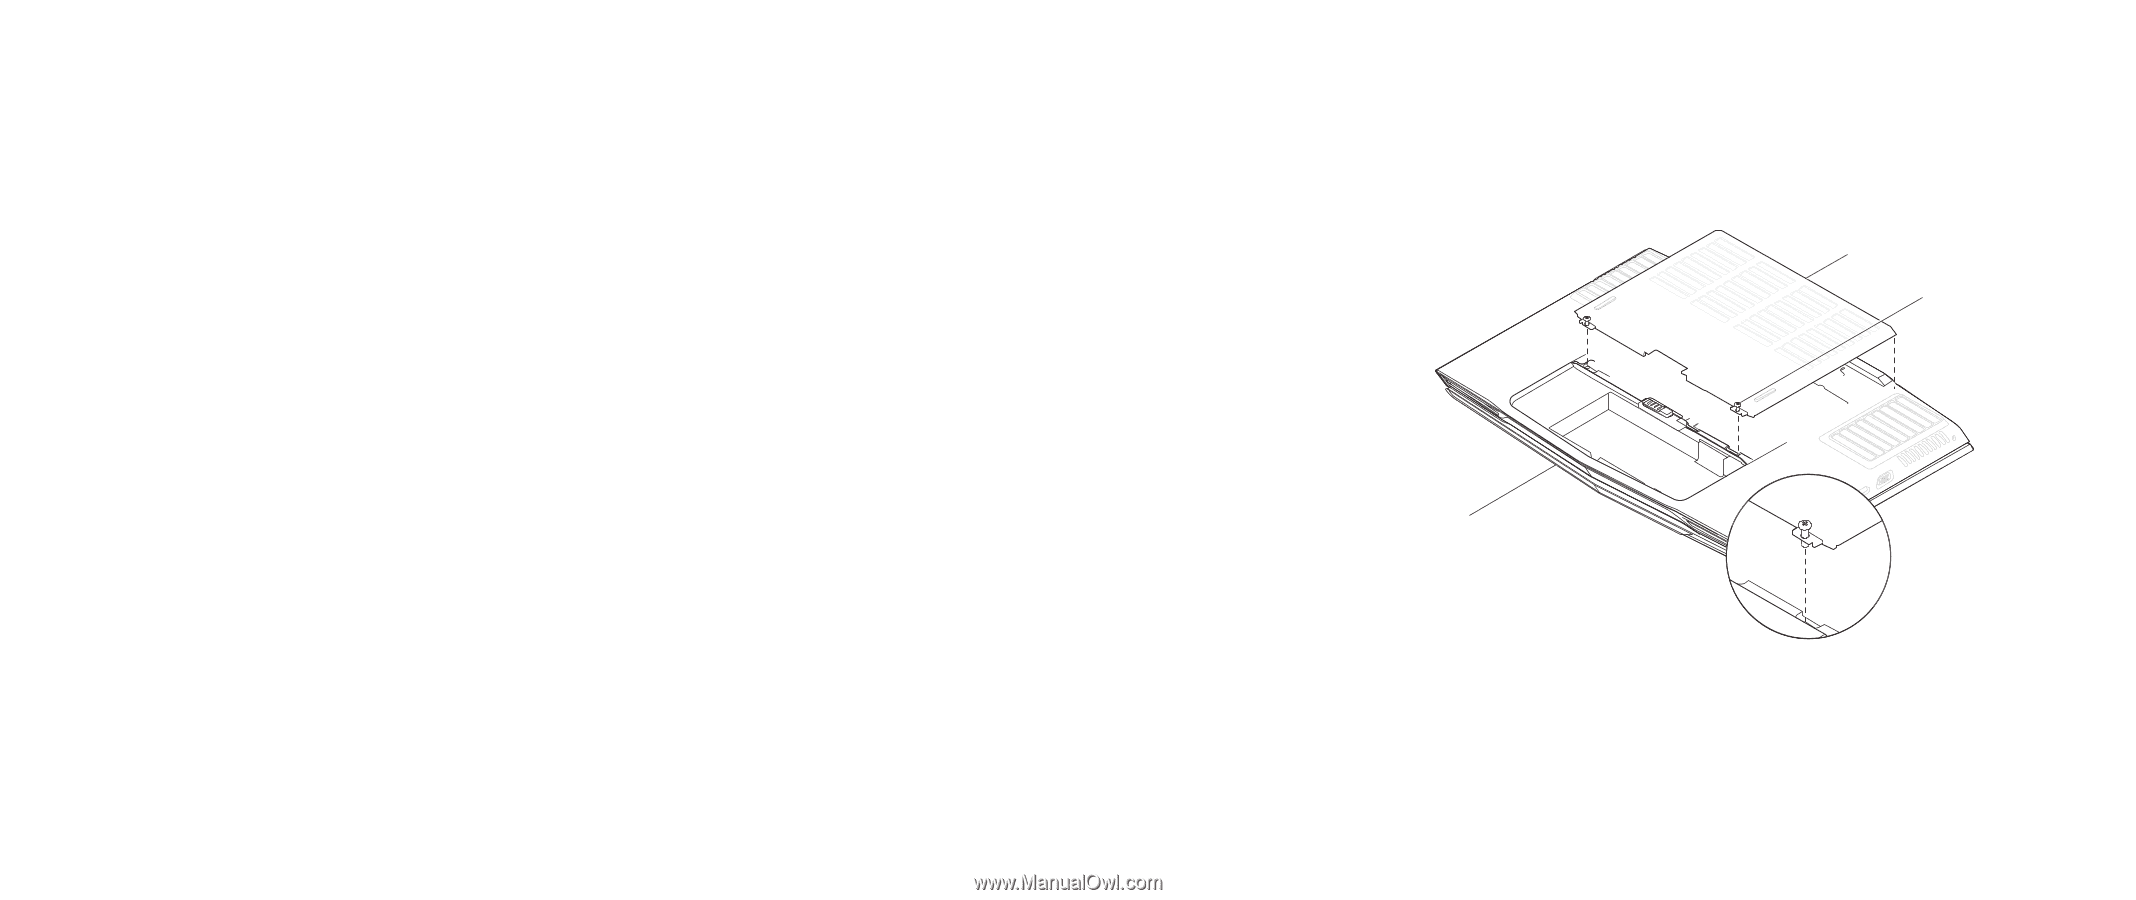
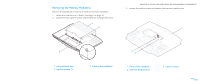
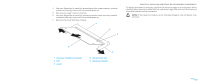
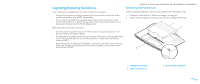
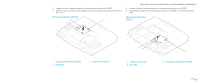
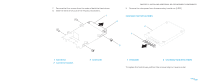
Upgrading/Replacing Hard Drives Your notebook is equipped with two sets of hard drive sockets. • If only one hard drive is being installed, place the primary hard drive in the socket indicated by the "HDD0" designation. • If two hard drives are being installed, place the primary hard drive in the socket indicated by the "HDD0" designation and the secondary hard drive in the socket indicated by the "HDD1" designation. Below are the three major scenarios: • One Windows® bootable hard drive: The hard drive should be placed in the primary hard drive socket (HDD0). • One Windows® bootable hard drive and another Windows® non-bootable hard drive: The bootable hard drive should be placed in the primary hard drive socket (HDD0). • Both hard drives are Windows® bootable: Choose the hard drive you want the computer to boot up from and have this drive installed in the primary hard drive socket (HDD0). CHAPTER 5: INSTALLING ADDITIONAL OR REPLACEMENT COMPONENTS Removing the Hard Drives Use the procedure below to remove your system's the hard disk drives. 1. Follow the instructions in "Before You Begin" on page 33. 2. Loosen the two captive screws and remove the compartment door. 1 2 3 1 compartment door 2 captive screws (2) 3 front of the notebook 037 /037
-
 1
1 -
2
-
3
-
4
-
5
-
6
-
7
-
8
-
9
-
10
-
11
-
12
-
13
-
14
-
15
-
16
-
17
-
18
-
19
-
20
-
21
-
22
-
23
-
24
-
25
-
26
-
27
-
28
-
29
-
30
-
31
-
 32
32 -
 33
33 -
 34
34 -
 35
35 -
 36
36 -
 37
37 -
 38
38 -
 39
39 -
 40
40 -
 41
41 -
 42
42 -
43
-
44
-
45
-
46
-
47
-
48
-
49
-
50
-
51
-
52
-
53
-
54
-
55
-
56
-
57
-
58
-
59
-
60
-
61
-
62
-
63
-
64
-
65
-
66
-
67
-
68
-
69
-
70
-
71
-
72
-
73
-
74
-
75
-
76
-
77
-
78
-
79
-
80
-
81
-
82
-
83
-
84
-
85
-
86
-
87
-
88
-
89
-
90
-
91
-
92
 |
 |