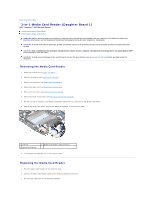
Dell Inspiron Mini 10 1010 Service Manual - Page 21
Replacing the Hard Drive
 |
View all Dell Inspiron Mini 10 1010 manuals
Add to My Manuals
Save this manual to your list of manuals |
Page 21 highlights
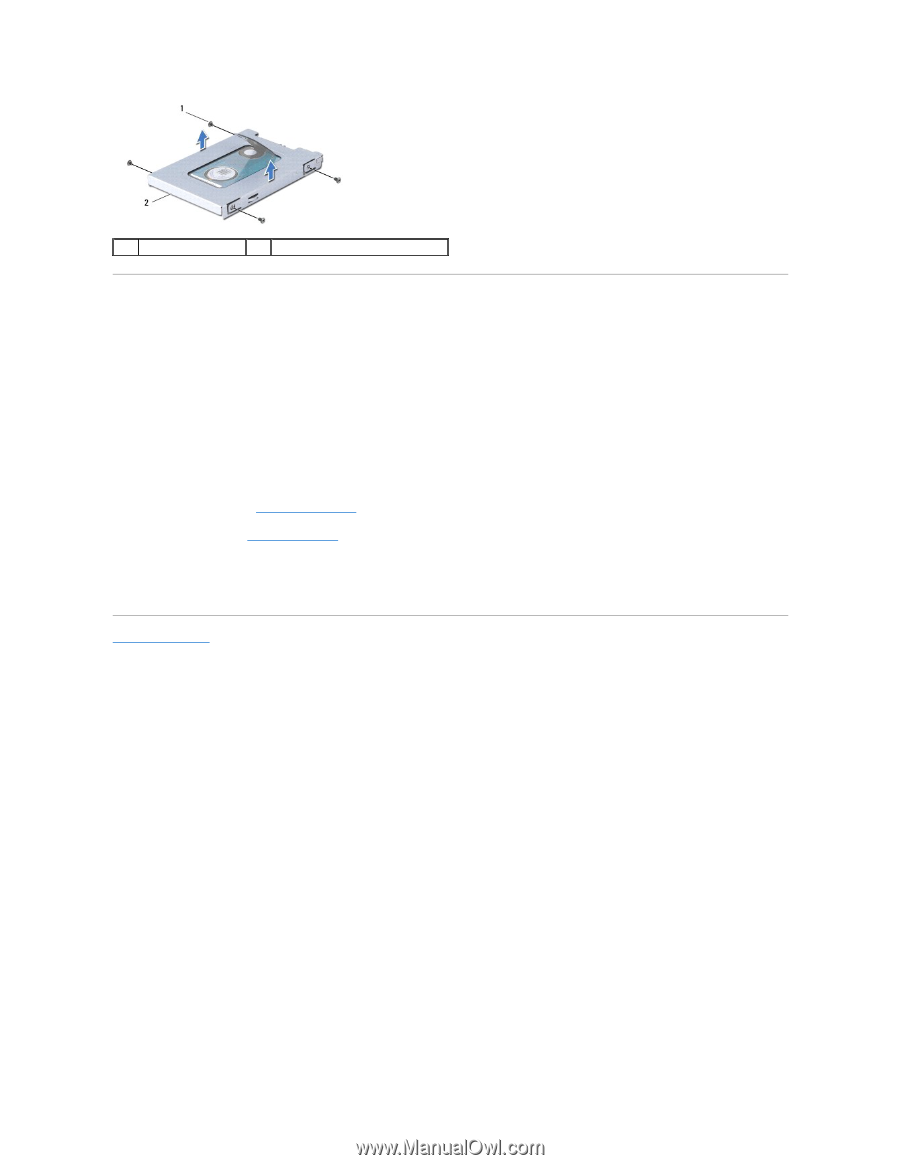
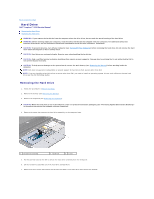
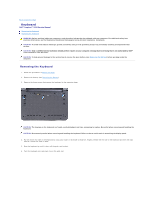
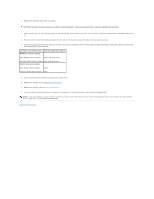
1 screws (4) 2 hard drive bracket Replacing the Hard Drive 1. Remove the new hard drive from its packaging. Save the original packaging for storing or shipping the hard drive. 2. Replace the hard drive bracket and the four screws that secure the bracket to the hard drive. 3. Place the hard drive assembly in the hard drive compartment. 4. Push the hard drive into the interposer until it is fully connected. 5. Replace the screw that secures the hard drive assembly to the computer base. 6. Replace the keyboard (see Replacing the Keyboard). 7. Replace the battery (see Replacing the Battery). 8. Install the operating system for your computer, as needed. See "Restoring Your Operating System" in the Setup Guide or Ubuntu Quick Start Guide. 9. Install the drivers and utilities for your computer, as needed. See "Reinstalling Drivers and Utilities" in the Dell Technology Guide. Back to Contents Page
-
 1
1 -
2
-
3
-
4
-
5
-
6
-
7
-
8
-
9
-
10
-
11
-
12
-
13
-
14
-
15
-
 16
16 -
 17
17 -
 18
18 -
 19
19 -
 20
20 -
 21
21 -
 22
22 -
 23
23 -
 24
24 -
 25
25 -
 26
26 -
27
-
28
-
29
-
30
-
31
-
32
-
33
-
34
-
35
-
36
-
37
-
38
-
39
-
40
-
41
-
42
-
43
-
44
 |
 |