Dell Inspiron Mini 9 910 Inspiron Mini 9 Service Manual - Page 14
Replacing the Display Assembly
 |
View all Dell Inspiron Mini 9 910 manuals
Add to My Manuals
Save this manual to your list of manuals |
Page 14 highlights
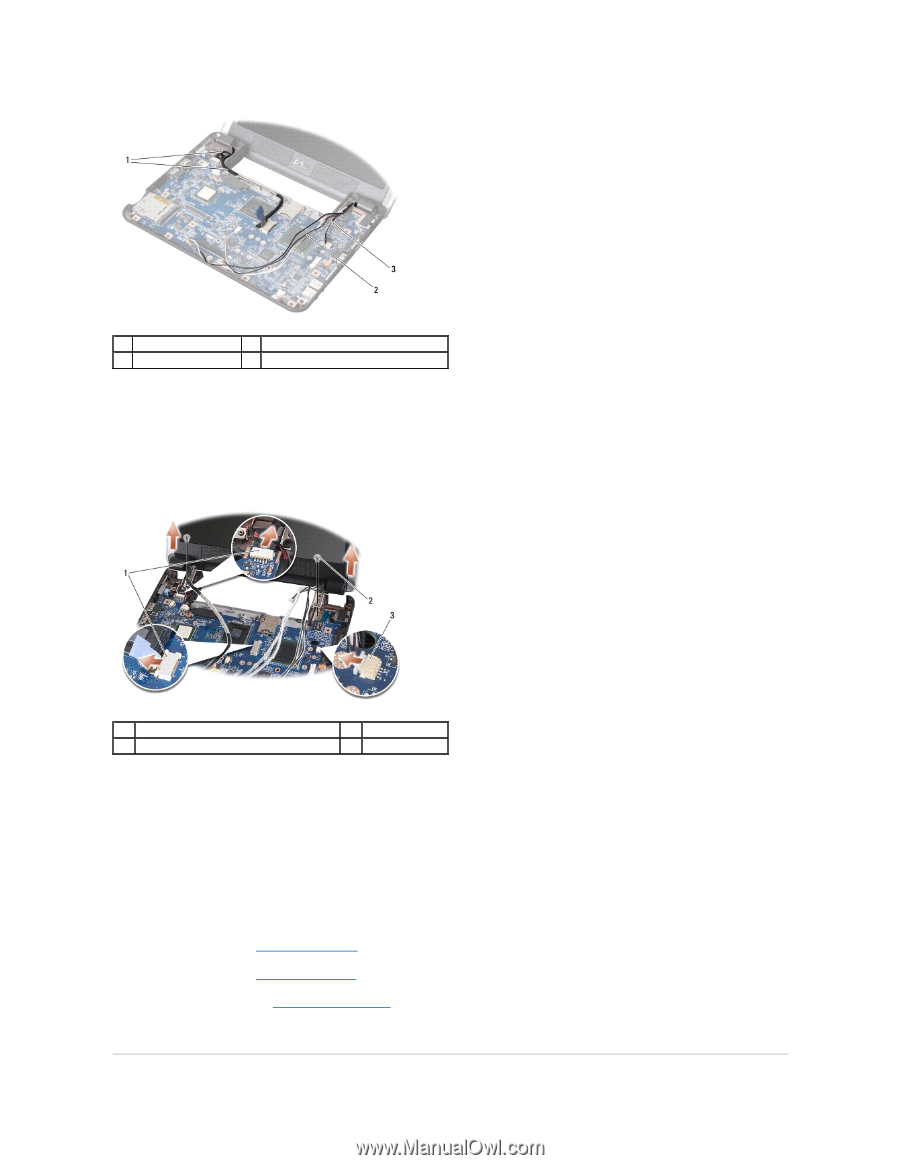
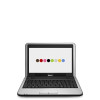
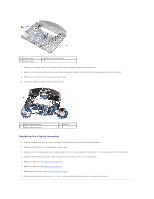
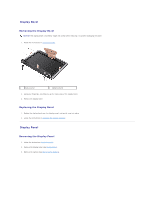
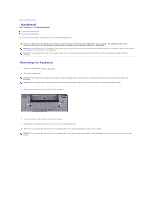
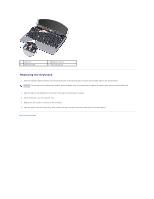
1 display cables 3 speaker cable 2 Mini-Card antenna cables 7. Disconnect the display cables and the speaker cable from the respective system board connectors. 8. Make note of the display cables and the speaker cable routing and carefully dislodge from their routing guides as shown in the figure. 9. Remove the two screws from the display assembly hinges. 10. Remove the display assembly from the computer base. 1 display cable connectors 3 speaker cable connector 2 screw (2) Replacing the Display Assembly 1. Align the display hinges with the holes in the base of the computer and then lower the display into place. 2. Replace and tighten the two display assembly hinge screws. 3. Carefully route the display cables and the speaker cable into their routing guides and connect them to the respective system board connectors. 4. Carefully slide the Mini-Card antenna cables through the system board and into their routing guides. 5. Replace the palm rest (see Replacing the Palm Rest). 6. Replace the keyboard (see Replacing the Keyboard). 7. Replace the module cover (see Replacing the Module Cover). 8. Slide the battery into the battery bay, until it clicks in place and slide the battery-lock latch towards the lock position.
-
 1
1 -
2
-
3
-
4
-
5
-
6
-
7
-
8
-
 9
9 -
 10
10 -
 11
11 -
 12
12 -
 13
13 -
 14
14 -
 15
15 -
 16
16 -
 17
17 -
 18
18 -
 19
19 -
20
-
21
-
22
-
23
-
24
-
25
-
26
-
27
-
28
-
29
-
30
-
31
-
32
-
33
-
34
-
35
-
36
-
37
-
38
 |
 |