Dell Latitude E5550 Dell LatitudeE5550 / 5550 Owners Manual - Page 8
Removing the Base Cover, Removing the Battery, Before Working Inside Your Computer, base cover - 15
 |
View all Dell Latitude E5550 manuals
Add to My Manuals
Save this manual to your list of manuals |
Page 8 highlights
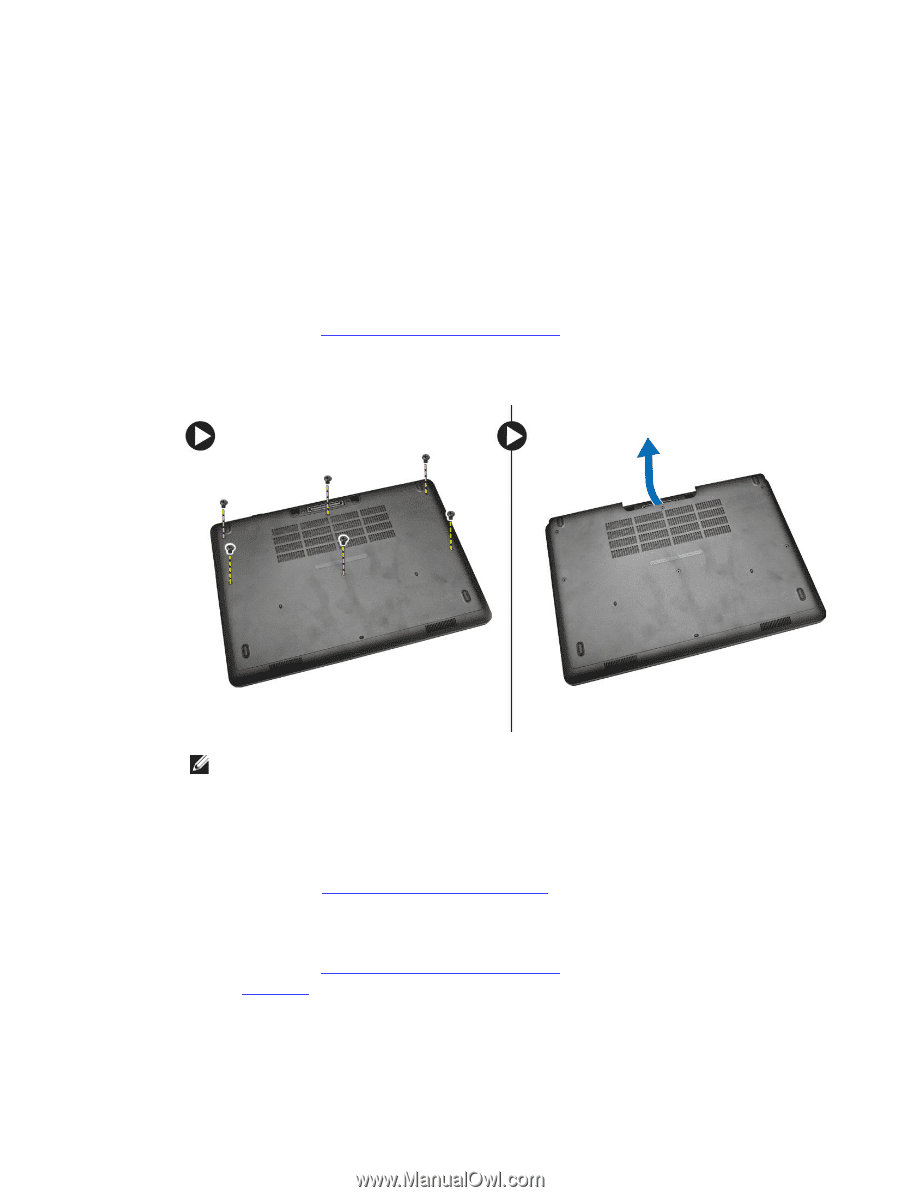
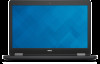
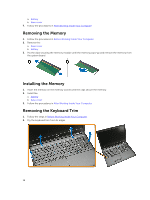
15. wireless-status light 17. hard-drive activity light 19. speakers 21. smart-card reader (optional) 23. security-cable slot 25. Service-Tag label 16. battery-status light 18. power-status light 20. touchpad 22. headset connector 24. dock connector (optional) Removing the Base Cover 1. Follow the procedures in Before Working Inside Your Computer. 2. Perform the following steps to remove the base cover from the computer: a. Remove the screws that secure the base cover to the computer. b. Lift the base cover from its edge and remove the base cover from the computer. NOTE: You may need a sharp tool to pry the base cover from its edge. Installing the Base Cover 1. Place the base cover to align with the screw holders on the computer. 2. Tighten the screws to secure the base cover to the computer. 3. Follow the procedures in After Working Inside Your Computer. Removing the Battery 1. Follow the procedures in Before Working Inside Your Computer. 2. Remove the base cover. 3. Disconnect the battery cable from its connector [1] and release the cable from its routing channel [2]. 8
-
 1
1 -
2
-
 3
3 -
 4
4 -
 5
5 -
 6
6 -
 7
7 -
 8
8 -
 9
9 -
 10
10 -
 11
11 -
 12
12 -
 13
13 -
14
-
15
-
16
-
17
-
18
-
19
-
20
-
21
-
22
-
23
-
24
-
25
-
26
-
27
-
28
-
29
-
30
-
31
-
32
-
33
-
34
-
35
-
36
-
37
-
38
-
39
-
40
-
41
-
42
-
43
-
44
-
45
-
46
-
47
-
48
-
49
-
50
-
51
-
52
-
53
-
54
-
55
-
56
-
57
-
58
-
59
-
60
-
61
-
62
 |
 |