Dell OptiPlex 3010 Owners Manual - Page 20
Installing The Heat Sink and Processor
 |
View all Dell OptiPlex 3010 manuals
Add to My Manuals
Save this manual to your list of manuals |
Page 20 highlights
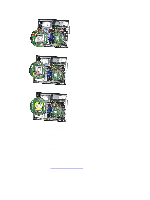
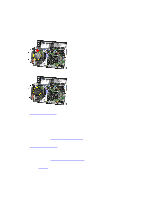
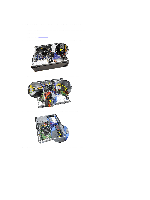
7. Lift the processor cover. 8. Lift the processor to remove it from the socket and place it in an antistatic package. Installing The Heat Sink and Processor 1. Insert the processor into the processor socket. Ensure that the processor is properly seated. 2. Lower the processor cover. 3. Press the release lever down and then move it inward to secure it with the retention hook. 4. Place the heat sink assembly into the chassis. 5. Tighten the captive screws to secure the heat sink assembly to the system board. 6. Connect the heat sink assembly cable to the system board. 7. Install the cover. 8. Follow the procedures in After Working Inside Your Computer. 20
-
 1
1 -
2
-
3
-
4
-
5
-
6
-
7
-
8
-
9
-
10
-
11
-
12
-
13
-
14
-
 15
15 -
 16
16 -
 17
17 -
 18
18 -
 19
19 -
 20
20 -
 21
21 -
 22
22 -
 23
23 -
 24
24 -
 25
25 -
26
-
27
-
28
-
29
-
30
-
31
-
32
-
33
-
34
-
35
-
36
-
37
-
38
-
39
-
40
-
41
-
42
-
43
-
44
-
45
-
46
-
47
-
48
-
49
-
50
-
51
-
52
-
53
-
54
-
55
-
56
-
57
-
58
-
59
-
60
-
61
-
62
-
63
 |
 |
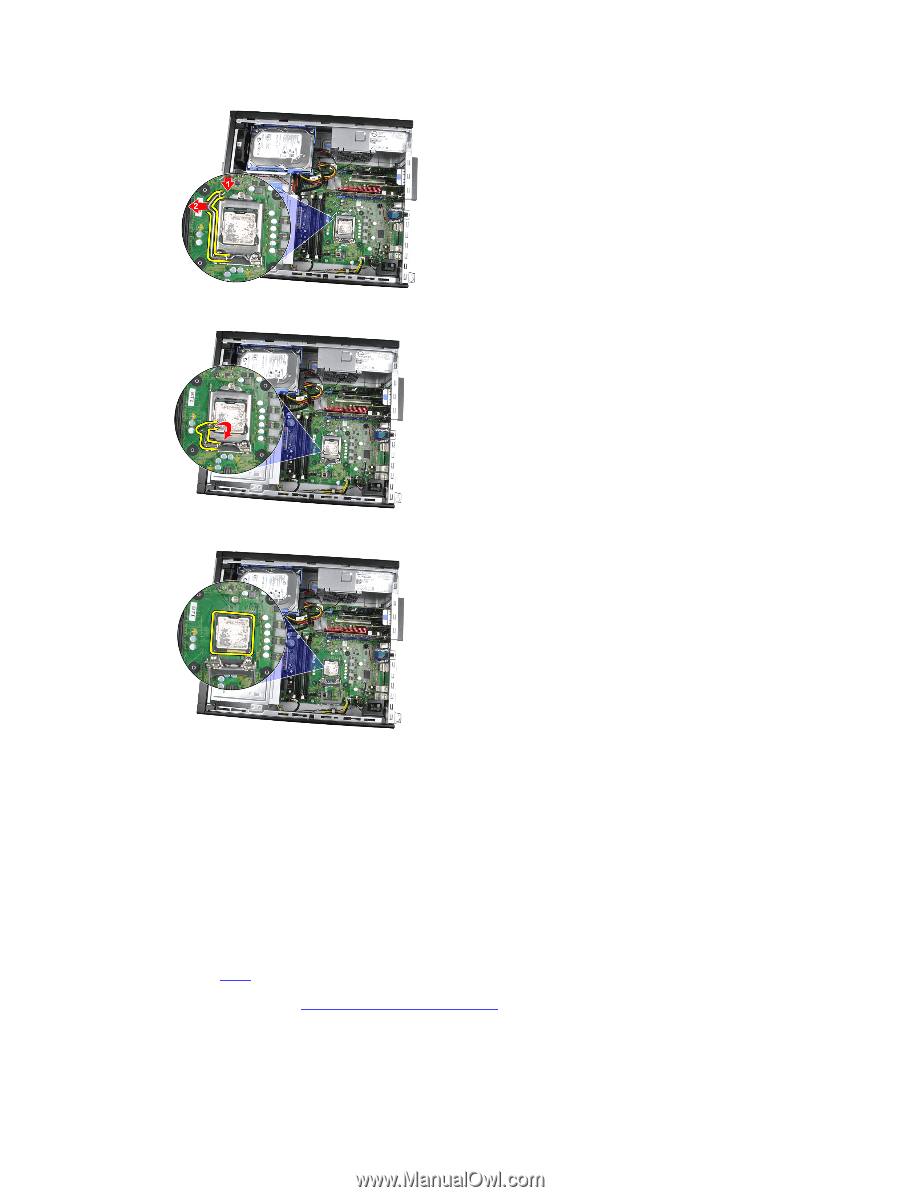
7.
Lift the processor cover.
8.
Lift the processor to remove it from the socket and place it in an antistatic package.
Installing The Heat Sink and Processor
1.
Insert the processor into the processor socket. Ensure that the processor is properly seated.
2.
Lower the processor cover.
3.
Press the release lever down and then move it inward to secure it with the retention hook.
4.
Place the heat sink assembly into the chassis.
5.
Tighten the captive screws to secure the heat sink assembly to the system board.
6.
Connect the heat sink assembly cable to the system board.
7.
Install the
cover
.
8.
Follow the procedures in
After Working Inside Your Computer
.
20