Dell OptiPlex 3010 Owners Manual - Page 29
Installing The Power Supply
 |
View all Dell OptiPlex 3010 manuals
Add to My Manuals
Save this manual to your list of manuals |
Page 29 highlights
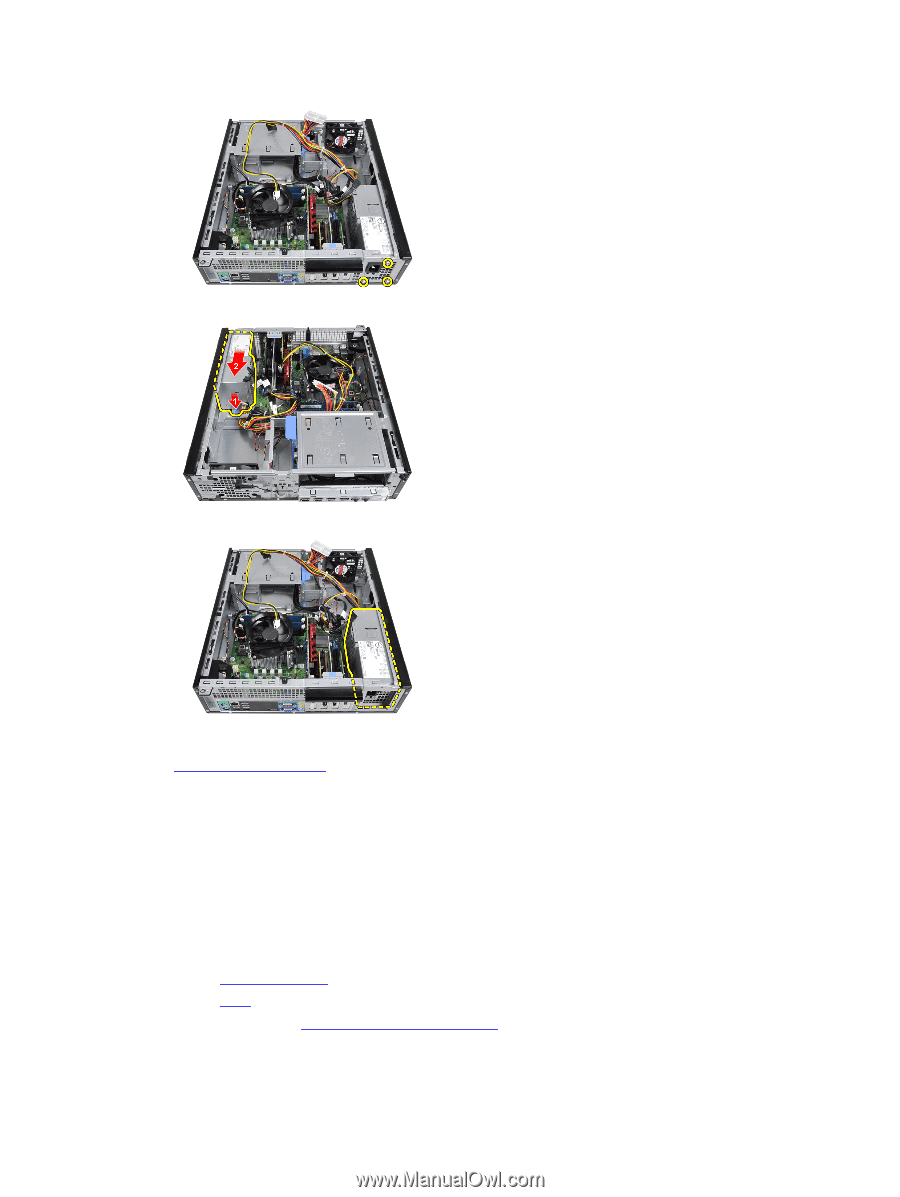
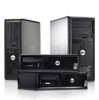
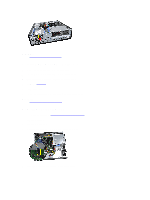
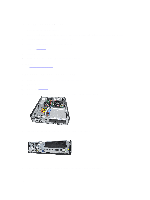
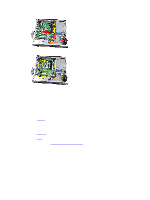
9. Push in on the blue release tab beside the power supply, and slide the power towards the front of the computer. 10. Lift the power supply out of the computer. Related Links Installing The Power Supply Installing The Power Supply 1. Place the power supply in the chassis and slide towards the back of the computer to secure it. 2. Tighten the screws to secure the power supply from the back of the computer. 3. Thread the 24-pin power cable into the chassis clip. 4. Connect the 24-pin power cable to the system board. 5. Thread the 4-pin power cable into the chassis clips. 6. Connect the 4-pin power cable to the system board. 7. Install the PSU thermal sensor. 8. Install the cover. 9. Follow the procedures in After Working Inside Your Computer. 29
-
 1
1 -
2
-
3
-
4
-
5
-
6
-
7
-
8
-
9
-
10
-
11
-
12
-
13
-
14
-
15
-
16
-
17
-
18
-
19
-
20
-
21
-
22
-
23
-
 24
24 -
 25
25 -
 26
26 -
 27
27 -
 28
28 -
 29
29 -
 30
30 -
 31
31 -
 32
32 -
 33
33 -
 34
34 -
35
-
36
-
37
-
38
-
39
-
40
-
41
-
42
-
43
-
44
-
45
-
46
-
47
-
48
-
49
-
50
-
51
-
52
-
53
-
54
-
55
-
56
-
57
-
58
-
59
-
60
-
61
-
62
-
63
 |
 |