Dell PowerConnect Brocade M6505 Brocade 7.1.0 EZSwitchSetup Administrator's Gu - Page 24
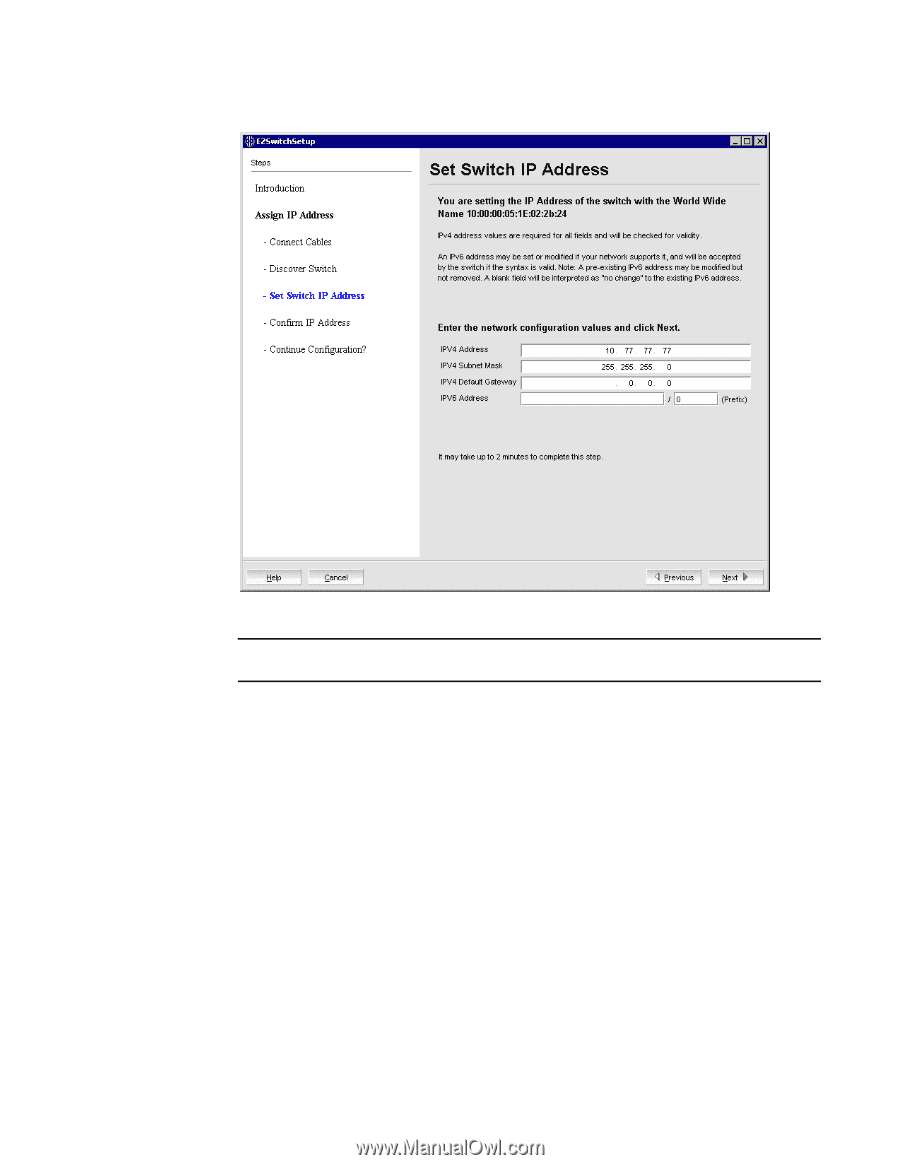
Confirming IP addresses, Set Switch IP Address window
 |
View all Dell PowerConnect Brocade M6505 manuals
Add to My Manuals
Save this manual to your list of manuals |
Page 24 highlights
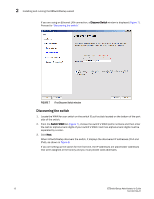
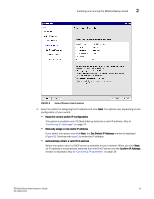
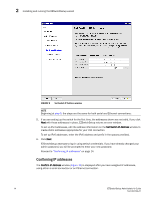
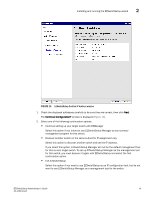
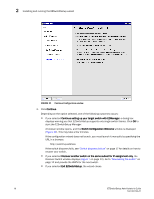
2 Installing and running the EZSwitchSetup wizard FIGURE 9 Set Switch IP Address window NOTE Beginning at step 5, the steps are the same for both serial and Ethernet connections. 5. If you are setting up the switch for the first time, the addresses shown are not valid. If you click Next with these addresses in place, EZSwitchSetup returns an error window. To set up IPv4 addresses, edit the address information on the Set Switch IP Address window to create static addresses appropriate for your LAN connection. To set up IPv6 addresses, enter the IPv6 address and prefix in the spaces provided. 6. Click Next. EZSwitchSetup attempts to log in using default credentials. If you have already changed your admin password, you will be prompted to enter your new password. Proceed to "Confirming IP addresses" on page 14. Confirming IP addresses The Confirm IP Address window (Figure 10) is displayed after you have assigned IP addresses, using either a serial connection or an Ethernet connection. 14 EZSwitchSetup Administrator's Guide 53-1002744-01
-
 1
1 -
2
-
3
-
4
-
5
-
6
-
7
-
8
-
9
-
10
-
11
-
12
-
13
-
14
-
15
-
16
-
17
-
18
-
 19
19 -
 20
20 -
 21
21 -
 22
22 -
 23
23 -
 24
24 -
 25
25 -
 26
26 -
 27
27 -
 28
28 -
 29
29 -
30
-
31
-
32
-
33
-
34
-
35
-
36
-
37
-
38
-
39
-
40
-
41
-
42
-
43
-
44
-
45
-
46
-
47
-
48
-
49
-
50
-
51
-
52
-
53
-
54
-
55
-
56
-
57
-
58
-
59
-
60
-
61
-
62
-
63
-
64
 |
 |