Dell PowerConnect W-6000 Installation Guide - Page 12
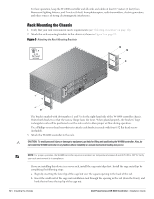
Rack Mounting the Chassis
 |
View all Dell PowerConnect W-6000 manuals
Add to My Manuals
Save this manual to your list of manuals |
Page 12 highlights
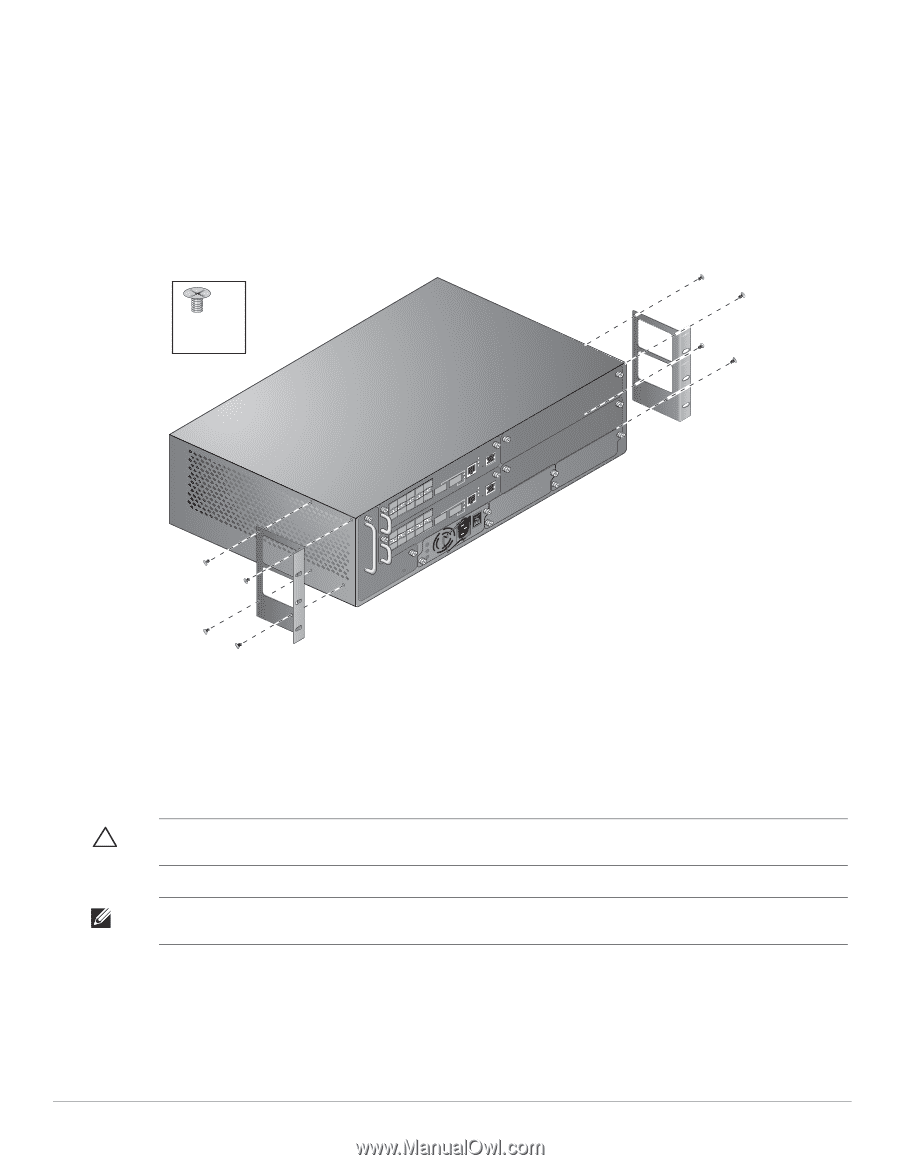
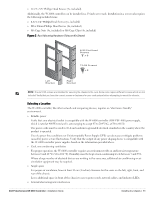
For best operation, keep the W-6000 controller and all cords and cables at least 0.7 meters (2 feet) from fluorescent lighting fixtures, and 2 meters (6 feet) from photocopiers, radio transmitters, electric generators, and other sources of strong electromagnetic interference. Rack Mounting the Chassis 1. Verify that your rack environment meets requirements (see "Selecting a Location" on page 11). 2. Attach the rack mounting brackets to the chassis as shown in Figure 3 on page 12. Figure 3 Attaching the Rack Mounting Brackets x 8 6-32 flat head screws The bracket marked with slot numbers 1 and 3 is for the right-hand side of the W-6000 controller chassis. Orient both brackets so that the narrow flange faces the front. When placed properly, the brackets' large rectangular voids will be positioned over the side vents to allow proper air flow during operation. Use a Phillips or cross-head screwdriver to attach each bracket securely with four 6-32 flat head screws (included). 3. Attach the W-6000 controller to the rack. CAUTION: To avoid personal injury or damage to equipment, get help for lifting and positioning the W-6000 controller. Also, do not install the W-6000 controller in any fashion where instability or uneven mechanical loading may occur. NOTE: For proper operation, the W-6000 controller requires an ambient air temperature between 0 and 40 ºC (32 to 104 ºF). Verify your rack environment is in compliance. If you are installing this device in a server rack, install the cage nuts/clips first. Install the cage nuts/clips by completing the following steps: a. Begin by inserting the lower lip of the cage but over the square opening in the back of the rail. b. Insert the small end of the cage-nut installation tool through the opening in the rail (from the front), and hook the tool over the top lip of the cage nut. 12 | Installing the Chassis Dell PowerConnect W-6000 Controller | Installation Guide
-
 1
1 -
2
-
3
-
4
-
5
-
6
-
 7
7 -
 8
8 -
 9
9 -
 10
10 -
 11
11 -
 12
12 -
 13
13 -
 14
14 -
 15
15 -
 16
16 -
 17
17 -
18
-
19
-
20
-
21
-
22
-
23
-
24
-
25
-
26
-
27
-
28
-
29
-
30
-
31
-
32
 |
 |