Dell PowerConnect W-6000 Installation Guide - Page 20
of the fans in a newly hot-swapped fan tray does not work yellow Fan Status LED, allow at least
 |
View all Dell PowerConnect W-6000 manuals
Add to My Manuals
Save this manual to your list of manuals |
Page 20 highlights
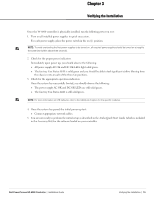
As the fan tray reaches the back of the chassis, moderate resistance may be felt. Press firmly so the connectors at the back of the module engage with the backplane, but do not use excessive force. When hot swapping the fan tray and when the connectors are properly engaged, power to the fans should be restored and they should start spinning. 4. Check the fans to verify all of them are working. Once power has been restored to the fan tray, either by engaging the module to the backplane during hotswap or by turning on system power after a cold-swap, the Fan Status LED should be green and you should be able to feel significant airflow blowing from the chassis vents at each fan position. If the fans are all working, this ends the time critical portion of the hot-swap procedure. If one of the fans in a newly hot-swapped fan tray does not work (yellow Fan Status LED), allow at least three minutes for the remaining fans to cool the chassis before attempting another hot-swap replacement. CAUTION: If two or more fans in the newly hot-swapped fan tray do not work (the Fan Status LED is red), shut down the W-6000 controller, replace the fan tray, and allow the W-6000 controller at least five minutes to cool before turning it back on. 5. Secure the fan tray. Use the screwdriver to push in and tighten both of the fastening screws on the faceplate of the newly installed fan tray. Rotate the screws clockwise until moderate resistance is felt, but do not over-tighten. 20 | The Fan Tray Dell PowerConnect W-6000 Controller | Installation Guide
-
 1
1 -
2
-
3
-
4
-
5
-
6
-
7
-
8
-
9
-
10
-
11
-
12
-
13
-
14
-
 15
15 -
 16
16 -
 17
17 -
 18
18 -
 19
19 -
 20
20 -
 21
21 -
 22
22 -
 23
23 -
 24
24 -
 25
25 -
26
-
27
-
28
-
29
-
30
-
31
-
32
 |
 |