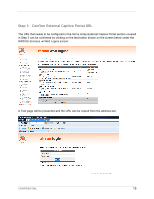
Dell PowerConnect W Clearpass 100 Software Xirrus Array Integration Guide - Page 11
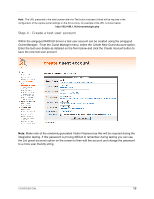
Step1 - Create RADIUS NAS for Xirrus Array
 |
View all Dell PowerConnect W Clearpass 100 Software manuals
Add to My Manuals
Save this manual to your list of manuals |
Page 11 highlights
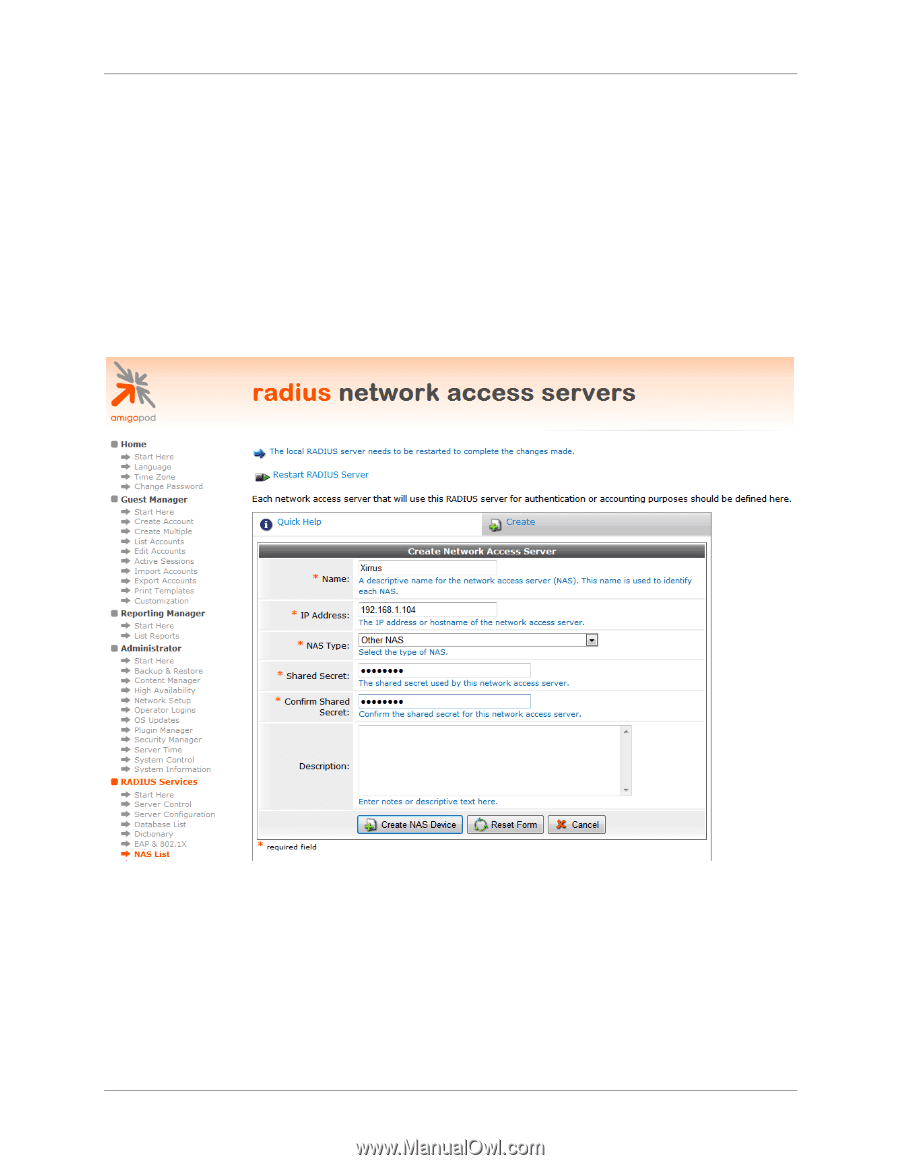
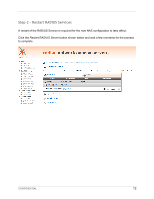
Step1 - Create RADIUS NAS for Xirrus Array In order for the Xirrus Array to authenticate users it needs to be able to communicate with the amigopod RADIUS instance. Back in Step 3 of the Xirrus Array configuration, a RADIUS server definition was created. This step configures the amigopod NAS definition for the Xirrus Array. The RADIUS key used in Step 3 needs to be configured exactly the same here for the RADIUS transactions to be successful. From the RADIUS ServicesNetwork Access Servers screen click on the Create button to add a new NAS device. Enter the Name and IP Address of the Xirrus Array, leave the NAS Type as Other NAS and enter the key from Step 3 in the Shared Secret field. Click the Create NAS button to commit the change to the RADIUS database. CONFIDENTIAL 11
-
 1
1 -
2
-
3
-
4
-
5
-
 6
6 -
 7
7 -
 8
8 -
 9
9 -
 10
10 -
 11
11 -
 12
12 -
 13
13 -
 14
14 -
 15
15 -
 16
16 -
17
-
18
-
19
-
20
 |
 |