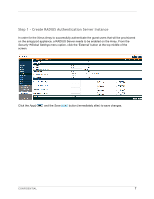
Dell PowerConnect W Clearpass 100 Software Xirrus Array Integration Guide - Page 9
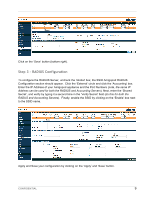
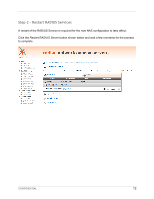
Step 3 - RADIUS Configuration
 |
View all Dell PowerConnect W Clearpass 100 Software manuals
Add to My Manuals
Save this manual to your list of manuals |
Page 9 highlights
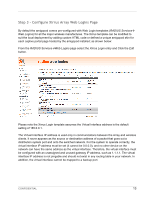
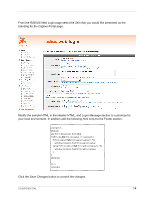
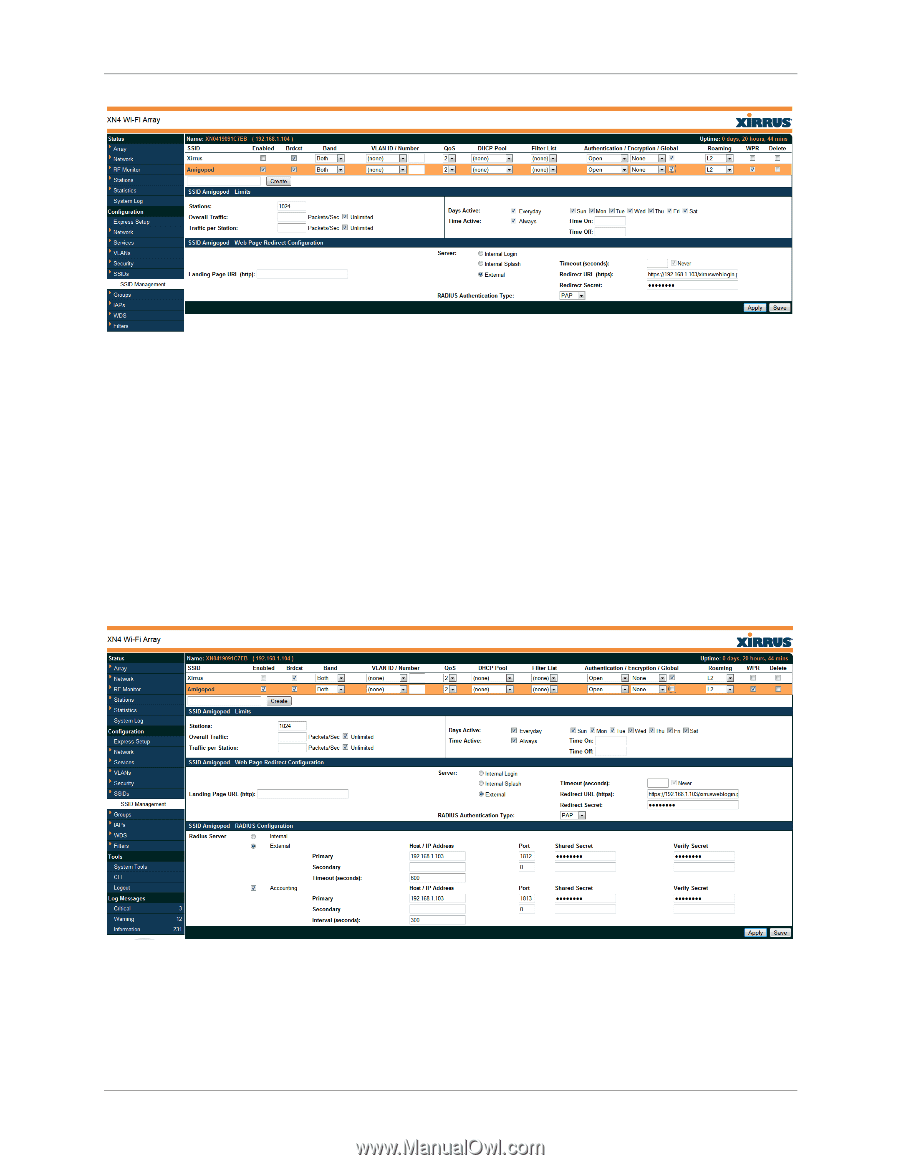
Click on the 'Save' button (bottom right). Step 3 - RADIUS Configuration To configure the RADUIS Server, uncheck the 'Global' box; the SSID Amigopod RADIUS Configuration section should appear. Click the 'External' circle and click the 'Accounting' box. Enter the IP Address of your Amigopod appliance and the Port Numbers (note, the same IP Address can be used for both the RADIUS and Accounting Servers). Next, enter the 'Shared Secret', and verify by typing it a second time in the 'Verify Secret' field (do this for both the RADUS and Accounting Servers). Finally, enable the SSID by clicking on the 'Enable' box next to the SSID name. Apply and Save your configuration by clicking on the 'Apply' and 'Save' button. CONFIDENTIAL 9
-
 1
1 -
2
-
3
-
 4
4 -
 5
5 -
 6
6 -
 7
7 -
 8
8 -
 9
9 -
 10
10 -
 11
11 -
 12
12 -
 13
13 -
 14
14 -
15
-
16
-
17
-
18
-
19
-
20
 |
 |
CONFIDENTIAL
9
Click on the ‘Save’ button (
bottom right
).
Step 3 – RADIUS Configuration
To configure the RADUIS Server, uncheck the ‘Global’ box; the SSID Amigopod RADIUS
Configuration section should appear.
Click the ‘External’ circle and click the ‘Accounting’ box.
Enter the IP Address of your Amigopod appliance and the Port Numbers (
note, the same IP
Address can be used for both the RADIUS and Accounting Servers
). Next, enter the ‘Shared
Secret’, and verify by typing it a second time in the ‘Verify Secret’ field (
do this for both the
RADUS and Accounting Servers
).
Finally, enable the SSID by clicking on the ‘Enable’ box next
to the SSID name.
Apply and Save your configuration by clicking on the ‘Apply’ and ‘Save’ button.