Dell PowerEdge M520 Dell 10 Gb Ethernet Pass Through-k for M1000e So - Page 23
Exit the 10GbE PTM CLI to the CMC command line. Run
 |
View all Dell PowerEdge M520 manuals
Add to My Manuals
Save this manual to your list of manuals |
Page 23 highlights
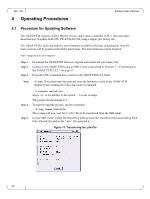
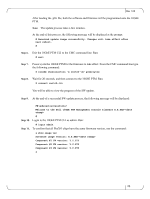
Rev 1.00 After loading the .pfw file, both the software and firmware will be programmed onto the 10GbE PTM. Note: The update process takes a few minutes. At the end of this process, the following message will be displayed at the prompt: # Received update image successfully. Changes will take effect after next reboot. # Step 6. Exit the 10GbE PTM CLI to the CMC command line. Run: # exit Step 7. Power cycle the 10GbE PTM for the firmware to take effect. From the CMC command line type the following command: $ racadm chassisaction -m switch- powercycle Step 8. Wait for 20 seconds, and then connect to the 10GbE PTM. Run: $ connect switch- You will be able to view the progress of the SW update. Step 9. At the end of a successful SW update process, the following message will be displayed: Step 10. FW updated successfully! Welcome to the Dell 10GbE PTM Management Console firmware X.X.XXX- # Login to the 10GbE PTM CLI as admin. Run: # login admin Step 11. To confirm that all PhyX® chips have the same firmware version, run the command: & show image ver Software image version: X.X.XXX- Component #1 FW version: Y.Y.YYY Component #2 FW version: Y.Y.YYY Component #3 FW version: Y.Y.YYY & 23
-
 1
1 -
2
-
3
-
4
-
5
-
6
-
7
-
8
-
9
-
10
-
11
-
12
-
13
-
14
-
15
-
16
-
17
-
 18
18 -
 19
19 -
 20
20 -
 21
21 -
 22
22 -
 23
23 -
 24
24 -
 25
25
 |
 |