Dell PowerStore 9000T EMC PowerStore Installation and Service Guide - Page 88
Sliding the node halfway into the chassis, Installing the node
 |
View all Dell PowerStore 9000T manuals
Add to My Manuals
Save this manual to your list of manuals |
Page 88 highlights
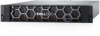
Figure 115. Sliding the node halfway into the chassis 3. Pull the black release tab out completely, and slide the rest of the node back into the chassis. The black release tab slides back into the system as it is inserted. Figure 116. Installing the node 4. Pull the orange release trigger and push in gently to re-engage the locking mechanism. If the black release tab comes out when pulled, the locking mechanism is not engaged. Power up the node Power up the node as described in Power control procedures. Verify the operation of a replacement part Steps 1. From PowerStore Manager, select Hardware. 2. Select the appliance where you replaced the faulted part. 3. From the Hardware card, select the view of the system where the part was replaced. The status of the replacement part should read Healthy. If the status is still Faulted, wait a few minutes and refresh PowerStore Manager. If the status does not change, ensure that the part is correctly seated, or contact your service provider. 88 Base enclosure service procedures
-
 1
1 -
2
-
3
-
4
-
5
-
6
-
7
-
8
-
9
-
10
-
11
-
12
-
13
-
14
-
15
-
16
-
17
-
18
-
19
-
20
-
21
-
22
-
23
-
24
-
25
-
26
-
27
-
28
-
29
-
30
-
31
-
32
-
33
-
34
-
35
-
36
-
37
-
38
-
39
-
40
-
41
-
42
-
43
-
44
-
45
-
46
-
47
-
48
-
49
-
50
-
51
-
52
-
53
-
54
-
55
-
56
-
57
-
58
-
59
-
60
-
61
-
62
-
63
-
64
-
65
-
66
-
67
-
68
-
69
-
70
-
71
-
72
-
73
-
74
-
75
-
76
-
77
-
78
-
79
-
80
-
81
-
82
-
 83
83 -
 84
84 -
 85
85 -
 86
86 -
 87
87 -
 88
88 -
 89
89 -
 90
90 -
 91
91 -
 92
92 -
 93
93 -
94
-
95
-
96
-
97
-
98
-
99
-
100
-
101
-
102
-
103
-
104
-
105
-
106
-
107
-
108
-
109
-
110
-
111
-
112
-
113
-
114
-
115
-
116
-
117
-
118
-
119
-
120
-
121
-
122
-
123
-
124
-
125
-
126
-
127
-
128
-
129
 |
 |
