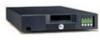
Dell PowerVault 122T LTO Dell PowerVault 122T DLT VS80 Autoloader User's Guide - Page 2
Autoloader Administration: Dell™ PowerVault™ 122T DLT VS80 Autoloader User's
 |
View all Dell PowerVault 122T LTO manuals
Add to My Manuals
Save this manual to your list of manuals |
Page 2 highlights
Back to Contents Page Autoloader Administration: Dell™ PowerVault™ 122T DLT VS80 Autoloader User's Guide Configuring the Autoloader Updating Firmware Running the Autoloader System Test Retrieving Information About the Autoloader Configuring the Autoloader The Configuration menu options enable you to perform the following tasks: l Resetting the autoloader l Setting SCSI IDs l Autoloader operating modes l Updating firmware To access the Configuration menu from the Home screen or main menu, press + or - until Configuration appears on the top line of the LCD screen. Press Enter, and then + or - to access the available options. Press Enter to execute the displayed menu option. Resetting the Autoloader This option resets the autoloader robotics and the tape drive within the autoloader, forces a new cartridge inventory, and clears any current error condition. NOTE: This option is primarily used if the autoloader is in an error state. To access this option, follow these steps: 1. From the Home screen or main menu, press + or - until Configuration appears on the top line of the LCD screen, and then press Enter. 2. Press + or - until Reset appears on the LCD screen. 3. Press Enter to reset the autoloader. 4. After initialization, the autoloader returns to normal operation and displays the Home screen. Changing the SCSI ID This option changes the SCSI ID the autoloader uses. The autoloader operates as a single SCSI device with two Logical Unit Numbers (LUNs), one LUN (0) is for the tape drive, the other (1) is for the autoloader robotics. The default SCSI ID is 6. You should only need to change the SCSI ID if there is another device on the SCSI bus with the same SCSI ID. To access this option, follow these steps: 1. From the Home screen or main menu, press + or - until Configuration appears on the top line of the LCD screen, and then press Enter. 2. Press + or - until Change SCSI ID appears on the LCD screen. The second line displays the current SCSI ID. 3. Press Enter. The second line on the LCD screen displays New ID:. 4. Press + or - until the desired SCSI ID displays. 5. Press Enter. The LCD screen displays Please Cycle Power. NOTE: The autoloader will not respond to input from the operator panel until the power has been cycled. 6. Turn off the autoloader. After a few seconds, turn it back on again. The selected SCSI ID is now in effect. NOTE: If you changed the SCSI ID, you may also need to reboot the host server and reconfigure your backup software before you can use the autoloader. Consult your hardware and software manuals for more information.
-
 1
1 -
 2
2 -
 3
3 -
 4
4 -
 5
5 -
 6
6 -
 7
7 -
 8
8 -
9
-
10
-
11
-
12
-
13
-
14
-
15
-
16
-
17
-
18
-
19
-
20
-
21
-
22
-
23
-
24
-
25
-
26
-
27
-
28
-
29
-
30
-
31
-
32
-
33
-
34
-
35
-
36
-
37
-
38
-
39
 |
 |