Dell PowerVault 122T LTO Dell PowerVault 122T DLT VS80 Autoloader User's Guide - Page 34
Cleaning the Tape Drive
 |
View all Dell PowerVault 122T LTO manuals
Add to My Manuals
Save this manual to your list of manuals |
Page 34 highlights
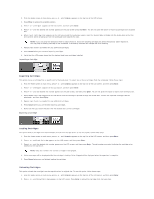
NOTE: Status messages will be displayed while the cartridge is unloading. Drive Empty will be displayed when the operation is complete. 3. Press Cancel when you are done unloading the cartridge. Write-Protecting Cartridges All cartridges have a write-protect switch to prevent accidental erasure or overwriting of data. Before loading a cartridge into the autoloader, make sure the write-protect switch on the front of the cartridge is positioned as desired: l Slide the switch to the left to write-protect the cartridge. A small orange rectangle is visible, indicating that the cartridge is write-protected. l Slide the switch to the right to allow the autoloader to write data to the cartridge. Write-Protecting a Cartridge Maintaining Cartridges To ensure the longest possible life for all of your DLTtapeIV cartridges, follow these guidelines: l Do not drop or strike a cartridge. Excessive shock can displace the tape leader, making the cartridge unusable and possibly damaging the autoloader. l Store your cartridges in their storage cases. l Do not expose your cartridges to direct sunlight or sources of heat, including portable heaters and heating ducts. l The operating temperature range for your DLTtapeIV cartridges is 50°F to 104°F (10°C to 40°C). The storage temperature range is 60°F to 90°F (16°C to 32°C). Always store your DLTtapeIV cartridges in their storage cases. l If a cartridge has been exposed to temperatures outside the ranges specified above, stabilize the cartridge at room temperature for the same amount of time it was exposed to extreme temperatures or 24 hours, whichever is less. l Store your cartridges in a dust-free environment in which relative humidity is always between 20% and 80% (Noncondensing). The ideal storage relative humidity is 40%, ± 20%. l Do not place DLTtapeIV cartridges near sources of electromagnetic energy or strong magnetic fields, such as computer monitors, electric motors, speakers, or X-ray equipment. Exposure to electromagnetic energy or magnetic fields can destroy data, rendering the cartridge unusable. l Place identification labels only in the slide-in slot on the front of the cartridge. Cleaning the Tape Drive When the Clean Drive LED is on, the autoloader's tape drive needs to be cleaned. An illuminated Media Attention LED or an exclamation point (!) in the inventory diplay may also indicate that the tape drive needs to be cleaned. Cleaning typically takes several minutes, during which the Ready LED blinks. Each cleaning cartridge has an approximate life of 20 cleanings. The cleaning cartridge includes a label with 20 small boxes printed on it. Always place a check mark in a box each time you use the cartridge to clean the drive. Replace the cleaning cartridge when all boxes are checked. The drive cannot keep track of how many times a cartridge has been used. Therefore, if you are using backup software to manage cleaning, then you must monitor the software logs or use some other method to determine when you need to replace the cleaning tape. Refer to the backup software documentation for more information. Also refer to the backup software documentation for information on enabling automatic or scheduled cleanings with the use of a dedicated cleaning slot. NOTICE: Use only DLT1 compatible cleaning cartridges in the autoloader, available at www.dell.com/tapebackup. Use of any other type of cleaning cartridge could damage the read/write head in the tape drive. Therefore, if you load any other type of cleaning cartridge, the autoloader will automatically unload it back into its original slot within approximately 25 seconds. NOTE: If you are using Operator's Panel commands to clean the drive, import the cleaning cartridge only after you have selected the Clean Drive command. If you would like to keep a cleaning cartridge in the autoloader, the backup software must manage drive cleaning. To clean the tape drive, follow these steps: 1. From the Home screen or main menu, press + or - until Commands appears on the top line of the LCD screen, and then press Enter.
-
 1
1 -
2
-
3
-
4
-
5
-
6
-
7
-
8
-
9
-
10
-
11
-
12
-
13
-
14
-
15
-
16
-
17
-
18
-
19
-
20
-
21
-
22
-
23
-
24
-
25
-
26
-
27
-
28
-
 29
29 -
 30
30 -
 31
31 -
 32
32 -
 33
33 -
 34
34 -
 35
35 -
 36
36 -
 37
37 -
 38
38 -
 39
39
 |
 |
