Dell S300WI User Guide - Page 63
USB Display Driver Installation
 |
UPC - 884116050148
View all Dell S300WI manuals
Add to My Manuals
Save this manual to your list of manuals |
Page 63 highlights
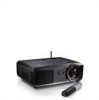
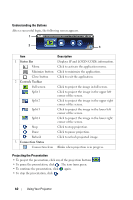
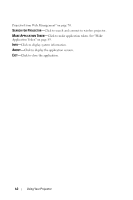
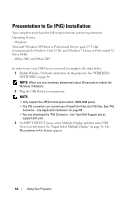
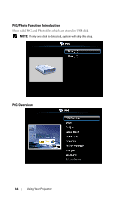
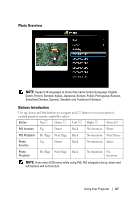
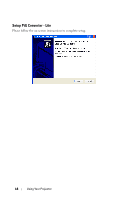
USB Display Driver Installation In order to use your USB Display, you need to complete the steps below: 1 Enable Wireless / Network connection on the projector. See "WIRELESS / NETWORK" on page 46. NOTE: When you start wireless, please wait about 50 seconds to reboot the Wireless / Network. 2 Connecting the USB cable to your projector and computer. See "Connecting a Computer Using an USB Display" on page 14. 3 On INPUT SELECT menu, select Multiple Display and then select USB Display on sub-menu. See "Input Select Multiple Display" on page 36. 4 Start the installation manually by clicking "dousb_install.Cab" on CD Drive. NOTE: If pop up "AutoPlay" installation window, please close it. 5 System will start to install the Remote NDIS driver on your computer at first time. NOTE: • If the warning message appears, please ignore and allow for installation. • You may require administrator level access to install the software. 6 Start to display the computer screen through USB cable. NOTE: When the computer resumes from standby or hibernation mode, the display over USB can also be resumed automatically. If it fails to resume automatically, you have to unplug and plug the USB cable again. Using Your Projector 63
-
 1
1 -
2
-
3
-
4
-
5
-
6
-
7
-
8
-
9
-
10
-
11
-
12
-
13
-
14
-
15
-
16
-
17
-
18
-
19
-
20
-
21
-
22
-
23
-
24
-
25
-
26
-
27
-
28
-
29
-
30
-
31
-
32
-
33
-
34
-
35
-
36
-
37
-
38
-
39
-
40
-
41
-
42
-
43
-
44
-
45
-
46
-
47
-
48
-
49
-
50
-
51
-
52
-
53
-
54
-
55
-
56
-
57
-
 58
58 -
 59
59 -
 60
60 -
 61
61 -
 62
62 -
 63
63 -
 64
64 -
 65
65 -
 66
66 -
 67
67 -
 68
68 -
69
-
70
-
71
-
72
-
73
-
74
-
75
-
76
-
77
-
78
-
79
-
80
-
81
-
82
-
83
-
84
-
85
-
86
-
87
-
88
-
89
-
90
-
91
-
92
-
93
-
94
-
95
-
96
-
97
-
98
-
99
-
100
-
101
-
102
-
103
-
104
-
105
-
106
-
107
-
108
-
109
 |
 |