Dell W-7030 Controller Installation Guide - Page 16
Selecting a Location, Rack Mounting- Standard, Required Tools and Equipment, Installation Steps
 |
View all Dell W-7030 manuals
Add to My Manuals
Save this manual to your list of manuals |
Page 16 highlights
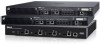
Do not ship or store this product near strong electromagnetic, electrostatic, magnetic, or radioactive fields. Do not disassemble the chassis. Selecting a Location The W-7030 controller, like other network and computing devices, requires the following "electronic-friendly" environment: Reliable power: Verify that the electrical outlet is compatible with the W-7030 controller power supply. Cool, non-condensing ventilation: For proper operation, the W-7030 controller requires an environment with an ambient air temperature between 0º C and 40º C (32º F and 104º F). Humidity must be kept at noncondensing levels, between 5% and 95%. Where a large number of electrical devices are working in the same area, additional air conditioning or air circulation equipment may be required. Ample space: For proper air circulation, leave at least 10 cm (4 inches) clearance all around the chassis. Leave additional space in front and rear side of the chassis to access power cords, network cables, and indicator LEDs. Limited electromagnetic interference: For best operation, keep the W-7030 controller and all cords and cables at least 0.7 meters (2 feet) from fluorescent lighting fixtures, and 2 meters (6 feet) from photocopiers, radio transmitters, electric generators, and other sources of strong electromagnetic interference. Rack Mounting- Standard This mounting option allows mounting the W-7030 controller in a two-post 19-inch Telco rack. CAUTION: Each W-7030 controller must have its own mounting equipment. Do not place other networking equipment directly on top of a mounted W-7030 controller. Failure to do so can damage the device. Required Tools and Equipment The following tools and equipment are required for installing a W-7030 controller: Mounting bracket (x2) Do not use for table or shelf installation Screws for mounting bracket (x8): M3 x 6.5 mm Phillips Flat Head Screws Screws for system rack mount (4x): M6 x 15 mm Phillips Pan Head Screws M6 cage nut (x4): Optional M6 clip nut (x4): Optional Suitable screwdrivers for all screw types provided in the box (not included in the package) NOTE: Some racks require screws that differ from those included with the W-7030 controller. Ensure to have the correct screws before installing the W-7030 controller. Installation Steps To install a W-7030 controller into a two-post 19-inch Telco rack: 1. Place the mounting bracket over the mounting holes on the controller (see Figure 1). 2. Secure the bracket to the controller using the eight screws for the mount bracket (four per bracket) and a suitable screwdriver. 8 | Installation Dell Networking W-7030 Controller | Installation Guide
-
 1
1 -
2
-
3
-
4
-
5
-
6
-
7
-
8
-
9
-
10
-
 11
11 -
 12
12 -
 13
13 -
 14
14 -
 15
15 -
 16
16 -
 17
17 -
 18
18 -
 19
19 -
 20
20 -
 21
21 -
22
-
23
-
24
-
25
-
26
-
27
-
28
 |
 |
