Dell W-7030 Controller Installation Guide - Page 19
Connecting and Disconnecting the AC Power Cord, Connecting the AC Power Cord
 |
View all Dell W-7030 manuals
Add to My Manuals
Save this manual to your list of manuals |
Page 19 highlights
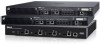
Figure 4 Attaching the Wall Mount Brackets 2. After choosing a mounting location, mark the locations on the wall for the mounting holes. 3. Create the holes and insert wall anchors if the installation requires them. 4. Align the mounting bracket holes with the holes created in the wall (see Figure 5). Figure 5 Wall Mounting 5. Use appropriate screws to secure the W-7030 controller. Connecting and Disconnecting the AC Power Cord Once the controller is installed, it is ready to be powered on. The W-7030 controller is not equipped with an on/ off switch. The device will power on when the AC power cord is connected to the AC inlet and an AC power outlet. Connecting the AC Power Cord To connect the AC power cord to the W-7030 controller: 1. Lift the power cord retaining clip so that it is not blocking the AC power connector. 2. Insert the coupler end of the AC power cord into the AC power connector on the AC inlet. 3. Lower the power cord retaining clip over the AC power cord. The W-7030 controller should now be receiving power. Disconnecting the AC Power Cord To disconnect the AC power cord from the W-7030 controller: 1. Lift the power cord retaining clip off the AC power cord. Dell Networking W-7030 Controller | Installation Guide Installation | 11
-
 1
1 -
2
-
3
-
4
-
5
-
6
-
7
-
8
-
9
-
10
-
11
-
12
-
13
-
 14
14 -
 15
15 -
 16
16 -
 17
17 -
 18
18 -
 19
19 -
 20
20 -
 21
21 -
 22
22 -
 23
23 -
 24
24 -
25
-
26
-
27
-
28
 |
 |
