Dell W-7200 PowerConnect Series Controller Installation Guide - Page 27
Removing a Power Supply, Installing an SFP, Removing an SFP, Connecting an LC Fiber Optic Cable
 |
View all Dell W-7200 manuals
Add to My Manuals
Save this manual to your list of manuals |
Page 27 highlights
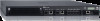
Removing a Power Supply To remove a power supply from your W-7200 controller: 1. Lift the power cord retaining clip from the power cord. 2. Remove the power cable connected to the power supply module. 3. Using a Phillips head screwdriver, loosen the hinged captive screw on the front of the power supply module. 4. Lower the hinged captive screw as far as it can go. 5. Using the power supply module's handle, pull the module out. 6. If you are not replacing the removed power supply module, install a blanking plate that was included with your W-7200 controller by following the installation procedure under "Installing a Power Supply" on page 26. Installing an SFP NOTE: Use standard ESD precautions when installing or removing an SFP. To install an SFP module into the W-7200 controller: 1. Slide the SFP module, top side facing upward, into a 1000Base-X port until a connection is made and an audible click is heard. See Figure 14 for more information. Figure 14 Installing an SFP 7200_09 Removing an SFP To remove an SFP module: 1. Open and release the latch on the SFP module. 2. Pull and remove the module from the port. Connecting an LC Fiber Optic Cable To connect an LC fiber optic cable into an SFP-SX or SFP-LX module: 1. Clean the fiber optic cable connector before inserting it into the SFP module. Dell PowerConnect W-7200 Series Controller | Installation Guide Installation | 27
-
 1
1 -
2
-
3
-
4
-
5
-
6
-
7
-
8
-
9
-
10
-
11
-
12
-
13
-
14
-
15
-
16
-
17
-
18
-
19
-
20
-
21
-
 22
22 -
 23
23 -
 24
24 -
 25
25 -
 26
26 -
 27
27 -
 28
28 -
 29
29 -
 30
30 -
 31
31 -
 32
32
 |
 |
