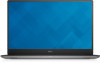
Dell XPS 15 9560 XPS 15 Service Manual
Dell XPS 15 9560 Manual
 |
View all Dell XPS 15 9560 manuals
Add to My Manuals
Save this manual to your list of manuals |
Dell XPS 15 9560 manual content summary:
- Dell XPS 15 9560 | XPS 15 Service Manual - Page 1
XPS 15 Service Manual Computer Model: XPS 15-9560 Regulatory Model: P56F Regulatory Type: P56F001 - Dell XPS 15 9560 | XPS 15 Service Manual - Page 2
tells you how to avoid the problem. WARNING: A WARNING indicates a potential for property damage, personal injury, or death. Copyright © 2016 - 2017 Dell Inc. or its subsidiaries. All rights reserved. Dell, EMC, and other trademarks are trademarks of Dell Inc. or its subsidiaries. Other trademarks - Dell XPS 15 9560 | XPS 15 Service Manual - Page 3
inside your computer 10 Before you begin 10 Safety instructions 10 Recommended tools 11 Screw list 12 After working inside your computer 14 Removing the base cover 15 Procedure 15 Replacing the base cover 18 Procedure 18 Removing the battery (half-length 19 Prerequisites 19 Procedure 19 - Dell XPS 15 9560 | XPS 15 Service Manual - Page 4
Replacing the battery (full-length 24 Procedure 24 Post-requisites 24 Removing the hard drive 25 Prerequisites 25 Procedure 25 Replacing the hard drive 30 Procedure 30 Post- - Dell XPS 15 9560 | XPS 15 Service Manual - Page 5
Replacing the speakers 41 Procedure 41 Post-requisites 41 Removing the wireless card 42 Prerequisites 42 Procedure 42 Replacing the wireless card 44 Procedure 44 Post-requisites 45 Removing the fans 46 Prerequisites 46 Procedure 46 Replacing the fans 49 Procedure 49 Post-requisites 49 - Dell XPS 15 9560 | XPS 15 Service Manual - Page 6
64 Procedure 64 Replacing the audio daughter-board 66 Procedure 66 Post-requisites 66 Removing the coin-cell battery 67 Prerequisites 67 Procedure 67 Replacing the coin-cell battery 69 Procedure 69 Post-requisites 69 Removing the keyboard 70 Prerequisites 70 Procedure 70 6 - Dell XPS 15 9560 | XPS 15 Service Manual - Page 7
Replacing the keyboard 73 Procedure 73 Post-requisites 73 Removing the display assembly 74 Prerequisites 74 Procedure 74 Replacing the display assembly 78 Procedure 78 Post-requisites 78 Removing the power-adapter port 79 Prerequisites 79 Procedure 79 Replacing the power-adapter port 81 - Dell XPS 15 9560 | XPS 15 Service Manual - Page 8
Procedure 95 Post-requisites 95 Downloading drivers 96 Downloading the audio driver 96 Downloading the graphics driver 96 Downloading the USB 3.0 driver 97 Downloading the Wi-Fi driver 97 Downloading the media-card reader driver 97 Downloading the chipset driver 98 Downloading the network - Dell XPS 15 9560 | XPS 15 Service Manual - Page 9
(RTC) battery reset 112 Flashing BIOS (USB key 112 Troubleshooting 113 Flashing the BIOS 113 Enhanced Pre-Boot System Assessment (ePSA) diagnostics 113 Running the ePSA diagnostics 114 Diagnostics 114 Flea power release 116 Wi-Fi power cycle 116 Getting help and contacting Dell 117 Self - Dell XPS 15 9560 | XPS 15 Service Manual - Page 10
card and optical disc from your computer, if applicable. Safety instructions Use the following safety guidelines to protect your computer from potential practices, see the Regulatory Compliance home page at www.dell.com/ regulatory_compliance. WARNING: Disconnect all power sources before opening - Dell XPS 15 9560 | XPS 15 Service Manual - Page 11
pins and contacts. CAUTION: You should only perform troubleshooting and repairs as authorized or directed by the Dell technical assistance team. Damage due to servicing that is not authorized by Dell is not covered by your warranty. See the safety instructions that shipped with the product or at www - Dell XPS 15 9560 | XPS 15 Service Manual - Page 12
type Quantity Screw image Base cover Palm-rest M2x3 T5 10 assembly System badge Palm-rest M2x8 2 assembly Battery (half- Palm-rest M2x4 4 length) assembly Battery (full- Palm-rest M2x4 7 length) assembly Hard-drive Hard-drive M2x4 4 cage assembly Solid-state System board - Dell XPS 15 9560 | XPS 15 Service Manual - Page 13
Component Heat-sink assembly Display-cable bracket System board Secured to System board System board Palm-rest assembly Screw type M2x3 M2x2 M2x4 Audio System board daughter-board Keyboard Palm-rest assembly Display hinges Palm-rest assembly M2x3 M1.6x1.5 M2.5x5 Quantity 5/4 1 5 2 31 6 - Dell XPS 15 9560 | XPS 15 Service Manual - Page 14
After working inside your computer CAUTION: Leaving stray or loose screws inside your computer may severely damage your computer. 1 Replace all screws and ensure that no stray screws remain inside your computer. 2 Connect any external devices, peripherals, or cables you removed before working on - Dell XPS 15 9560 | XPS 15 Service Manual - Page 15
your computer. After working inside your computer, follow the instructions in After working inside your computer. For more safety best practices , see the Regulatory Compliance home page at www.dell.com/ regulatory_compliance. Procedure 1 Close the display, and turn the computer - Dell XPS 15 9560 | XPS 15 Service Manual - Page 16
3 Remove the 10 screws (M2x3 T5) that secure the base cover to the palm-rest assembly. Figure 1. Removing the base cover 1 base cover 3 screws (12) 2 system badge 16 - Dell XPS 15 9560 | XPS 15 Service Manual - Page 17
4 Using a plastic scribe, gently pry the base cover off the palm-rest assembly. Figure 2. Prying the base cover off the computer base 1 base cover 17 - Dell XPS 15 9560 | XPS 15 Service Manual - Page 18
your computer. After working inside your computer, follow the instructions in After working inside your computer. For more safety best practices, see the Regulatory Compliance home page at www.dell.com/ regulatory_compliance. Procedure 1 Place the base cover on the palm-rest - Dell XPS 15 9560 | XPS 15 Service Manual - Page 19
computer, follow the instructions in After working inside your computer. For more safety best practices, see the Regulatory Compliance home page at www.dell.com/ regulatory_compliance. Prerequisites Remove the base cover. Procedure 1 Remove the four screws (M2x4) that secure the battery to the palm - Dell XPS 15 9560 | XPS 15 Service Manual - Page 20
3 Lift the battery off the palm-rest assembly. Figure 3. Removing the battery 1 battery cable 3 battery 2 screws (4) 4 palm-rest assembly 4 Turn the computer over, open the display, and press the power button for five seconds to ground the system board. 20 - Dell XPS 15 9560 | XPS 15 Service Manual - Page 21
. After working inside your computer, follow the instructions in After working inside your computer. For more safety best practices, see the Regulatory Compliance home page at www.dell.com/ regulatory_compliance. Procedure 1 Align the screw holes on the battery with the screw holes on the palm-rest - Dell XPS 15 9560 | XPS 15 Service Manual - Page 22
computer, follow the instructions in After working inside your computer. For more safety best practices, see the Regulatory Compliance home page at www.dell.com/ regulatory_compliance. Prerequisites Remove the base cover. Procedure 1 Remove the seven screws (M2x4) that secure the battery to the palm - Dell XPS 15 9560 | XPS 15 Service Manual - Page 23
3 Lift the battery off the palm-rest assembly. Figure 4. Removing the battery 1 palm-rest assembly 3 screws (7) 2 battery cable 4 battery 4 Turn the computer over, open the display, and press the power button for five seconds to ground the system board. 23 - Dell XPS 15 9560 | XPS 15 Service Manual - Page 24
. After working inside your computer, follow the instructions in After working inside your computer. For more safety best practices, see the Regulatory Compliance home page at www.dell.com/ regulatory_compliance. Procedure 1 Align the screw holes on the battery with the screw holes on the palm-rest - Dell XPS 15 9560 | XPS 15 Service Manual - Page 25
inside your computer, follow the instructions in After working inside your computer. For see the Regulatory Compliance home page at www.dell.com/ regulatory_compliance. CAUTION: Hard drives are the base cover. 2 Remove the battery (half-length). Procedure 1 Remove the four screws (M2x4) that - Dell XPS 15 9560 | XPS 15 Service Manual - Page 26
2 Lift the hard-drive cage off the hard-drive assembly. Figure 5. Removing the hard-drive cage 1 screws (4) 2 hard-drive cage 3 hard-drive assembly 3 Using the pull tab disconnect the hard-drive cable from the system board. 26 - Dell XPS 15 9560 | XPS 15 Service Manual - Page 27
4 Lift the hard-drive assembly off the palm-rest assembly. Figure 6. Disconnecting the hard-drive cable from the system board 1 pull tab 2 hard-drive assembly 27 - Dell XPS 15 9560 | XPS 15 Service Manual - Page 28
5 Disconnect the hard-drive interposer from the hard-drive assembly. Figure 7. Disconnecting the hard-drive interposer from the hard-drive assembly 1 hard-drive assembly 2 hard-drive interposer 28 - Dell XPS 15 9560 | XPS 15 Service Manual - Page 29
6 Remove the hard-drive covers away from the hard drive. Figure 8. Removing the hard-drive cover 1 hard-drive covers (2) 2 hard drive 29 - Dell XPS 15 9560 | XPS 15 Service Manual - Page 30
After working inside your computer, follow the instructions in After working inside your computer. For more safety practices, see the Regulatory Compliance home page at www.dell.com/ regulatory_compliance. CAUTION: Hard drives are fragile. the battery (half-length). 2 Replace the base cover. 30 - Dell XPS 15 9560 | XPS 15 Service Manual - Page 31
computer, follow the instructions in After working inside your computer. For more safety best practices, see the Regulatory Compliance home page at www.dell.com/ regulatory_compliance. Prerequisites 1 Remove the base cover. 2 Remove the battery (half-length) or the battery (full-length). Procedure - Dell XPS 15 9560 | XPS 15 Service Manual - Page 32
2 Lift and slide the solid-state drive assembly from the system board. Figure 9. Removing the solid-state drive assembly 1 screw 3 solid-state drive slot 2 solid-state drive assembly 4 system board 32 - Dell XPS 15 9560 | XPS 15 Service Manual - Page 33
3 Turn the solid-state drive assembly over, then remove the screw (M2x2) that secures the solid-state drive to the solid-state drive bracket. Figure 10. Removing the solid-state drive bracket 1 solid-state drive bracket 3 solid-state drive 2 screw 4 Lift the solid-state drive off the solid-state - Dell XPS 15 9560 | XPS 15 Service Manual - Page 34
working inside your computer, follow the instructions in After working inside your computer. For more , see the Regulatory Compliance home page at www.dell.com/ regulatory_compliance. Procedure 1 Align the screw hole battery (half-length) or the battery (full-length). 2 Replace the base cover. 34 - Dell XPS 15 9560 | XPS 15 Service Manual - Page 35
computer, follow the instructions in After working inside your computer. For more safety best practices, see the Regulatory Compliance home page at www.dell.com/ regulatory_compliance. Prerequisites 1 Remove the base cover. 2 Remove the battery (half-length) or the battery (full-length). Procedure - Dell XPS 15 9560 | XPS 15 Service Manual - Page 36
2 Lift and slide the solid-state drive from the system board. Figure 11. Removing the solid-state drive 1 screw 3 solid-state drive slot 2 thermal pad 4 solid-state drive 36 - Dell XPS 15 9560 | XPS 15 Service Manual - Page 37
3 Peel the thermal pad off the solid-state drive. Figure 12. Removing the thermal pad 1 thermal pad 2 solid-state drive 37 - Dell XPS 15 9560 | XPS 15 Service Manual - Page 38
working inside your computer, follow the instructions in After working inside your computer. For more , see the Regulatory Compliance home page at www.dell.com/ regulatory_compliance. Procedure 1 Adhere the thermal pad battery (half-length) or the battery (full-length). 2 Replace the base cover. 38 - Dell XPS 15 9560 | XPS 15 Service Manual - Page 39
computer, follow the instructions in After working inside your computer. For more safety best practices, see the Regulatory Compliance home page at www.dell.com/ regulatory_compliance. Prerequisites 1 Remove the base cover. 2 Remove the battery (half-length) or the battery (full-length). Procedure - Dell XPS 15 9560 | XPS 15 Service Manual - Page 40
4 Lift the speakers, along with the speaker cable, off the palm-rest assembly. Figure 13. Removing the speakers 1 speaker cable 3 speakers (2) 2 screws (4) 4 palm-rest assembly 40 - Dell XPS 15 9560 | XPS 15 Service Manual - Page 41
inside your computer, follow the instructions in After working inside your computer. For see the Regulatory Compliance home page at www.dell.com/ regulatory_compliance. Procedure 1 Using the the speaker cables through the routing guides on the palm-rest assembly. 4 Connect the speaker cable - Dell XPS 15 9560 | XPS 15 Service Manual - Page 42
computer, follow the instructions in After working inside your computer. For more safety best practices, see the Regulatory Compliance home page at www.dell.com/ regulatory_compliance. Prerequisites 1 Remove the base cover. 2 Remove the battery (half-length) or the battery (full-length). Procedure - Dell XPS 15 9560 | XPS 15 Service Manual - Page 43
4 Slide and remove the wireless card out of the wireless-card slot. Figure 14. Removing the wireless card 1 captive screw 3 wireless card 2 wireless-card bracket 4 antenna cables (2) 43 - Dell XPS 15 9560 | XPS 15 Service Manual - Page 44
inside your computer, follow the instructions in After working inside your computer. For see the Regulatory Compliance home page at www.dell.com/ regulatory_compliance. Procedure CAUTION: To avoid antenna-cable color scheme for the wireless card supported by your computer: Table 2. Antenna-cable - Dell XPS 15 9560 | XPS 15 Service Manual - Page 45
screw that secures the wireless-card bracket to the wireless card. Figure 15. Replacing the wireless card 1 wireless card 3 captive screw 2 antenna cables (2) 4 wireless-card bracket Post-requisites 1 Replace the battery (half-length) or the battery (full-length). 2 Replace the base cover. 45 - Dell XPS 15 9560 | XPS 15 Service Manual - Page 46
computer, follow the instructions in After working inside your computer. For more safety best practices, see the Regulatory Compliance home page at www.dell.com/ regulatory_compliance. Prerequisites 1 Remove the base cover. 2 Remove the battery (half-length) or the battery (full-length). Procedure - Dell XPS 15 9560 | XPS 15 Service Manual - Page 47
6 Lift the video fan (JFAN_2) away from the palm-rest assembly. Figure 16. Removing the video fan 1 routing guide 3 tape 5 video fan (JFAN_2) 2 touch-screen cable (optional) 4 fan cable 6 screws (2) 7 Remove the two screws (M2x4) that secure the processor fan (JFAN_1) to the system - Dell XPS 15 9560 | XPS 15 Service Manual - Page 48
10 Lift the processor fan (JFAN_1) away from the palm-rest assembly. Figure 17. Removing the processor fan 1 routing guide 3 fan cable 5 screws (2) 2 display cable 4 processor fan (JFAN_1) 48 - Dell XPS 15 9560 | XPS 15 Service Manual - Page 49
, follow the instructions in After working inside Compliance home page at www.dell.com/ regulatory_compliance. Procedure 1 . 3 Route the display cable through the routing guides on the processor fan (JFAN_1). 4 Replace the battery (half-length) or the battery (full-length). 2 Replace the base cover. 49 - Dell XPS 15 9560 | XPS 15 Service Manual - Page 50
inside your computer, follow the instructions in After working inside your computer. For the Regulatory Compliance home page at www.dell.com/ regulatory_compliance. WARNING: The heat sink Remove the base cover. 2 Remove the battery (half-length) or the battery (full-length). Procedure 1 Remove the - Dell XPS 15 9560 | XPS 15 Service Manual - Page 51
2 Lift the heat-sink assembly off the system board. Figure 18. Removing the heat-sink assembly 1 heat-sink assembly 2 screws (5/4) 51 - Dell XPS 15 9560 | XPS 15 Service Manual - Page 52
working inside your computer, follow the instructions in After working inside your computer. For more see the Regulatory Compliance home page at www.dell.com/ regulatory_compliance. CAUTION: Incorrect alignment of the battery (half-length) or the battery (full-length). 2 Replace the base cover. 52 - Dell XPS 15 9560 | XPS 15 Service Manual - Page 53
computer, follow the instructions in After working inside your computer. For more safety best practices, see the Regulatory Compliance home page at www.dell.com/ regulatory_compliance. Prerequisites 1 Remove the base cover. 2 Remove the battery (half-length) or the battery (full-length). Procedure - Dell XPS 15 9560 | XPS 15 Service Manual - Page 54
2 Slide and remove the memory module from the memory-module slot. Figure 19. Removing the memory modules 1 memory module 3 memory-module slot 2 securing clips (2) 54 - Dell XPS 15 9560 | XPS 15 Service Manual - Page 55
the safety information that shipped with your computer and follow the steps in Before working inside your computer. After working inside your computer, follow the instructions in After working inside your computer. For more safety best practices, see the Regulatory Compliance home page at www - Dell XPS 15 9560 | XPS 15 Service Manual - Page 56
the memory module and reinstall it. Figure 20. Replacing the memory modules 1 memory module 3 tab 5 securing clips 2 notch 4 memory-module slot Post-requisites 1 Replace the battery (half-length) or the battery (full-length). 56 - Dell XPS 15 9560 | XPS 15 Service Manual - Page 57
2 Replace the base cover. 57 - Dell XPS 15 9560 | XPS 15 Service Manual - Page 58
, follow the instructions in After working inside your computer. For more safety best practices, see the Regulatory Compliance home page at www.dell.com/ regulatory_compliance. NOTE: Your computer's Service Tag is stored in the system board. You must enter the Service Tag in the BIOS setup program - Dell XPS 15 9560 | XPS 15 Service Manual - Page 59
Procedure NOTE: The touch-screen cable is available only on laptop configurations with touch displays. 1 Remove the screw (M2x2) that secures the display-cable bracket to the system board. 2 Lift the solid-state drive bracket to access the display cable. 3 Disconnect the display cable from the - Dell XPS 15 9560 | XPS 15 Service Manual - Page 60
5 Peel off the tape and disconnect the touch-screen cable from the system board. Figure 22. Disconnecting the cables 1 power-adapter port cable 3 keyboard-control board cable 5 fingerprint reader cable 7 tape 2 speaker cable 4 touch-pad cable 6 touch-screen cable (optional) 6 Remove the five - Dell XPS 15 9560 | XPS 15 Service Manual - Page 61
7 Lift the system board off the palm-rest assembly. CAUTION: Hold the system board from the center. The circuitry on the sides is delicate and can be easily damaged if the system board is held in any other way. Figure 23. Removing the system board 1 system board 3 palm-rest assembly 2 screws (5) - Dell XPS 15 9560 | XPS 15 Service Manual - Page 62
, follow the instructions in After working inside your computer. For more safety best practices, see the Regulatory Compliance home page at www.dell.com/ regulatory_compliance. NOTE: Your computer's Service Tag is stored in the system board. You must enter the Service Tag in the BIOS setup program - Dell XPS 15 9560 | XPS 15 Service Manual - Page 63
) or the solid-state drive (full-length). 5 Follow the procedure from step 3 to step 6 in "Replacing the hard drive". 6 Replace the wireless card. 7 Replace the battery (half-length) or the battery (full-length). 8 Replace the base cover. 63 - Dell XPS 15 9560 | XPS 15 Service Manual - Page 64
computer, follow the instructions in After working inside your computer. For more safety best practices, see the Regulatory Compliance home page at www.dell.com/ regulatory_compliance. Prerequisites 1 Remove the base cover. 2 Remove the battery (half-length) or the battery (full-length). 3 Remove - Dell XPS 15 9560 | XPS 15 Service Manual - Page 65
2 Lift the audio daughter-board off the system board and turn the audio daughterboard over. Figure 24. Removing the audio daughter-board 1 screws (2) 2 audio daughter-board 65 - Dell XPS 15 9560 | XPS 15 Service Manual - Page 66
working inside your computer, follow the instructions in After working inside your computer. For , see the Regulatory Compliance home page at www.dell.com/ regulatory_compliance. Procedure 1 Turn the audio daughter the battery (half-length) or the battery (full-length). 9 Replace the base cover. 66 - Dell XPS 15 9560 | XPS 15 Service Manual - Page 67
working inside your computer, follow the instructions in After working inside your computer. For more safety best practices, see the Regulatory Compliance home page at www.dell.com/ regulatory_compliance. CAUTION: Removing the coin-cell battery resets the BIOS setup program's settings to default. It - Dell XPS 15 9560 | XPS 15 Service Manual - Page 68
3 Note the location of the coin-cell battery and pry it off the system board. Figure 25. Removing the coin-cell battery 1 coin-cell battery 3 system board 2 coin-cell battery cable 68 - Dell XPS 15 9560 | XPS 15 Service Manual - Page 69
. After working inside your computer, follow the instructions in After working inside your computer. For more safety best practices, see the Regulatory Compliance home page at www.dell.com/ regulatory_compliance. Procedure 1 Adhere the coin-cell battery to the system board. 2 Connect the coin - Dell XPS 15 9560 | XPS 15 Service Manual - Page 70
computer, follow the instructions in After working inside your computer. For more safety best practices, see the Regulatory Compliance home page at www.dell.com/ regulatory_compliance. Prerequisites 1 Remove the base cover. 2 Remove the battery (half-length) or the battery (full-length). 3 Follow - Dell XPS 15 9560 | XPS 15 Service Manual - Page 71
2 Lift up the Mylar to access the screws that secure the keyboard to the palm-rest assembly. NOTE: All new keyboards will be shipped with the Mylar. Do not peel off the Mylar. Figure 26. Disconnecting the keyboard and keyboard-backlight cable 1 Mylar 3 latches (2) 2 keyboard cable 4 keyboard- - Dell XPS 15 9560 | XPS 15 Service Manual - Page 72
4 Lift the keyboard off the palm-rest assembly. Figure 27. Removing the screws from the keyboard 1 screws (31) 3 palm-rest assembly 2 keyboard 72 - Dell XPS 15 9560 | XPS 15 Service Manual - Page 73
working inside your computer, follow the instructions in After working inside your computer. For , see the Regulatory Compliance home page at www.dell.com/ regulatory_compliance. Procedure 1 Align the screw holes Replace the battery (half-length) or the battery (full-length). 4 Replace the base - Dell XPS 15 9560 | XPS 15 Service Manual - Page 74
computer, follow the instructions in After working inside your computer. For more safety best practices, see the Regulatory Compliance home page at www.dell.com/ regulatory_compliance. Prerequisites 1 Remove the base cover. 2 Remove the battery (half-length) or the battery (full-length). 3 Remove - Dell XPS 15 9560 | XPS 15 Service Manual - Page 75
3 Peel off the tape and remove the touch-screen cable from the routing guides on the fan. Figure 28. Disconnecting the cables 1 touch-screen cable (optional) 3 display-cable bracket 5 display cable 2 tape 4 screw 4 Turn the computer over and open - Dell XPS 15 9560 | XPS 15 Service Manual - Page 76
7 Carefully lift the display assembly from the palm-rest assembly Figure 29. Removing the screws that secure the display hinges to palm-rest assembly 1 palm-rest assembly 3 display hinges (2) 2 screws (6) 4 display assembly 76 - Dell XPS 15 9560 | XPS 15 Service Manual - Page 77
8 Carefully place the display assembly on a clean, flat surface. Figure 30. Display assembly 1 display assembly 77 - Dell XPS 15 9560 | XPS 15 Service Manual - Page 78
computer, follow the instructions in After working inside Compliance home page at www.dell.com/ regulatory_compliance. Procedure 1 the touch-screen cable (optional) through the routing guides on the fan. 5 Connect the touch-screen battery (half-length) or the battery (full-length). 3 Replace the base - Dell XPS 15 9560 | XPS 15 Service Manual - Page 79
computer, follow the instructions in After working inside your computer. For more safety best practices, see the Regulatory Compliance home page at www.dell.com/ regulatory_compliance. Prerequisites 1 Remove the base cover. 2 Remove the battery (half-length) or the battery (full-length). 3 Remove - Dell XPS 15 9560 | XPS 15 Service Manual - Page 80
3 Lift the power-adapter port along with its cable, off the palm-rest assembly. Figure 31. Removing the power-adapter port 1 screw 3 power-adapter port cable 2 power-adapter port 80 - Dell XPS 15 9560 | XPS 15 Service Manual - Page 81
computer, follow the instructions in After working inside your Compliance home page at www.dell.com/ regulatory_compliance. Procedure 1 power-adapter port cable through its routing guides on the palm-rest assembly. 3 Replace battery (half-length) or the battery (full-length). 3 Replace the base cover. 81 - Dell XPS 15 9560 | XPS 15 Service Manual - Page 82
computer, follow the instructions in After working inside your computer. For more safety best practices, see the Regulatory Compliance home page at www.dell.com/ regulatory_compliance. Prerequisites 1 Remove the base cover. 2 Remove the battery (half-length) or the battery (full-length). 3 Remove - Dell XPS 15 9560 | XPS 15 Service Manual - Page 83
Procedure 1 Carefully turn the display hinges at an angle. Figure 32. Turning the display hinge 1 display assembly 2 display hinges (2) 83 - Dell XPS 15 9560 | XPS 15 Service Manual - Page 84
2 Slide and lift the antenna cover away from the display assembly. Figure 33. Removing the antenna cover 1 display assembly 2 antenna cover 84 - Dell XPS 15 9560 | XPS 15 Service Manual - Page 85
working inside your computer, follow the instructions in After working inside your computer. For more see the Regulatory Compliance home page at www.dell.com/ regulatory_compliance. Procedure 1 Replace the antenna Replace the battery (half-length) or the battery (full-length). 4 Replace the base cover - Dell XPS 15 9560 | XPS 15 Service Manual - Page 86
, see the Regulatory Compliance home page at www.dell.com/ regulatory_compliance. Prerequisites NOTE: These instructions are applicable only for laptops with a nontouchscreen display. 1 Remove the base cover. 2 Remove the battery (half-length) or the battery (full-length). 3 Remove the wireless card - Dell XPS 15 9560 | XPS 15 Service Manual - Page 87
Procedure 1 Peel off the tape to access the screws on the display hinges. Figure 34. Peeling the tape 1 tape 2 display hinges (2) 2 Remove the six screws (M2.5x5) that secure the display hinges to the display assembly. 87 - Dell XPS 15 9560 | XPS 15 Service Manual - Page 88
3 Carefully lift the display hinges off the display assembly. Figure 35. Removing the display hinges 1 screws (6) 2 display hinges (2) 88 - Dell XPS 15 9560 | XPS 15 Service Manual - Page 89
working inside your computer, follow the instructions in After working inside your computer. For , see the Regulatory Compliance home page at www.dell.com/ regulatory_compliance. Procedure 1 Align the screw holes the battery (half-length) or the battery (full-length). 5 Replace the base cover. - Dell XPS 15 9560 | XPS 15 Service Manual - Page 90
, see the Regulatory Compliance home page at www.dell.com/ regulatory_compliance. Prerequisites NOTE: These instructions are applicable only for laptops with a nontouchscreen display. 1 Remove the base cover. 2 Remove the battery (half-length) or the battery (full-length). 3 Remove the wireless card - Dell XPS 15 9560 | XPS 15 Service Manual - Page 91
3 Lift the antenna module away from the display assembly. Figure 36. Removing the antenna module 1 tape 3 screws (4) 5 display assembly 2 antenna cable 4 antenna module 91 - Dell XPS 15 9560 | XPS 15 Service Manual - Page 92
working inside your computer, follow the instructions in After working inside your computer. For more , see the Regulatory Compliance home page at www.dell.com/ regulatory_compliance. Procedure 1 Align the screw holes Replace the battery (half-length) or the battery (full-length). 5 Replace the base cover. - Dell XPS 15 9560 | XPS 15 Service Manual - Page 93
your computer, follow the instructions in After working inside your computer. the Regulatory Compliance home page at www.dell.com/ regulatory_compliance. Prerequisites NOTE: Remove the 1 Remove the base cover. 2 Remove the battery (half-length) or the battery (full-length). 3 Remove the memory modules. 4 - Dell XPS 15 9560 | XPS 15 Service Manual - Page 94
Figure 37. Removing the palm-rest assembly 1 palm-rest assembly 94 - Dell XPS 15 9560 | XPS 15 Service Manual - Page 95
working inside your computer, follow the instructions in After working inside your computer. For more , see the Regulatory Compliance home page at www.dell.com/ regulatory_compliance. Procedure Place the palm-rest assembly battery (half-length) or the battery (full-length). 13 Replace the base cover. 95 - Dell XPS 15 9560 | XPS 15 Service Manual - Page 96
where you saved the audio driver file. 8 Double-click the audio driver file icon and follow the instructions on the screen to install the driver. Downloading the graphics driver 1 Turn on your computer. 2 Go to www.dell.com/support. 3 Click Product Support, enter the Service Tag of your computer - Dell XPS 15 9560 | XPS 15 Service Manual - Page 97
instructions on screen to install the driver. Downloading the Wi-Fi driver 1 Turn on the computer. 2 Go to www.dell.com/support. 3 Click Product support, enter the Service Tag of your computer, and then click Submit. NOTE: If you do not have the Service Tag, use the auto-detect feature or manually - Dell XPS 15 9560 | XPS 15 Service Manual - Page 98
the instructions on the screen. Downloading the chipset driver 1 Turn on your computer. 2 Go to www.dell.com/support. 3 Click Product Support, enter the Service Tag of your computer, and then click Submit. NOTE: If you do not have the Service Tag, use the auto-detect feature or manually browse - Dell XPS 15 9560 | XPS 15 Service Manual - Page 99
3 Click Product support enter the Service Tag of your computer and click Submit. NOTE: If you do not have the Service Tag, use the auto-detect feature or manually browse for your computer model. 4 Click Drivers & downloads → Find it myself. 5 Scroll down the page and expand Network. 6 Click Download - Dell XPS 15 9560 | XPS 15 Service Manual - Page 100
boot device order and boot directly to a specific device (for example: optical drive or hard drive). During the Power-on Self Test (POST), when the Dell logo appears, you can: • Access System Setup by pressing F2 key • Bring up the one-time boot menu by pressing F12 key The one-time boot - Dell XPS 15 9560 | XPS 15 Service Manual - Page 101
program, it is recommended that you write down the BIOS Setup program screen information for future reference. Use the BIOS Setup program for the following purposes: • Get information about the hardware installed in your computer, such as the amount of RAM and the size of the hard drive. • Change - Dell XPS 15 9560 | XPS 15 Service Manual - Page 102
when the DELL logo is BIOS version number. Service Tag Displays the Service Tag of the computer. Asset Tag Displays the Asset Tag of the computer. Ownership Tag Displays the ownership tag of the computer. Manufacture Date Displays the manufacture date of the computer. Ownership Date - Dell XPS 15 9560 | XPS 15 Service Manual - Page 103
Hard Drive Displays the primary hard drive. M.2 PCIe SSD-0 Displays the M.2 PCIe solid state drive. Passthrough Displays the video controller. Video BIOS Version Displays the video BIOS version. Video Memory Displays device. Battery Information Displays the battery health information. Boot - Dell XPS 15 9560 | XPS 15 Service Manual - Page 104
or disables prompts for the administrator password when booting from UEFI. Date/Time Displays the current date in MM/DD/YY format and current time in HH:MM: disable booting from USB mass storage Support devices connected to the thunderbolt ports. Always Allow Dell Docks Enable or disable the - Dell XPS 15 9560 | XPS 15 Service Manual - Page 105
the SD card read-only mode. Table 5. System setup options-Video menu Video LCD Brightness Set the panel brightness independently for battery and AC power. Table 6. System setup options-Security menu Security Admin Password Set, change, or delete the administrator password. System Password - Dell XPS 15 9560 | XPS 15 Service Manual - Page 106
or disable Trusted Platform Module (TPM) visibility to the operating system. Computrace(R) Enable or disable the BIOS module interface of the optional Computrace service. CPU XD Support Enable or disable the execute disable mode of the processor. OROM Keyboard Access Enable or disable access - Dell XPS 15 9560 | XPS 15 Service Manual - Page 107
control Power Management AC Behavior Auto on Time USB Wake Support Wake on LAN Enable or disable additional processor sleep states. Enable to set the computer to turn on automatically every day or on a pre-selected date and time. This option can be configured only if the Auto On Time is set - Dell XPS 15 9560 | XPS 15 Service Manual - Page 108
Emulation Fn Lock Options Fast-boot Extend BIOS POST Time Full Screen logo Warnings and Errors Enable or disable the sleep state. Configure the AC power usage. Enable from the beginning of the day to a specified work period. Set the primary battery charge setting with a preselected custom charge - Dell XPS 15 9560 | XPS 15 Service Manual - Page 109
Table 10. System setup options-Virtualization support menu Virtualization Support Virtualization Specify whether a Virtual Machine options-Maintenance menu Maintenance Service Tag Display the system's Service Tag. Asset Tag Create a system asset tag. BIOS Downgrade Control flashing of - Dell XPS 15 9560 | XPS 15 Service Manual - Page 110
flow for the SupportAssist System Resolution console and for the Dell OS Recovery tool. SupportAssist OS Recovery Enable or disable your system. Password that you must enter to access and make changes to the BIOS settings of your computer. CAUTION: The password features provide a basic level of - Dell XPS 15 9560 | XPS 15 Service Manual - Page 111
password, if the Password Status is Locked. To enter the System Setup, press F2 immediately after a power-on or reboot. 1 In the System BIOS or System Setup screen, select System Security and press Enter. The System Security screen is displayed. 2 In the System Security screen, verify that Password - Dell XPS 15 9560 | XPS 15 Service Manual - Page 112
see the knowledge base article SLN143196 at www.dell.com/support. 3 Copy the BIOS setup program file to the bootable USB drive. 4 Connect the bootable USB drive to the computer that needs the BIOS update. 5 Restart the computer and press F12 when the Dell logo is displayed on the screen. 6 Boot to - Dell XPS 15 9560 | XPS 15 Service Manual - Page 113
flash the BIOS: 1 Turn on your computer. 2 Go to www.dell.com/support. 3 Click Product support, enter the Service Tag of your computer, and then click Submit. NOTE: If you do not have the Service Tag, use the auto-detect feature or manually browse for your computer model. 4 Click Drivers & downloads - Dell XPS 15 9560 | XPS 15 Service Manual - Page 114
that inform you of problems encountered during testing NOTE: computer boots, press the F12 key as the Dell logo appears. 3 On the boot menu screen, Dell. Diagnostics Power and battery-status light Indicates the power and battery-charge status. Solid white - Power adapter is connected and the battery - Dell XPS 15 9560 | XPS 15 Service Manual - Page 115
indicate. Table 15. Diagnostics Light Pattern 2,1 2,2 2,3 2,4 2,5 2,6 2,7 3,1 3,2 3,3 3,4 Problem description CPU failure System board: BIOS and ROM failure No memory or RAM detected Memory or RAM failure Invalid memory installed System board or chipset error LCD failure CMOS battery failure PCI - Dell XPS 15 9560 | XPS 15 Service Manual - Page 116
powered off and the battery has been removed. The following procedure provides the instructions on how to conduct flea power release: 1 Turn off The following procedure provides the instructions on how to conduct a Wi-Fi power cycle: NOTE: Some ISPs (Internet Service Providers) provide a modem/router - Dell XPS 15 9560 | XPS 15 Service Manual - Page 117
help for operating system www.dell.com/support/windows www.dell.com/support/linux Troubleshooting information, user manuals, setup instructions, product specifications, technical help blogs, drivers, software updates, and so on. www.dell.com/support Dell knowledge base articles for a variety - Dell XPS 15 9560 | XPS 15 Service Manual - Page 118
and system restore • BIOS information • Locate your product through the drop-down menu under View Products. • Enter the Service Tag number or Product ID in the search bar. Contacting Dell To contact Dell for sales, technical support, or customer service issues, see www.dell.com/contactdell. NOTE
-
 1
1 -
 2
2 -
 3
3 -
 4
4 -
 5
5 -
 6
6 -
 7
7 -
8
-
9
-
10
-
11
-
12
-
13
-
14
-
15
-
16
-
17
-
18
-
19
-
20
-
21
-
22
-
23
-
24
-
25
-
26
-
27
-
28
-
29
-
30
-
31
-
32
-
33
-
34
-
35
-
36
-
37
-
38
-
39
-
40
-
41
-
42
-
43
-
44
-
45
-
46
-
47
-
48
-
49
-
50
-
51
-
52
-
53
-
54
-
55
-
56
-
57
-
58
-
59
-
60
-
61
-
62
-
63
-
64
-
65
-
66
-
67
-
68
-
69
-
70
-
71
-
72
-
73
-
74
-
75
-
76
-
77
-
78
-
79
-
80
-
81
-
82
-
83
-
84
-
85
-
86
-
87
-
88
-
89
-
90
-
91
-
92
-
93
-
94
-
95
-
96
-
97
-
98
-
99
-
100
-
101
-
102
-
103
-
104
-
105
-
106
-
107
-
108
-
109
-
110
-
111
-
112
-
113
-
114
-
115
-
116
-
117
-
118
 |
 |

XPS 15
Service Manual
Computer Model: XPS 15–9560
Regulatory Model: P56F
Regulatory Type: P56F001