Dewalt DXCMTB5590856 Instruction Manual - Page 17
Draining Air Tank Fig. 1
 |
View all Dewalt DXCMTB5590856 manuals
Add to My Manuals
Save this manual to your list of manuals |
Page 17 highlights
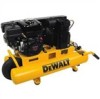
English Inspect drive belt X Check drive belt tension X Check pulley/flywheel alignment X Check for unusual noise/vibration X Check for air leaks X* Clean compressor exterior X Remove tank from service X++ Engine See engine instruction manual. * To check for air leaks apply a solution of soapy water around joints. While compressor is pumping to pressure and after pressure cuts out, look for air bubbles to form. **The pump oil must be changed after the first 20 hours or operation. Thereafter, when using DeWALT synthetic compressor oil, change oil every 200 hours of operation or once a year, whichever comes first. + Perform more frequent in dusty or humid conditions. ++ For more information, call 1-888-895-4549 Checking Safety Valve (Fig. 1) WARNING: Hot surfaces. Risk of burn. Aftercooler, pump head, and surrounding parts are very hot, do not touch (see the Hot Surfaces identified in Fig. 2). Allow compressor to cool prior to servicing. WARNING: Risk of bursting. If the safety valve does not work properly, over-pressurization may occur, causing air tank rupture or an explosion. WARNING: Risk from flying objects. Always wear certified safety equipment: ANSI Z87.1 eye protection (CAN/CSA Z94.3) with side shields when using the compressor. Before starting compressor, pull the ring on the safety valve to make sure that the safety valve operates freely. If the valve is stuck or does not operate smoothly, it must be replaced with the same type of valve. Checking Air Filter Element (Fig. 1) WARNING: Hot surfaces. Risk of burn. Aftercooler, pump head, and surrounding parts are very hot, do not touch (see the Hot Surfaces identified in Fig. 2). Allow compressor to cool prior to servicing. 1. Ensure engine ON/OFF switch (C) is in the OFF position. 2. Allow unit to cool. 3. Remove filter (A) top from filter base by turning filter counter- clockwise about 5 degrees. 4. Separate filter top from base. 5. Remove element from filter base. 6. If element needs cleaning, blow out with air. Replace if need- ed. Purchase replacement parts from your local dealer or authorized service center. Always use identical replacement parts. 7. Place element back in filter base. 8. Reconnect filter top to filter base. While pushing in, rotate clockwise 5 degrees. NOTICE: Risk of unsafe operation. Do not operate without air inlet filter. Draining Air Tank (Fig. 1) WARNING: Risk of unsafe operation. Risk from noise. Air tanks contain high pressure air. Keep face and other body parts away from outlet of drain. Use eye protection [ANSI Z87.1 (CAN/ CSA Z94.3)] when draining as debris can be kicked up into face. WARNING: Risk from noise. Use ear protection [ANSI S12.6 (S3.19)] as air flow noise is loud when draining. 17
-
 1
1 -
2
-
3
-
4
-
5
-
6
-
7
-
8
-
9
-
10
-
11
-
 12
12 -
 13
13 -
 14
14 -
 15
15 -
 16
16 -
 17
17 -
 18
18 -
 19
19 -
 20
20 -
 21
21 -
 22
22 -
23
-
24
-
25
-
26
-
27
-
28
-
29
-
30
-
31
-
32
-
33
-
34
-
35
-
36
-
37
-
38
-
39
-
40
-
41
-
42
-
43
-
44
-
45
-
46
-
47
-
48
-
49
-
50
-
51
-
52
-
53
-
54
-
55
-
56
-
57
-
58
-
59
-
60
-
61
-
62
-
63
-
64
-
65
-
66
-
67
-
68
-
69
-
70
-
71
-
72
-
73
-
74
-
75
-
76
-
77
-
78
-
79
-
80
-
81
-
82
-
83
-
84
-
85
-
86
-
87
-
88
 |
 |
