Dynex DX-24L230A12 User Manual (English) - Page 19
Connecting a camcorder or game console, Connecting a computer
 |
View all Dynex DX-24L230A12 manuals
Add to My Manuals
Save this manual to your list of manuals |
Page 19 highlights
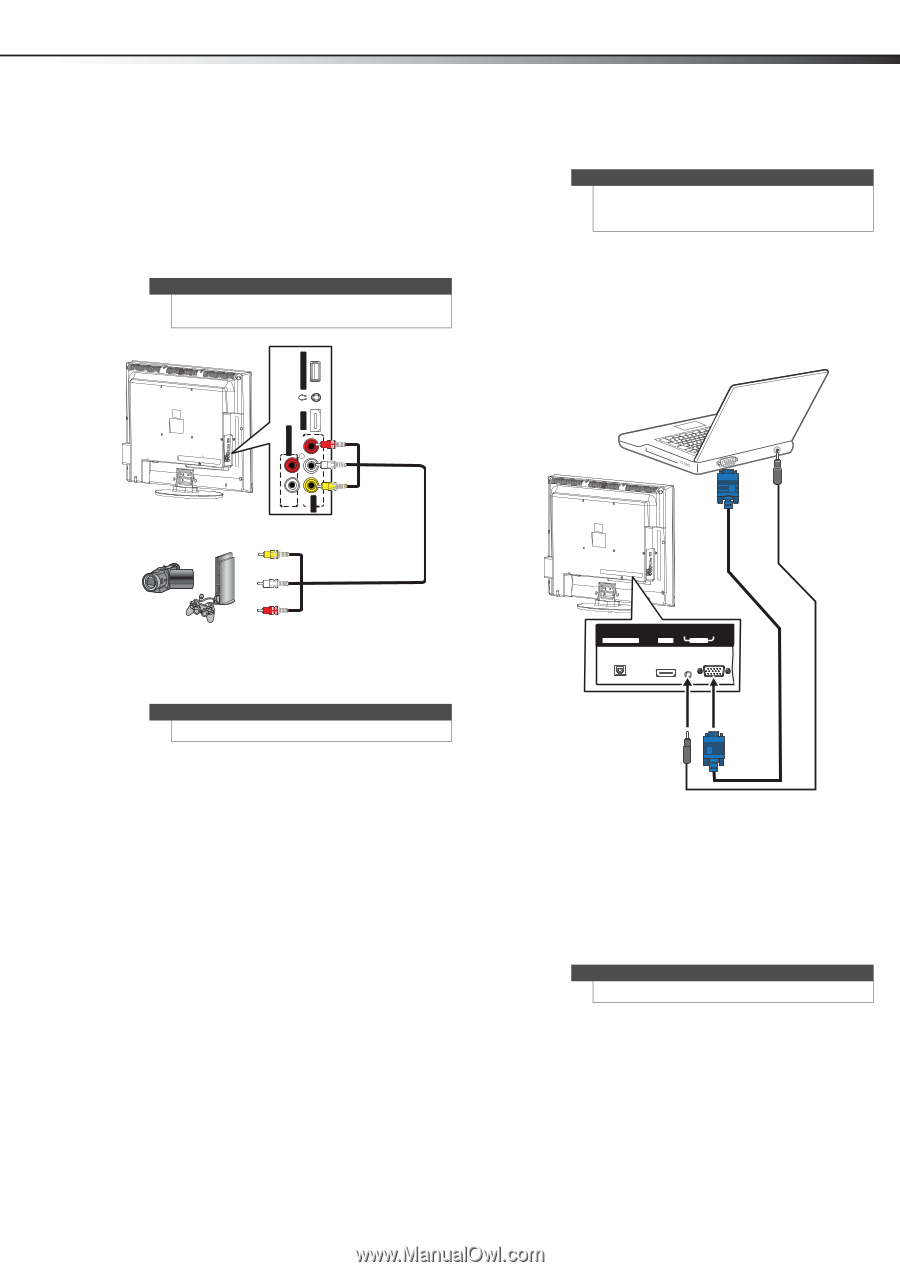
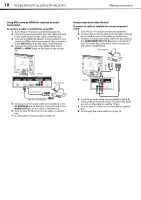
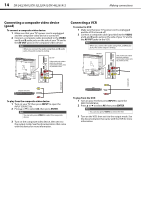
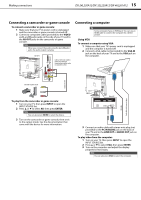
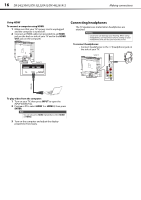
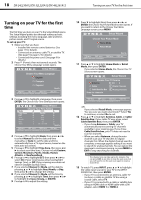
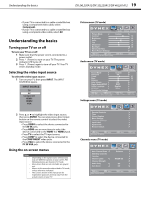
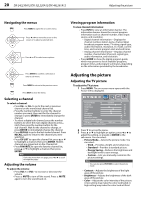
Making connections DX-24L230A12/DX-32L220A12/DX-46L261A12 15 Connecting a camcorder or game console To connect a camcorder or game console: 1 Make sure that your TV's power cord is unplugged and the camcorder or game console is turned off. 2 Connect a composite cable (provided) to the VIDEO and L and R audio jacks on the side of your TV and to the AV OUT jacks on the camcorder or game console. Note When you connect the audio using the L and R audio jacks, the audio output is analog. Side of TV SERVICE PORT Cables are often color-coded to match color-coded jacks. Connect yellow to yellow, red to red, and white to white. Connecting a computer Tip Some computers have an HDMI jack. You can use an HDMI cable to connect the computer for a better picture. Using VGA To connect a computer using VGA: 1 Make sure that your TV's power cord is unplugged and the computer is turned off. 2 Connect a VGA cable (not provided) to the VGA IN jack on the back of your TV and to the VGA jack on the computer. R AUDIO R AUDIO OUT AUDIO HDMI 2 L L VIDEO AV IN Composite cable Camcorder or game console To play from the camcorder or game console: 1 Turn on your TV, then press INPUT to open the INPUT SOURCE list. 2 Press or to select AV, then press ENTER. Note You can also press VIDEO to select the device. 3 Turn on the camcorder or game console, then set it to the output mode. See the documentation that came with the device for more information. DIGITAL OUTPUT Back of TV AUDIO VGA HDMI 1 PC IN VGA cable Audio cable with stereo mini plug 3 Connect an audio cable with stereo mini plug (not provided) to the PC IN AUDIO jack on the back of your TV and to the LINE OUT or AUDIO OUT jack on the computer. To play video from the computer: 1 Turn on your TV, then press INPUT to open the INPUT SOURCE list. 2 Press or to select VGA, then press ENTER. 3 Turn on the computer and adjust the display properties if necessary. Note You can also press VGA to select the computer.
-
 1
1 -
2
-
3
-
4
-
5
-
6
-
7
-
8
-
9
-
10
-
11
-
12
-
13
-
 14
14 -
 15
15 -
 16
16 -
 17
17 -
 18
18 -
 19
19 -
 20
20 -
 21
21 -
 22
22 -
 23
23 -
 24
24 -
25
-
26
-
27
-
28
-
29
-
30
-
31
-
32
-
33
-
34
-
35
-
36
-
37
-
38
-
39
-
40
-
41
-
42
-
43
-
44
-
45
-
46
-
47
-
48
 |
 |