Dynex DX-L19-10A User Manual (English) - Page 16
Displaying additional information, Adjusting the picture, Adjusting Advanced Video settings - resolution
 |
UPC - 600603122408
View all Dynex DX-L19-10A manuals
Add to My Manuals
Save this manual to your list of manuals |
Page 16 highlights
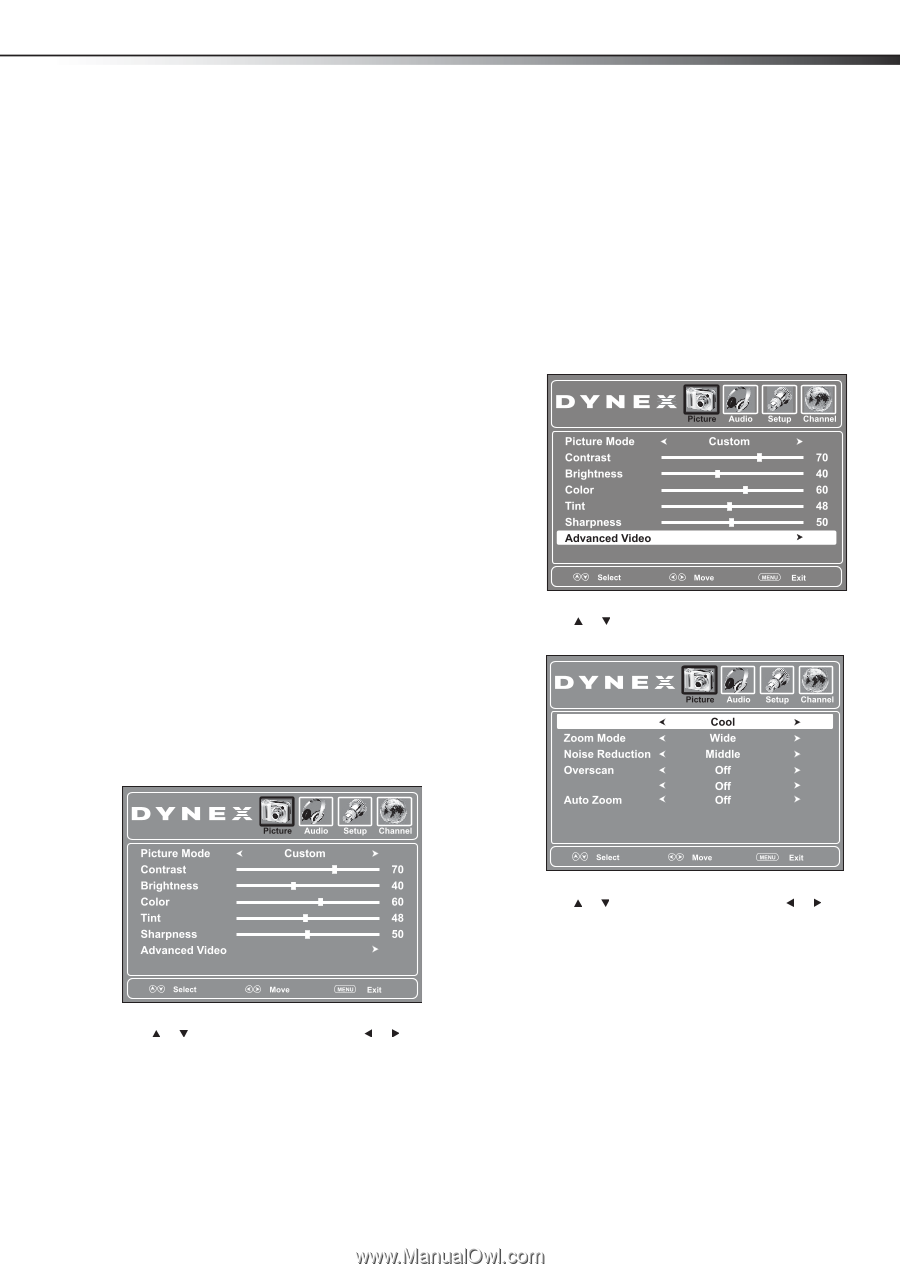
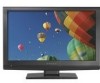
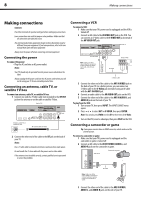
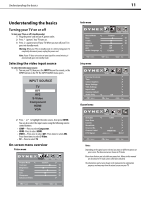
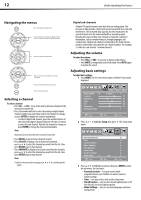
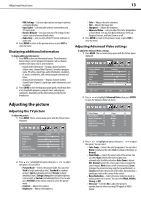
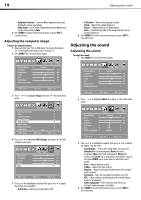
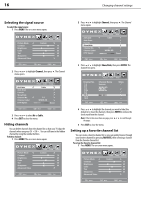
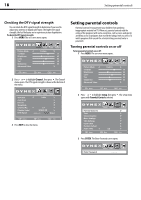
Adjusting the picture 13 • VGA Settings-Lets you adjust picture settings to optimize a computer display. • Input Label-Lets you label a device connected to your TV's input jacks. • Restore Default-Lets you reset most TV settings for the current source to factory default values. • Audio Only-Lets you turn off the TV picture and listen to audio only. 4 Press MENU to return to the previous menu, or press EXIT to close the menu. Displaying additional information To display additional information: 1 Press INFO to show an information banner. The information banner shows current program information such as channel number, video input source, and resolution. • Digital mode information-Displays channel number, station name, channel label (if preset), broadcast program name, TV rating, signal type, audio information, resolution, CC mode, current time, and current program start and end times. • Analog mode information-Displays channel number, channel label (if preset), signal type, audio information, and resolution. 2 Press GUIDE to show the digital program guide, which may show a list of available programs, program times, and program summaries, depending on the information provided by the broadcaster. Adjusting the picture • Color-Adjusts the color saturation. • Tint-Adjusts the image tint. • Sharpness-Adjusts the sharpness. • Advanced Video-Lets you adjust the Color Temperature or Zoom Mode. Lets you turn Noise Reduction, Overscan, Adaptive Contrast, and Auto Zoom on or off. 3 Press MENU to return to the previous menu, or press EXIT to close the menu. Adjusting Advanced Video settings To adjust the Advanced Video settings: 1 Press MENU. The on-screen menu opens with the Picture menu displayed. 2 Press or to highlight Advanced Video, then press ENTER to open the Advanced Video sub menu. Adjusting the TV picture To adjust the picture: 1 Press MENU. The on-screen menu opens with the Picture menu displayed. Color Temp Adaptive Contrast 2 Press or to highlight an option, then press or to adjust the option. You can select: • Picture Mode-Selects the picture mode. You can select Vivid (a bright and vivid picture), Standard (a standard picture), Sports (a dynamic picture), Theater (a finely detailed picture), Energy Saving (the backlight brightness is decreased), or Custom (customized picture). You can also press PICTURE on the remote control to select the picture mode. • Contrast-Adjusts the contrast. • Brightness-Adjusts the brightness. 3 Press or to highlight an option, then press or to adjust the option. You can select: • Color Temp-Selects the color temperature. You can select Warm (to enhance the reds), Cool (to enhance the blues), or Normal. • Zoom Mode-Selects the aspect ratio of the picture. You can select Auto (selects the correct aspect ratio automatically. Available only when Auto Zoom is turned ON), Normal (selects the correct aspect ratio to match the source image), Wide (shows a full-screen picture), Zoom (enlarges the picture but may crop the top and bottom), or Cinema (stretches the picture at the edges, but maintains a good aspect ratio at the center of the screen). • Noise Reduction-Selects the noise reduction mode to reduce picture noise (snow). You can select Weak, Middle, Strong, or Off. • Overscan-Turn this On to adjust the picture's reproduction rate when receiving DVI signals in VIDEO format.
-
 1
1 -
2
-
3
-
4
-
5
-
6
-
7
-
8
-
9
-
10
-
 11
11 -
 12
12 -
 13
13 -
 14
14 -
 15
15 -
 16
16 -
 17
17 -
 18
18 -
 19
19 -
 20
20 -
 21
21 -
22
-
23
-
24
-
25
-
26
-
27
-
28
-
29
-
30
-
31
-
32
-
33
 |
 |