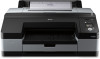
Epson 4900 Managing Color Guide Windows 7 and Windows 8 Mac OS X 10.7 and 10.8 - Page 5
Printing with Adobe Photoshop CC or CS6, Assign working RGB: Adobe, RGB 1998, Assign Profile, Profile - scanner
 |
View all Epson 4900 manuals
Add to My Manuals
Save this manual to your list of manuals |
Page 5 highlights
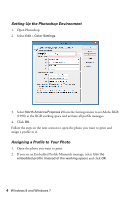
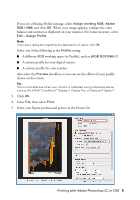
If you see a Missing Profile message, select Assign working RGB: Adobe RGB (1998) and click OK. When your image appears, evaluate the color balance and contrast as displayed on your monitor. If it looks incorrect, select Edit > Assign Profile. Note: If you see a dialog box regarding the appearance of layers, click OK. Select one of the following as the Profile setting: ■ A different RGB working space (or Profile), such as sRGB IEC61966-2.1 ■ A camera profile for your digital camera ■ A scanner profile for your scanner Also select the Preview checkbox so you can see the effects of your profile choice on the screen. Tip: This is most effective when your monitor is calibrated using a hardware device such as the X-Rite® ColorMunki™ Display, i1 Display Pro, or Datacolor® Spyder™. 3. Click OK. 4. Select File, then select Print. 5. Select your Epson professional printer in the Printer list. Printing with Adobe Photoshop CC or CS6 5
-
 1
1 -
 2
2 -
 3
3 -
 4
4 -
 5
5 -
 6
6 -
 7
7 -
 8
8 -
 9
9 -
 10
10 -
 11
11 -
12
-
13
-
14
-
15
-
16
-
17
-
18
-
19
-
20
-
21
-
22
-
23
-
24
-
25
-
26
-
27
-
28
-
29
-
30
-
31
-
32
-
33
-
34
 |
 |
