Epson B-300 User's Guide - Page 139
Cleaning the Print Head, Paper/Cancel, Power
 |
View all Epson B-300 manuals
Add to My Manuals
Save this manual to your list of manuals |
Page 139 highlights
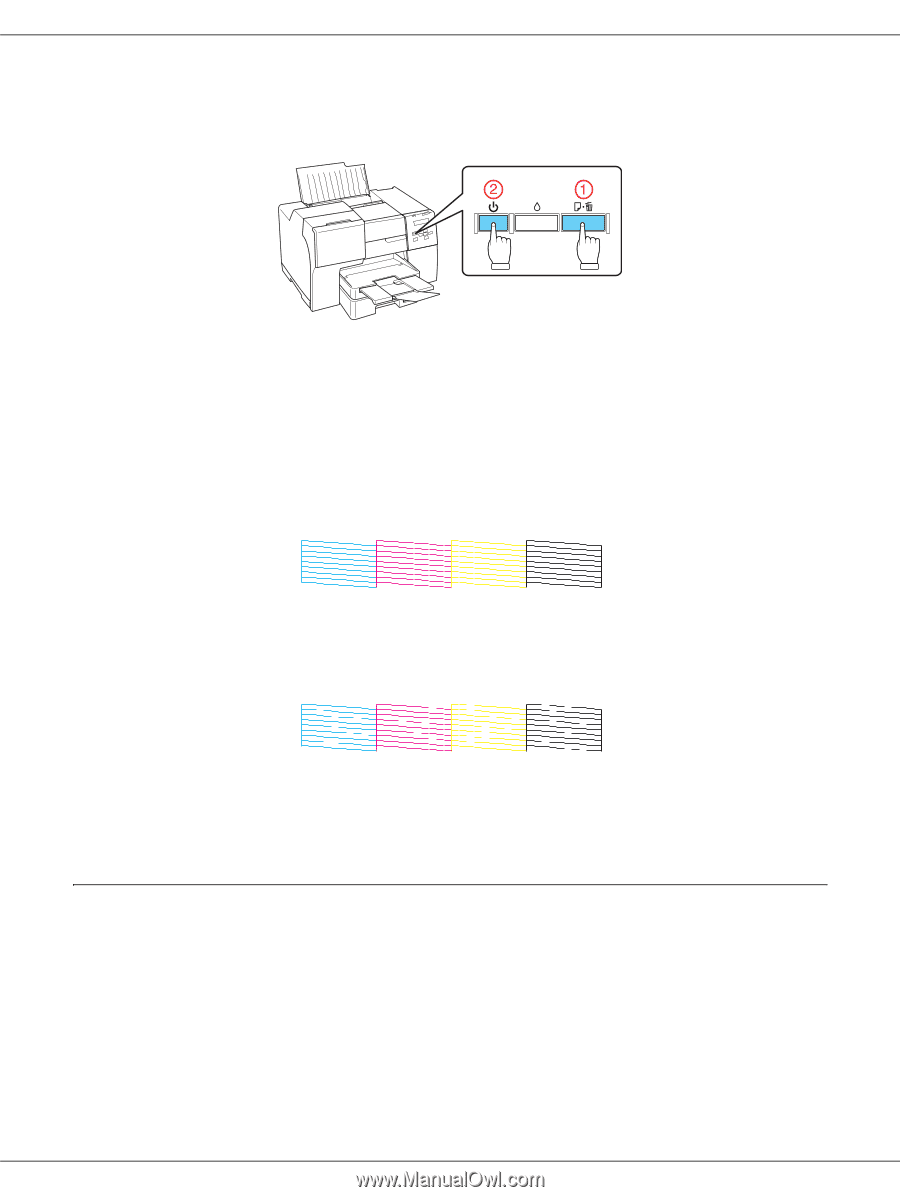
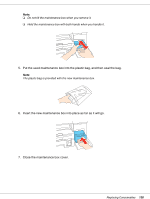
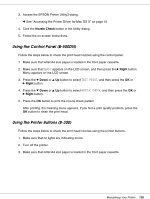
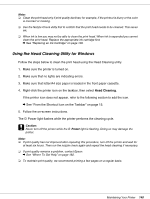
4. Hold down the ) Paper/Cancel button and press the P Power button to turn on the printer. 5. When the printer turns on, release both the buttons. Below are two sample nozzle check patterns. Compare the quality of the printed check page with the sample shown below. If there are no print quality problems, such as gaps or missing segments in the test lines, the print head is fine. If any segment of the printed lines is missing, as shown below, this could mean a clogged ink nozzle or a misaligned print head. & See "Cleaning the Print Head" on page 139. & See "Aligning the Print Head" on page 143. Cleaning the Print Head If you find that your printouts are unexpectedly faint or have gaps in them, you may be able to solve these problems by cleaning the print head, which ensures that the nozzles are delivering ink properly. You can clean the print head from your computer using the Head Cleaning utility in the printer driver or from the printer by using the control panel or buttons. Maintaining Your Printer 139
-
 1
1 -
2
-
3
-
4
-
5
-
6
-
7
-
8
-
9
-
10
-
11
-
12
-
13
-
14
-
15
-
16
-
17
-
18
-
19
-
20
-
21
-
22
-
23
-
24
-
25
-
26
-
27
-
28
-
29
-
30
-
31
-
32
-
33
-
34
-
35
-
36
-
37
-
38
-
39
-
40
-
41
-
42
-
43
-
44
-
45
-
46
-
47
-
48
-
49
-
50
-
51
-
52
-
53
-
54
-
55
-
56
-
57
-
58
-
59
-
60
-
61
-
62
-
63
-
64
-
65
-
66
-
67
-
68
-
69
-
70
-
71
-
72
-
73
-
74
-
75
-
76
-
77
-
78
-
79
-
80
-
81
-
82
-
83
-
84
-
85
-
86
-
87
-
88
-
89
-
90
-
91
-
92
-
93
-
94
-
95
-
96
-
97
-
98
-
99
-
100
-
101
-
102
-
103
-
104
-
105
-
106
-
107
-
108
-
109
-
110
-
111
-
112
-
113
-
114
-
115
-
116
-
117
-
118
-
119
-
120
-
121
-
122
-
123
-
124
-
125
-
126
-
127
-
128
-
129
-
130
-
131
-
132
-
133
-
 134
134 -
 135
135 -
 136
136 -
 137
137 -
 138
138 -
 139
139 -
 140
140 -
 141
141 -
 142
142 -
 143
143 -
 144
144 -
145
-
146
-
147
-
148
-
149
-
150
-
151
-
152
-
153
-
154
-
155
-
156
-
157
-
158
-
159
-
160
-
161
-
162
-
163
-
164
-
165
-
166
-
167
-
168
-
169
-
170
-
171
-
172
-
173
-
174
-
175
-
176
-
177
-
178
-
179
-
180
-
181
-
182
-
183
-
184
-
185
-
186
-
187
-
188
-
189
-
190
-
191
-
192
-
193
-
194
-
195
-
196
-
197
-
198
-
199
-
200
-
201
 |
 |