Epson B-300 User's Guide - Page 72
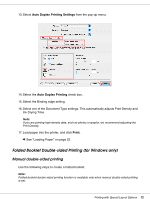
Folded Booklet Double-sided Printing (for Windows only), Manual double-sided printing
 |
View all Epson B-300 manuals
Add to My Manuals
Save this manual to your list of manuals |
Page 72 highlights
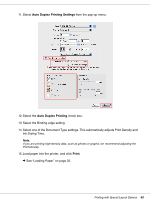
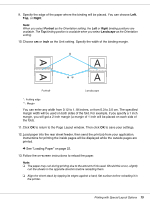
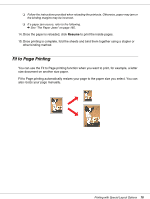
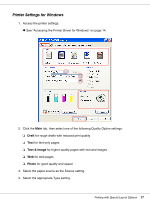
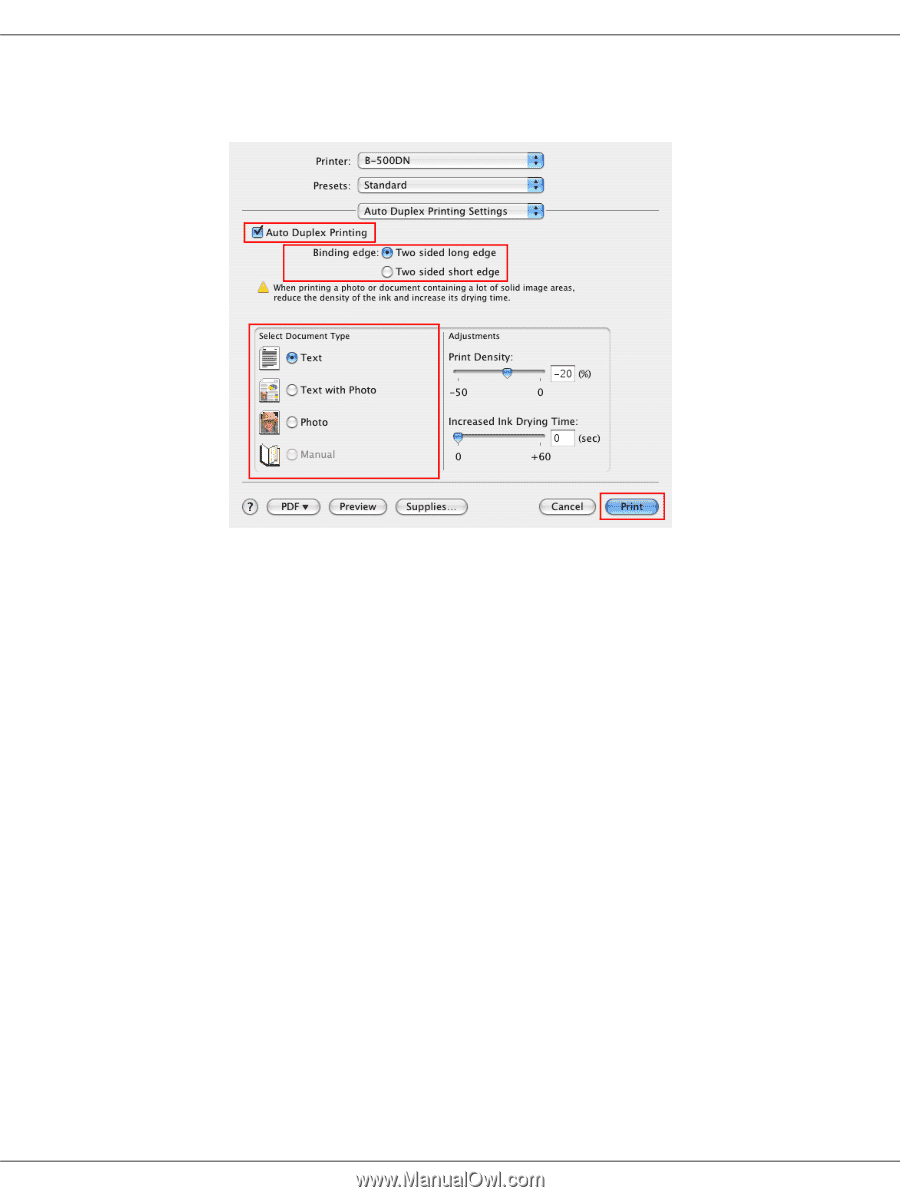
13. Select Auto Duplex Printing Settings from the pop-up menu. 14. Select the Auto Duplex Printing check box. 15. Select the Binding edge setting. 16. Select one of the Document Type settings. This automatically adjusts Print Density and Ink Drying Time. Note: If you are printing high-density data, such as photos or graphs, we recommend adjusting the Print Density. 17. Load paper into the printer, and click Print. & See "Loading Paper" on page 22. Folded Booklet Double-sided Printing (for Windows only) Manual double-sided printing Use the following steps to create a folded booklet. Note: Folded booklet double-sided printing function is available only when manual double-sided printing is set. Printing with Special Layout Options 72
-
 1
1 -
2
-
3
-
4
-
5
-
6
-
7
-
8
-
9
-
10
-
11
-
12
-
13
-
14
-
15
-
16
-
17
-
18
-
19
-
20
-
21
-
22
-
23
-
24
-
25
-
26
-
27
-
28
-
29
-
30
-
31
-
32
-
33
-
34
-
35
-
36
-
37
-
38
-
39
-
40
-
41
-
42
-
43
-
44
-
45
-
46
-
47
-
48
-
49
-
50
-
51
-
52
-
53
-
54
-
55
-
56
-
57
-
58
-
59
-
60
-
61
-
62
-
63
-
64
-
65
-
66
-
 67
67 -
 68
68 -
 69
69 -
 70
70 -
 71
71 -
 72
72 -
 73
73 -
 74
74 -
 75
75 -
 76
76 -
 77
77 -
78
-
79
-
80
-
81
-
82
-
83
-
84
-
85
-
86
-
87
-
88
-
89
-
90
-
91
-
92
-
93
-
94
-
95
-
96
-
97
-
98
-
99
-
100
-
101
-
102
-
103
-
104
-
105
-
106
-
107
-
108
-
109
-
110
-
111
-
112
-
113
-
114
-
115
-
116
-
117
-
118
-
119
-
120
-
121
-
122
-
123
-
124
-
125
-
126
-
127
-
128
-
129
-
130
-
131
-
132
-
133
-
134
-
135
-
136
-
137
-
138
-
139
-
140
-
141
-
142
-
143
-
144
-
145
-
146
-
147
-
148
-
149
-
150
-
151
-
152
-
153
-
154
-
155
-
156
-
157
-
158
-
159
-
160
-
161
-
162
-
163
-
164
-
165
-
166
-
167
-
168
-
169
-
170
-
171
-
172
-
173
-
174
-
175
-
176
-
177
-
178
-
179
-
180
-
181
-
182
-
183
-
184
-
185
-
186
-
187
-
188
-
189
-
190
-
191
-
192
-
193
-
194
-
195
-
196
-
197
-
198
-
199
-
200
-
201
 |
 |
Printing with Special Layout Options
72
13.Select
Auto Duplex Printing Settings
from the pop-up menu.
14.Select the
Auto Duplex Printing
check box.
15.Select the Binding edge setting.
16.Select one of the Document Type settings. This automatically adjusts Print Density and
Ink Drying Time.
Note:
If you are printing high-density data, such as photos or graphs, we recommend adjusting the
Print Density.
17.Load paper into the printer, and click
Print
.
&
See “Loading Paper” on page 22.
Folded Booklet Double-sided Printing (for Windows only)
Manual double-sided printing
Use the following steps to create a folded booklet.
Note:
Folded booklet double-sided printing function is available only when manual double-sided printing
is set.