Epson CX6000 Product Information Guide - Page 13
Restoring Color in Faded Photos, Checking the Print Head Nozzles and Ink, Home or Professional Mode - scanner
 |
UPC - 010343858992
View all Epson CX6000 manuals
Add to My Manuals
Save this manual to your list of manuals |
Page 13 highlights
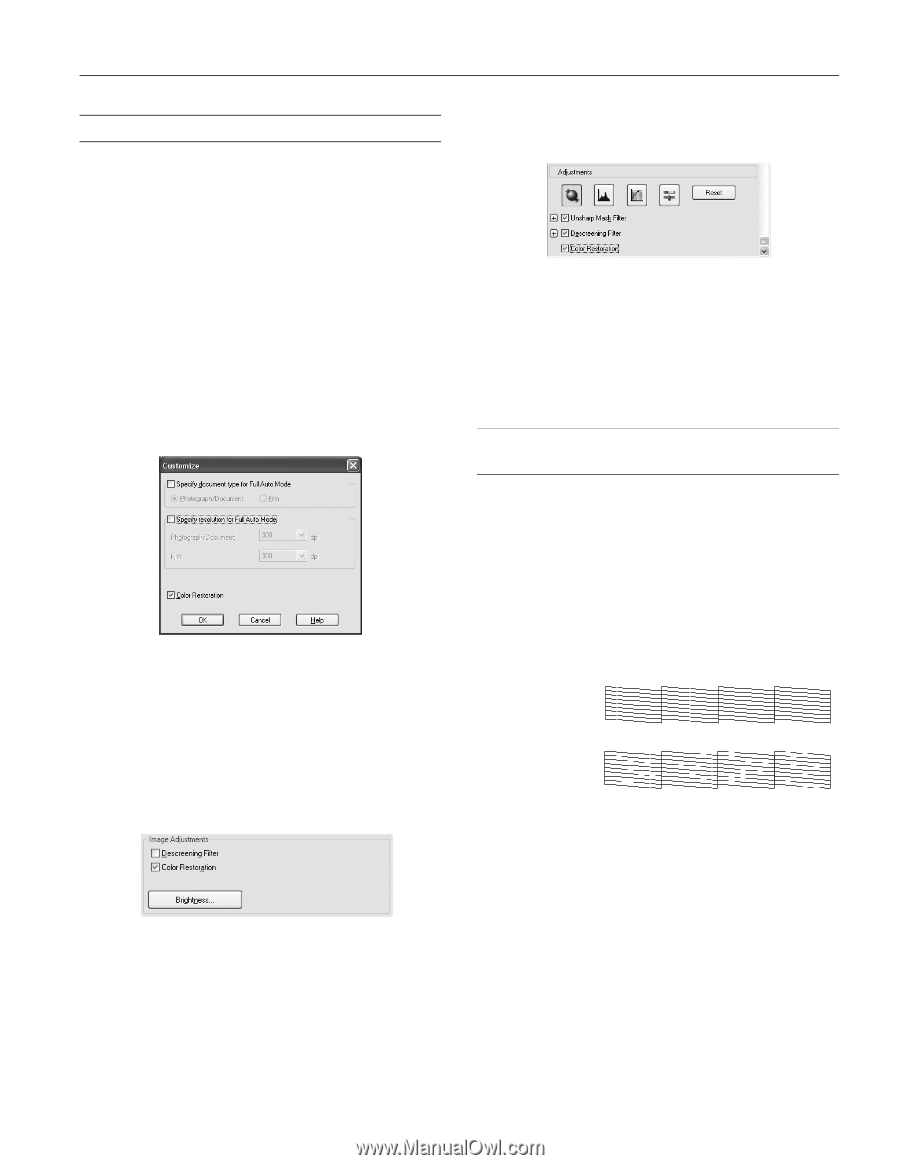
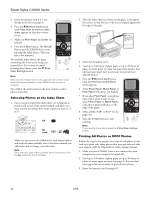
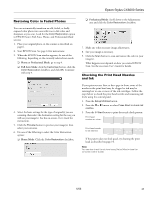
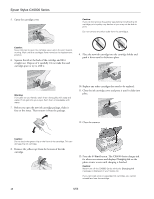
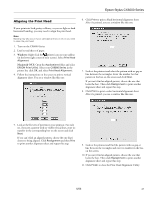
Epson Stylus CX6000 Series Restoring Color in Faded Photos You can automatically transform an old, faded, or badly exposed color photo into one with true-to-life color and sharpness as you scan. Look for the Color Restoration option in EPSON Scan's Full Auto, Home, and Professional Mode screens: 1. Place your original photo on the scanner as described on page 6. 2. Start EPSON Scan. See page 12 for instructions: 3. When the EPSON Scan window appears, do one of the following, depending on the currently selected scan mode: ❏ Home or Professional Mode: go to step 4. ❏ Full Auto Mode: click the Customize button, click the Color Restoration checkbox, and click OK. Continue with step 9. 4. Select the basic settings for the type of original(s) you are scanning, then select the destination setting for the way you will use your image(s). See the on-screen User's Guide for instructions. 5. Click the Preview button to preview your image(s), then select your scan area. 6. Do one of the following to select the Color Restoration option: ❏ Home Mode: Click the Color Restoration checkbox. ❏ Professional Mode: Scroll down to the Adjustments area and click the Color Restoration checkbox. 7. Make any other necessary image adjustments. 8. Size your image as necessary. 9. Click the Scan button to scan and restore the color in your image(s). What happens next depends on how you started EPSON Scan. See the on-screen User's Guide for details. Checking the Print Head Nozzles and Ink If your printouts are faint or have gaps in them, some of the nozzles in the print head may be clogged or ink may be running low in one or more of the ink cartridges. Follow the steps below to check the print head nozzles and remaining ink levels using the control panel. 1. Press the Setup/Utilities button. 2. Press the l or r button to select Press Start to check ink nozzles. 3. Press the x Start button to print the nozzle check pattern. Print head nozzles are clean: Print head needs to be cleaned: If the pattern does not look good, try cleaning the print head as described on page 14. Note: You can also check the ink level using Status Monitor (see the on-screen User's Guide). 6/06 13
-
 1
1 -
2
-
3
-
4
-
5
-
6
-
7
-
 8
8 -
 9
9 -
 10
10 -
 11
11 -
 12
12 -
 13
13 -
 14
14 -
 15
15 -
 16
16 -
 17
17 -
 18
18
 |
 |