Epson CX6000 Product Information Guide - Page 18
Transporting the CX6000 Series, Turn off the CX6000 Series. - stylus power cord
 |
UPC - 010343858992
View all Epson CX6000 manuals
Add to My Manuals
Save this manual to your list of manuals |
Page 18 highlights
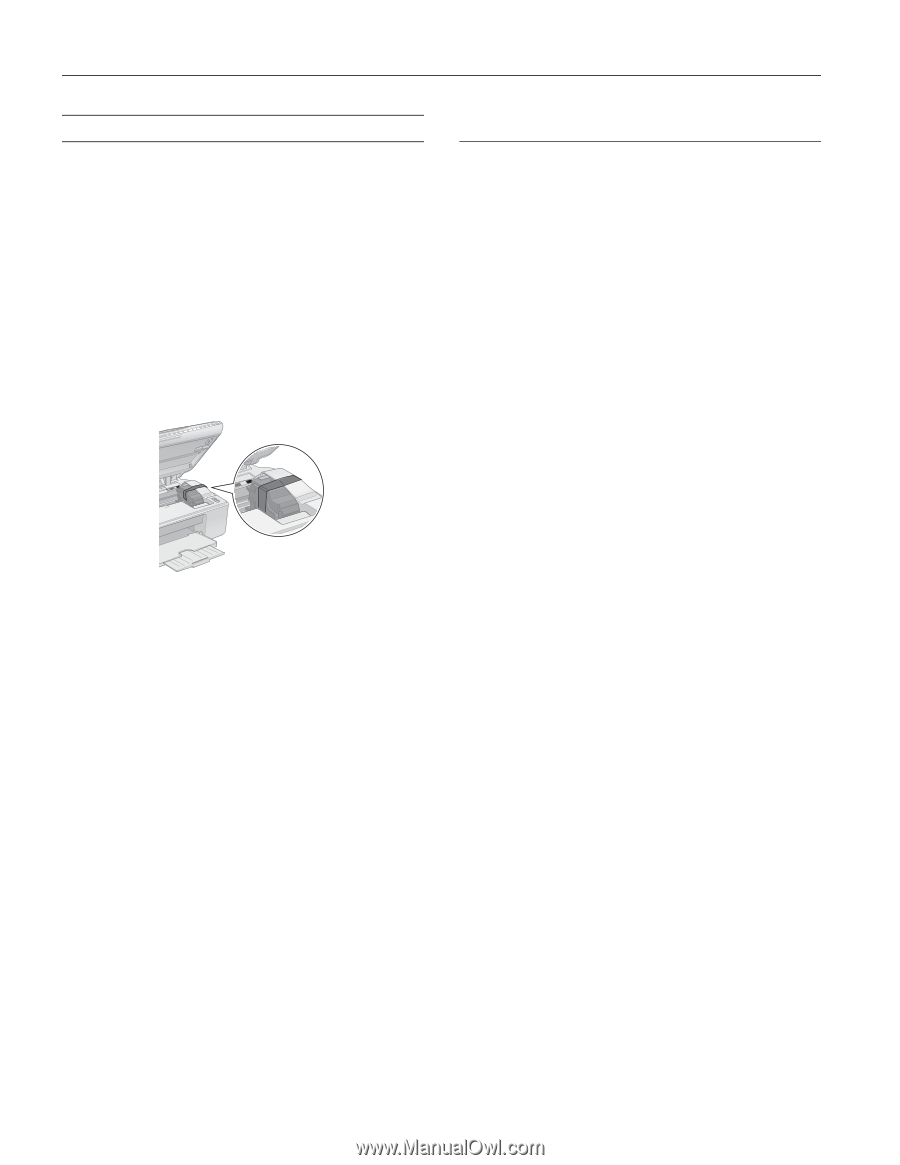
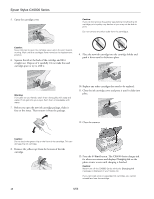
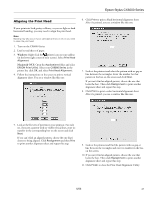
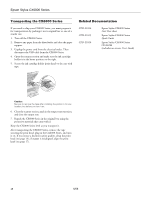
Epson Stylus CX6000 Series Transporting the CX6000 Series If you need to ship your CX6000 Series, you must prepare it for transportation by packing it in its original box or one of a similar size. 1. Turn off the CX6000 Series. 2. Remove any paper from the sheet feeder and close the paper support. 3. Unplug the power cord from the electrical outlet. Then disconnect the USB cable from the CX6000 Series. 4. Open the scanner section and make sure the ink cartridge holder is in the home position on the right. 5. Secure the ink cartridge holder (print head) to the case with tape. Related Documentation CPD-21814 CPD-21815 CPD-21816 Epson Stylus CX6000 Series Start Here sheet Epson Stylus CX6000 Series Quick Guide Epson Stylus CX6000 Series CD-ROM (includes on-screen User's Guide) Caution: Be sure to remove the tape after installing the printer in its new location, but before you turn it on. 6. Close the scanner section, push in the output tray extension, and close the output tray. 7. Repack the CX6000 Series in the original box using the protective materials that came with it. Keep the CX6000 Series level as you transport it. After transporting the CX6000 Series, remove the tape securing the print head, plug in the CX6000 Series, and turn it on. If you notice a decline in print quality, clean the print head (see page 14); if output is misaligned, align the print head (see page 17). 18 6/06
-
 1
1 -
2
-
3
-
4
-
5
-
6
-
7
-
8
-
9
-
10
-
11
-
12
-
 13
13 -
 14
14 -
 15
15 -
 16
16 -
 17
17 -
 18
18
 |
 |