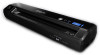
Epson DS-40 User Manual
Epson DS-40 Manual
 |
View all Epson DS-40 manuals
Add to My Manuals
Save this manual to your list of manuals |
Epson DS-40 manual content summary:
- Epson DS-40 | User Manual - Page 1
DS-40 User's Guide - Epson DS-40 | User Manual - Page 2
- Epson DS-40 | User Manual - Page 3
Contents DS-40 User's Guide ...7 Scanner Basics...8 Scanner Parts Locations ...8 Scanner Parts...8 Scanner Buttons and Lights...11 Optional and User Replaceable Epson Scanner Parts 13 Powering Your Scanner ...13 Installing Batteries ...13 Using the Optional AC Adapter...15 Changing the Power Off - Epson DS-40 | User Manual - Page 4
...52 Cleaning Inside Your Scanner...52 Replacing Batteries ...54 Calibrating Your Scanner ...56 Transporting Your Scanner ...57 Solving Problems ...59 Scanner Light Status ...59 Solving Scanning Problems ...61 Scanner Does Not Turn On or Turns Off Unexpectedly 61 Scanner Button Does Not Work as - Epson DS-40 | User Manual - Page 5
...78 Safety and Approvals Specifications 78 Notices ...80 Important Safety Instructions...80 Battery Safety Instructions ...81 Restrictions on Copying ...82 Default Delay Times for Power Management for Epson Products 83 Trademarks ...83 Copyright Notice...83 Open Source Software License - Epson DS-40 | User Manual - Page 6
- Epson DS-40 | User Manual - Page 7
DS-40 User's Guide Welcome to the DS-40 User's Guide. For a printable PDF copy of this guide, click here. 7 - Epson DS-40 | User Manual - Page 8
Locations Powering Your Scanner Changing the Power Off Setting Scanner Parts Locations See these sections to identify the parts on your scanner. Scanner Parts Scanner Buttons and Lights Optional and User Replaceable Epson Scanner Parts Parent topic: Scanner Basics Scanner Parts Front 1 Edge guide 8 - Epson DS-40 | User Manual - Page 9
2 Input slot 3 Connection mode switch Back 1 USB interface connector 2 DC inlet 3 The Connect button 4 Output slot 9 - Epson DS-40 | User Manual - Page 10
Accessories 1 USB cable 2 Accessory kit 3 Carrying bag 4 4 AA batteries Parent topic: Scanner Parts Locations 10 - Epson DS-40 | User Manual - Page 11
Scanner Buttons and Lights Buttons 1 The power button 2 The start button 11 - Epson DS-40 | User Manual - Page 12
Lights 1 The low battery light 2 The Wi-Fi light 3 The ready light Parent topic: Scanner Parts Locations Related references Scanner Light Status 12 - Epson DS-40 | User Manual - Page 13
800GO-EPSON (800-463-7766). Part AC adapter Maintenance sheet kit Part number B12B867201 B12B818291 Parent topic: Scanner Parts Locations Powering Your Scanner See these sections to learn about the power management options for your scanner. If you connect your scanner using a USB connection, you - Epson DS-40 | User Manual - Page 14
1. Slide off the battery cover. 2. Insert the batteries with the + and - ends facing as shown. 14 - Epson DS-40 | User Manual - Page 15
Slide the battery cover back on. Parent topic: Powering Your Scanner Related references Battery Safety Instructions Using the Optional AC Adapter When scanning a large number of documents over a wireless connection, use the optional AC adapter (part number B12B867201) to avoid draining the batteries - Epson DS-40 | User Manual - Page 16
with this product. Do not use the AC adapter with any other electronic device. Parent topic: Powering Your Scanner Changing the Power Off Setting You can use the Epson Scan Settings utility to change the time period of inactivity before the scanner turns off automatically. 1. Do one of the following - Epson DS-40 | User Manual - Page 17
2. Click Energy Saving. 3. Enter the time period of inactivity before the scanner turns off automatically as the Power Off Timer setting. If you enter a value of 0, the scanner will not turn off automatically. 4. Click OK. Parent topic: Scanner Basics 17 - Epson DS-40 | User Manual - Page 18
Loading Originals Follow the instructions here to load your originals into the scanner. Loading Originals in the Input slot. 1. Slide the edge guide all the way out. Caution: Do not load photos, or valuable original documents or artwork, directly into the scanner. This may wrinkle or damage the - Epson DS-40 | User Manual - Page 19
2. Slide your original into the input slot against the right side as shown until it meets resistance. Make sure the printed side is face down and top edge first. 3. Slide the edge guide against the edge of the original. Parent topic: Loading Originals 19 - Epson DS-40 | User Manual - Page 20
(0.38 mm) Loading capacity 1 sheet 1 envelope Note: The length of paper that can be scanned on Windows is 2.9 to 36.0 inches (73.7 to 914.4 mm). On Macintosh, the maximum length is 16.5 inches (419 mm). Caution: Do not load the following types of originals in the scanner, or they may be damaged - Epson DS-40 | User Manual - Page 21
sealed with sealing wax • Envelopes with windows Parent topic: Loading Originals Plastic Card plastic card that meets these specifications in your scanner. Type Size Thickness Loading capacity Plastic cards, including Scanning may not work properly for plastic cards with shiny surfaces. 21 - Epson DS-40 | User Manual - Page 22
Parent topic: Loading Originals 22 - Epson DS-40 | User Manual - Page 23
Wi-Fi Mode Setup Wi-Fi Protected Setup (WPS) Epson DocumentScan App for iOS/Android Connection Mode Switch The position of the connection mode switch determines which method you can use to connect the scanner to a wireless network or device, or to a computer. Connection mode Wi-Fi AP mode USB - Epson DS-40 | User Manual - Page 24
EpsonNet Config. 3. Set up your computer to scan to the networked scanner. Follow the links here for instructions on each procedure. Parent topic: Wi-Fi Networking Related tasks Enabling a Direct Wi-Fi Connection Manually Connecting to a Wi-Fi Router Using EpsonNet Config Setting Up Network Scanning - Epson DS-40 | User Manual - Page 25
point can be connected to your computer over a wireless or wired network. 1 Epson scanner 2 Wireless router or access point 3 Computer with a wireless interface 4 Computer 5 Internet 6 Ethernet cable (used only for wired connection to the wireless router or access point) Manually Connecting to a Wi - Epson DS-40 | User Manual - Page 26
with a wireless adapter to set up the connection. 1. Set the connection mode switch on the scanner to the AP mode position. 2. Turn on the scanner. 3. Connect the computer to the scanner using a direct Wi-Fi connection. 4. Do one of the following to start EpsonNet Config: • Windows 8.x: Navigate - Epson DS-40 | User Manual - Page 27
Direct Wi-Fi Mode Setup Related references Connection Mode Switch Related tasks Setting Up Network Scanning Setting Up Network Scanning After manually configuring your scanner to connect to your network, you must set up the computer to connect to the scanner using the Epson Scan Settings utility - Epson DS-40 | User Manual - Page 28
• OS X: Open the Applications folder, click Epson Software, and click EPSON Scan Settings. 2. Select your scanner from the Select Scanner list. 3. Select the Network setting and click Add. You see a screen like this: 4. Do one of the following: • Under Search for addresses, select the IP - Epson DS-40 | User Manual - Page 29
and write down the IP address. Parent topic: Setting Up Network Scanning Direct Wi-Fi Mode Setup You can set up your scanner to communicate directly with your computer or another device without requiring a wireless router or access point. If your product is not already connected to a wireless 29 - Epson DS-40 | User Manual - Page 30
Parent topic: Wi-Fi Networking Enabling a Direct Wi-Fi Connection You can enable a direct Wi-Fi connection to allow direct communication between your scanner and computer or other devices without a wireless router or access point. 1. Set the connection mode switch on the scanner to AP mode. 30 - Epson DS-40 | User Manual - Page 31
to Set Up a Direct Wi-Fi Connection You can use Wi-Fi Protected Setup (WPS) to create a direct Wi-Fi connection to a WPS-enabled computer or device. 1. Set the connection mode switch on the scanner to AP mode. 2. Turn on the scanner. 3. Press and hold the Connect button for at least 3 seconds until - Epson DS-40 | User Manual - Page 32
Mode to Connect to a Network Parent topic: Wi-Fi Networking Using WPS to Connect to a Network If you have a WPS-enabled wireless router or access point, you can use Wi-Fi Protected Setup (WPS) to connect your scanner to the network. 1. Set the connection mode switch on the scanner to Wi-Fi. 2. Turn - Epson DS-40 | User Manual - Page 33
Protected Setup (WPS) Using WPS PIN Mode to Connect to a Network If you have a WPS-enabled wireless router or access point that supports PIN mode, you can use Wi-Fi Protected Setup (WPS) PIN mode to connect your scanner to the network. 1. Set the connection mode switch on the scanner to AP mode. 33 - Epson DS-40 | User Manual - Page 34
2. Press and hold the Connect button and press the power button to turn on the scanner. 3. Hold the Connect button until the ready and Wi-Fi lights flash alternately. The scanner enters standby mode for WPS connection for two minutes. 4. Enter the PIN code 01234565 on the wireless router or access - Epson DS-40 | User Manual - Page 35
the power button to turn on the scanner. The ready and Wi-Fi lights on the scanner stay on, indicating that the scanner is connected to the network. 8. Set up network scanning on your computer. Parent topic: Wi-Fi Protected Setup (WPS) Epson DocumentScan App for iOS/Android You can use the Epson - Epson DS-40 | User Manual - Page 36
. Note: Document Capture Pro (Windows) and Document Capture (OS X) do not support scanning from the scanner button over a wireless network. Launch Epson Scan before scanning from the scanner button. 1. Make sure you installed the scanner software and connected the scanner to your computer or network - Epson DS-40 | User Manual - Page 37
Document Capture (OS X) program. 1. Start Document Capture Pro or Document Capture on a computer connected to the scanner. 2. Click the Manage Job icon from the toolbar at the top of the window. 3. On the Job Management window, click Add or the + icon. 4. Enter a name for the new job, then select - Epson DS-40 | User Manual - Page 38
You see a window like this: 2. Click the Scan icon. 38 - Epson DS-40 | User Manual - Page 39
select it from the Job list in the Document Capture Pro or Document Capture window, click the Start Job button, and skip the rest of these steps. 3. • OS X: Close the Scan window. Open the Scan menu at the top of the screen and select Displays the EPSON Scan Setup Screen. Click the Scan icon. - Epson DS-40 | User Manual - Page 40
tasks Scanning to a SharePoint Server or Cloud Service Scanning with Epson Scan Epson Scan automatically saves your scanned file on your computer following to start Epson Scan: • Windows 8.x: Navigate to the Apps screen and select EPSON Scan under EPSON or EPSON Software. • Windows (other versions): - Epson DS-40 | User Manual - Page 41
You see a window like this: 2. Select options for each of the scan settings on the screen. 3. If necessary, click the Preview button. Epson Scan previews your original, and displays the result in a separate Preview window. The scanner also ejects the page. 4. Reload the page in the scanner. 41 - Epson DS-40 | User Manual - Page 42
want to use. Before making adjustments, click the image or scan area in the Preview window. 6. Click Scan. You see the File Save Settings window. 7. Change any of the necessary file save settings and click OK. Epson Scan scans your original, and saves the file in the selected folder or opens it in - Epson DS-40 | User Manual - Page 43
Scan Starting a Scan from a Scanning Program You can start Epson Scan from a TWAIN-compliant scanning program to select scan settings, scan, and open the scanned image in the program. 1. Open your scanning program and select its scanning option. (See your scanning program help for instructions.) 43 - Epson DS-40 | User Manual - Page 44
programs, you may need to select your product as the "source" first. If you see a Select Source option, choose it and select your product. With Windows, do not select a WIA option for your product; it will not work correctly. You see an Epson Scan window like this: 44 - Epson DS-40 | User Manual - Page 45
Special Projects Scanning Using OCR - Windows You can use the ABBYY FineReader OCR program to convert scanned documents to editable text. 1. Load your original in the scanner. 2. Do one of the following to open ABBYY FineReader: • Windows 8.x: Navigate to the Apps screen and select ABBYY FineReader - Epson DS-40 | User Manual - Page 46
or format you want to scan to. 5. If you see the Select Scanner window, select your product and click OK. Note: Do not select a WIA option for your product; it will not work correctly. You see the scan settings window. 6. Select your scan settings. 7. Click Preview and adjust the area you want - Epson DS-40 | User Manual - Page 47
window. 10. Select a name and a file format for your document and click Save. The file is saved and then opened in an application associated with the file type you selected, if available on your system. Parent topic: Convert Scanned Documents to Editable Text (OCR) Related tasks Scanning with Epson - Epson DS-40 | User Manual - Page 48
scan as the Document Language setting. 5. Select the type of document you are going to scan. Epson Scan starts in the last scan mode you used. 6. Select your scan settings and click Scan. Your document is scanned and you see the Epson Scan window while your document is converted to editable text. 48 - Epson DS-40 | User Manual - Page 49
if available on your system. Parent topic: Convert Scanned Documents to Editable Text (OCR) Related tasks Scanning with Epson Scan Scanning to a SharePoint Server or Cloud Service You can use Document Capture Pro (Windows) or Document Capture (OS X) to upload scanned images to a SharePoint server or - Epson DS-40 | User Manual - Page 50
in Document Capture Pro or Document Capture for details. 4. Click Scan. You see a preview of your scan in the Document Capture Pro or Document Capture window. 5. Click one of the cloud service Destination icons to choose where to save your scanned file. (If you cannot see all of the icons below, the - Epson DS-40 | User Manual - Page 51
• Microsoft OneNote • Google Drive • SugarSync You see the Transfer Settings window. 6. Enter any required information to set up the destination. If you have previously created a saved setting for the destination, select it from the drop-down - Epson DS-40 | User Manual - Page 52
outer case. 1. Turn off the scanner and unplug the optional AC adapter. 2. Disconnect any connected cables. 3. Clean the outer case with Cleaning and Transporting Your Scanner Cleaning Inside Your Scanner Clean your scanner regularly using the wet and dry cleaning sheets that came with your scanner - Epson DS-40 | User Manual - Page 53
call 800GO-EPSON (800-463-7766). 1. Turn on the scanner and make sure it is connected to the computer. 2. Load the dry cleaning sheet into the scanner. 3. Do one of the following to start Epson Scan Settings: • Windows 8.x: Navigate to the Apps screen and select EPSON Scan Settings. • Windows (other - Epson DS-40 | User Manual - Page 54
topic: Cleaning and Transporting Your Scanner Related references Optional and User Replaceable Epson Scanner Parts Replacing Batteries When the low battery light is on, you need to replace the batteries. You can use 4 AA batteries (Ni- MH, alkaline, or lithium) to power your scanner. Caution - Epson DS-40 | User Manual - Page 55
2. Remove the old batteries and recycle them appropriately. 3. Insert the batteries with the + and - ends facing as shown. 55 - Epson DS-40 | User Manual - Page 56
lines. Note: You can use the calibration sheet multiple times. If calibrating the scanner does not improve the image quality, contact Epson for support. Make sure the scanner batteries are not low or calibration will not start. 1. Turn on the scanner and make sure it is connected to the computer. 56 - Epson DS-40 | User Manual - Page 57
topic: Cleaning and Transporting Your Scanner Related references Optional and User Replaceable Epson Scanner Parts Transporting Your Scanner You can transport your scanner in the pouch that came with it. 1. Turn off the scanner and unplug the optional AC adapter. 2. Disconnect any connected cables - Epson DS-40 | User Manual - Page 58
3. Place the scanner and USB cable in the provided pouch. Parent topic: Cleaning and Transporting Your Scanner 58 - Epson DS-40 | User Manual - Page 59
may have using your product. Scanner Light Status Solving Scanning Problems Solving Network Scanning Problems Solving Scanned Image Quality Problems When to Uninstall Your Scanner Software Where to Get Help Scanner Light Status You can often diagnose problems with your scanner by checking its lights - Epson DS-40 | User Manual - Page 60
off and then back on again. If the error continues, contact Epson for support. Wireless connection Light status Condition/solution The ready light is on The scanner is turned on and ready to scan. The ready light is flashing The scanner is scanning or initializing. Wait for the ready light to - Epson DS-40 | User Manual - Page 61
topic: Solving Problems Scanner Does Not Turn On or Turns Off Unexpectedly If the scanner does not turn on or if it turns off unexpectedly, try these solutions: • Make sure the optional AC adapter is securely connected to the scanner and to a working electrical outlet. • If the scanner turns off - Epson DS-40 | User Manual - Page 62
the connection mode switch is set correctly. • When using a wireless connection, start Epson Scan on your computer before scanning from the product. • Document Capture Pro (Windows) and Document Capture (OS X) do not support using the button to scan over a wireless connection. Connect the scanner - Epson DS-40 | User Manual - Page 63
Scan, try these solutions: • Make sure your scanner is turned on and any interface cables are securely connected at both ends. • Make sure Epson Scan is selected in your scanning program. • Make sure your computer is not running in a power-saving mode, such as sleep or standby. If so, wake your - Epson DS-40 | User Manual - Page 64
Related tasks Scanning with Epson Scan Original Feeds Incorrectly in Scanner If you have problems feeding originals in your scanner, try these solutions: • Load only an original that meets the specifications for your scanner. • Clean inside the scanner using a cleaning sheet. Parent topic: Solving - Epson DS-40 | User Manual - Page 65
remains inside the scanner, remove it carefully with a pair of tweezers in the direction of the output slot. If you cannot remove it, contact Epson support. 3. Carefully follow all loading instructions when you reload your original. Parent topic: Solving Scanning Problems Related references Original - Epson DS-40 | User Manual - Page 66
Document Capture Pro and Document Capture Scanning with Epson Scan Solving Network Scanning Problems Check these sections for potential solutions to network scanning and connection problems. Cannot Scan Over a Network Scanner Cannot Connect to a Wireless Router or Access Point Parent topic: Solving - Epson DS-40 | User Manual - Page 67
seconds, and restart it. If Epson Scan cannot restart, turn off your scanner, turn it back on, and try restarting Epson Scan again. • Check the connection setting and test the connection using Epson Scan Settings: Windows 8.x: Navigate to the Apps screen and select EPSON Scan Settings. Make sure the - Epson DS-40 | User Manual - Page 68
necessary. • If you connected your scanner to a Windows computer using a direct Wi-Fi connection and it automatically selected Access Point Mode, you may have trouble accessing a low-priority Internet connection. Check the network connection or adapter settings in the Windows Control Panel and set - Epson DS-40 | User Manual - Page 69
topic: Solving Scanned Image Quality Problems Related tasks Scanning with Epson Scan Scanned Characters are Blurry If characters in your scanned images are blurry, try these solutions: • Make sure you do not move the scanner or original while scanning. • Operate the scanner on a flat, stable surface - Epson DS-40 | User Manual - Page 70
the scanning resolution between 200 and 600 dpi. • If you are using OCR software, check the manual for any additional adjustments. Parent topic: Solving Scanned Image Quality Problems Related tasks Scanning Using OCR - Windows Scanning Using OCR - OS X Ripple Patterns Appear in an Image You may see - Epson DS-40 | User Manual - Page 71
re-install your scanner software to solve certain problems. 1. Turn off the scanner. 2. Disconnect any interface cables. 3. Do the following to uninstall each of your scanning software programs, then follow any on-screen instructions: • Windows 8.x: Navigate to the Apps screen and select Control - Epson DS-40 | User Manual - Page 72
. 7. Follow the on-screen instructions to uninstall the software. 8. To reinstall your scanner software, see the Start Here sheet for instructions. Parent topic: When to Uninstall Your Scanner Software Where to Get Help If you need to contact Epson for technical support services, use the following - Epson DS-40 | User Manual - Page 73
Epson's support website at epson.com/support (U.S.) or epson.ca/support (Canada) for solutions to common problems. You can download drivers and documentation, get FAQs and troubleshooting advice, or email Epson with your questions. Speak to a Support Representative Before you call Epson for support - Epson DS-40 | User Manual - Page 74
higher and 24-bit color (Full Color) Parent topic: Technical Specifications Mac System Requirements Make sure your system meets these requirements before using it with your scanner. System OS X 10.10.x, 10.9.x, 10.8.x, 10.7.x, 10.6.x, 10.5.8 (Fast user switching on Mac OS X is not supported.) 74 - Epson DS-40 | User Manual - Page 75
and millions of colors Note: Epson Scan does not support the UNIX File System (UFS) for OS X. Install Epson Scan on a disk or in Output resolution Sheet feed, simplex color A4 scanner CIS 5154 × 8400 pixels at 600 dpi Maximum: Up to 8.5 × 14 inches (215.9 × 355.6 mm) at 600 dpi Windows maximum: - Epson DS-40 | User Manual - Page 76
Specifications Electrical Specifications Note: Power consumption varies depending on operating conditions or whether an option is installed. Power supply External power supply Four AA-size alkaline, Ni-MH, or lithium batteries USB bus power: DC5V, 0.5 A Optional AC adapter model: SYS1319-1005 76 - Epson DS-40 | User Manual - Page 77
mode: 1.3 W Power off mode: 0.0125 W Wireless network connection: Operating: 5.5 W Ready mode: 3.5 W Sleep mode: 3.0 W Power off mode: 0.4 W Parent topic: Technical Specifications Environmental Specifications Temperature Humidity (non-condensing) Operating conditions Operating: 50 to 95 °F (10 - Epson DS-40 | User Manual - Page 78
WPA2 compliant with support for WPA/WPA2 personal 2.4 GHz Infrastructure mode Direct Wi-Fi connection (access point mode) Note: Wireless LAN standard complies with 15 of FCC Rules and RSS-210 of the IC Rules. Epson cannot accept responsibility for any failure to satisfy the protection requirements - Epson DS-40 | User Manual - Page 79
To prevent radio interference to the licensed service, this device is intended to be operated indoors and away from windows to provide maximum shielding. Equipment (or its transmit antenna) that is installed outdoors is subject to licensing. Parent topic: Technical Specifications 79 - Epson DS-40 | User Manual - Page 80
Power Management for Epson Products Trademarks Copyright Notice Important Safety Instructions Follow these safety instructions when setting up and using the scanner: • Read all these instructions, and follow all warnings and instructions marked on the scanner. • Place the scanner devices connected by - Epson DS-40 | User Manual - Page 81
service personnel under the following conditions: Liquid has entered the scanner; the scanner has been dropped or the case has been damaged; the scanner does not operate normally or exhibits a distinct change in performance. (Do not adjust controls that are not covered by the operating instructions - Epson DS-40 | User Manual - Page 82
the following restrictions to ensure responsible and legal use of your scanner. Copying of the following items is prohibited by law: • Bank notes, checks, etc.), monthly passes, concession tickets, etc. • Passports, driver's licenses, warrants of fitness, road passes, food stamps, tickets, etc. - Epson DS-40 | User Manual - Page 83
for Power Management for Epson Products This product will enter sleep mode EPSON® is a registered trademark and EPSON Exceed Your Vision is a registered logomark of Seiko Epson Corporation. Mac and OS X are trademarks of Apple Inc., registered in the U.S. and other countries. App Store is a service - Epson DS-40 | User Manual - Page 84
problems arising from the use of any options or any consumable products other than those designated as Original Epson Products or Epson Approved Products by Seiko Epson Corporation. Seiko Epson above, contact Epson as described in the User's Guide. You shall OSS.pdf on your scanner software CD. 4) - Epson DS-40 | User Manual - Page 85
module-init-tools-3.2pre1 mount-2.12 net-tools-1.60 netbase-4.29 psmisc-21.5 readline-libs-5.0 sysvinit-2.86 udev-0.093 udhcp 0.9.8cvs20050124-5 util-linux-2.12 usb8786 GNU LGPL This product includes the open source software programs which apply the GNU Lesser General Public License Version 2 or - Epson DS-40 | User Manual - Page 86
the open source software programs which apply the Berkeley Software Distribution License ("BSD Programs"). The list of BSD Programs: busybox-1.2.2.1 util-linux-2.12 mount-2.12 mvlutils-2.8.4 netkit-ftp-0.17 netkit-base-0.17 portmap-5beta Sun RPC License This product includes the open source software - Epson DS-40 | User Manual - Page 87
software program "busybox- 1.2.2.1" which applies the terms and conditions provided by owner of the copyright to the "busybox". linux-ftpd license This product includes the open source software program "linux-ftpd-0.17" which applies the terms and conditions provided by owner of the copyright to the - Epson DS-40 | User Manual - Page 88
from misrepresentative use of the Zip-Bugs or Info-ZIP e-mail addresses or the Info-ZIP URL(s), such as to imply Info-ZIP will provide support for the altered versions. 4. Info-ZIP retains the right to use the names "Info-ZIP," "Zip," "UnZip," "UnZipSFX," "WiZ," "Pocket UnZip," "Pocket Zip," and - Epson DS-40 | User Manual - Page 89
encourages each user to be responsible and respectful of the copyright laws when using any Epson product. While some countries' laws permit limited copying or reuse of copyrighted material in certain circumstances, those circumstances may not be as broad as some
-
 1
1 -
 2
2 -
 3
3 -
 4
4 -
 5
5 -
 6
6 -
 7
7 -
8
-
9
-
10
-
11
-
12
-
13
-
14
-
15
-
16
-
17
-
18
-
19
-
20
-
21
-
22
-
23
-
24
-
25
-
26
-
27
-
28
-
29
-
30
-
31
-
32
-
33
-
34
-
35
-
36
-
37
-
38
-
39
-
40
-
41
-
42
-
43
-
44
-
45
-
46
-
47
-
48
-
49
-
50
-
51
-
52
-
53
-
54
-
55
-
56
-
57
-
58
-
59
-
60
-
61
-
62
-
63
-
64
-
65
-
66
-
67
-
68
-
69
-
70
-
71
-
72
-
73
-
74
-
75
-
76
-
77
-
78
-
79
-
80
-
81
-
82
-
83
-
84
-
85
-
86
-
87
-
88
-
89
 |
 |

DS-40 User's Guide