Epson Expression 636 User Setup Information - PC - Page 10
Note for Windows 95 SCSI users, Add New Hardware, Do not install a driver, Start
 |
View all Epson Expression 636 manuals
Add to My Manuals
Save this manual to your list of manuals |
Page 10 highlights
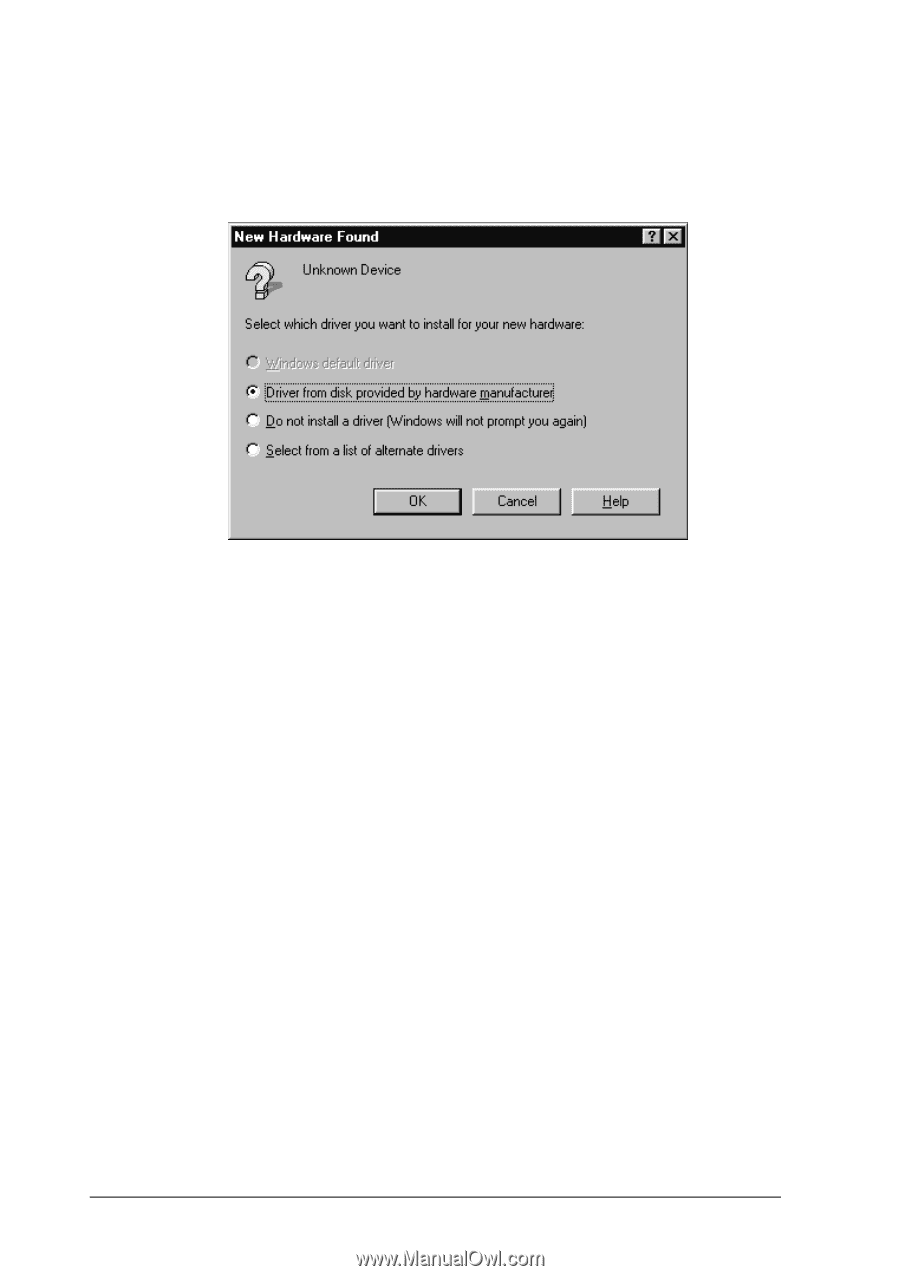
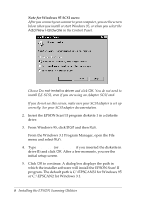
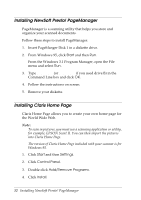
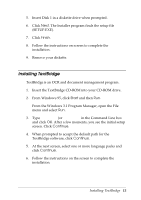
Note for Windows 95 SCSI users: After you connect your scanner to your computer, you see the screen below when you install or start Windows 95, or when you select the Add New Hardware in the Control Panel. Choose Do not install a driver and click OK. You do not need to install EZ-SCSI, even if you are using an Adaptec SCSI card. If you do not see this screen, make sure your SCSI adapter is set up correctly. See your SCSI adapter documentation. 2. Insert the EPSON Scan! II program diskette 1 in a diskette drive. 3. From Windows 95, click Start and then Run. From the Windows 3.1 Program Manager, open the File menu and select Run. 4. Type A:\SETUP (or B:\SETUP if you inserted the diskette in drive B) and click OK. After a few moments, you see the initial setup screen. 5. Click OK to continue. A dialog box displays the path in which the installer software will install the EPSON Scan! II program. The default path is C:\EPSCAN32 for Windows 95 or C:\EPSCAN2 for Windows 3.1. 8 Installing the EPSON Scanning Utilities
-
 1
1 -
2
-
3
-
4
-
 5
5 -
 6
6 -
 7
7 -
 8
8 -
 9
9 -
 10
10 -
 11
11 -
 12
12 -
 13
13 -
 14
14 -
 15
15 -
16
-
17
-
18
-
19
-
20
 |
 |