Epson MX-70 User Manual - Page 12
The Starting Line - ribbon
 |
View all Epson MX-70 manuals
Add to My Manuals
Save this manual to your list of manuals |
Page 12 highlights
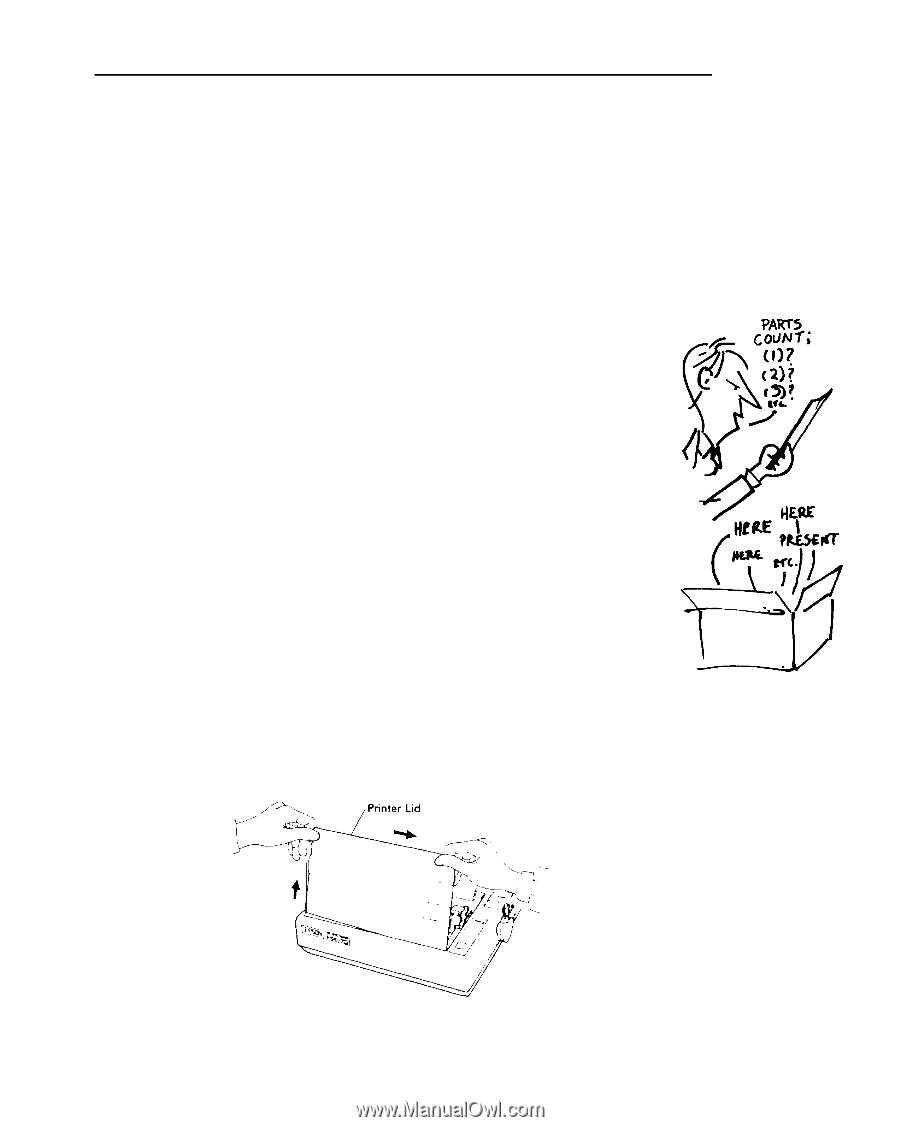
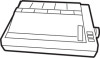
The Starting Line Chapter 1 The Starting Line This important chapter shows how to unpack, set up, and test your new printer. Read it before you get into trouble. The time spent will be your best investment since buying the printer itself. Counting the Parts Open the box and carefully and remove the contents. We should find: 1. This User's Manual (obviously . . . ) 2. The Epson MX-70 printer 3. A long box containing the ribbon cartridge 4. A wire rack to guide the paper We also need a cable to connect the printer to our particular computer. Your Epson dealer can provide cables that match the Apple, TRS-80, and other computers. If you use a non-Epson cable, make sure it is wired properly. We have tried many other cables that "should" work, but don't. The MX-70 uses the Centronics Standard Parallel Interface scheme. Users whose computers require other interfacing schemes should select another printer in the MX series. Setting it up Let's first remove the printer lid so we can work without breaking something. Lay the MX-70 flat on a firm surface and raise its lid to the full vertical position (Figure l-l). Figure l-l 1
-
 1
1 -
2
-
3
-
4
-
5
-
6
-
 7
7 -
 8
8 -
 9
9 -
 10
10 -
 11
11 -
 12
12 -
 13
13 -
 14
14 -
 15
15 -
 16
16 -
 17
17 -
18
-
19
-
20
-
21
-
22
-
23
-
24
-
25
-
26
-
27
-
28
-
29
-
30
-
31
-
32
-
33
-
34
-
35
-
36
-
37
-
38
-
39
-
40
-
41
-
42
-
43
-
44
-
45
-
46
-
47
-
48
-
49
-
50
-
51
-
52
-
53
-
54
-
55
-
56
-
57
-
58
-
59
-
60
-
61
-
62
-
63
-
64
-
65
-
66
-
67
-
68
-
69
-
70
-
71
-
72
-
73
-
74
-
75
-
76
-
77
-
78
-
79
-
80
-
81
-
82
-
83
-
84
-
85
-
86
-
87
-
88
-
89
-
90
-
91
-
92
-
93
-
94
-
95
-
96
-
97
-
98
-
99
-
100
-
101
-
102
-
103
-
104
-
105
-
106
-
107
 |
 |